TryHackMe — Basic Malware RE Walkthrough
Basic malware reverse engineering with Ghidra

Image Credit: https://tryhackme.com/r/room/basicmalwarere
Introduction:
Have you ever wondered how malware reverse engineering works when using Ghidra? We’re about to find out together!
Welcome to my weekly walkthrough where we’ll tackle the Basic Malware RE room on TryHackMe. This is a follow-up to the MAL: Strings room on the Cyber Defense learning path that I explored last week.
TryHackMe — MAL: Strings Room Walkthrough
As a beginner with reverse engineering, I’m confident that this room will challenge me with the basics and help me to fill in some knowledge gaps. So, while I’m still learning and won’t have many real-world application tips this time around, the hands-on experience will be a lot of fun.
So, whether you’re here to learn with me or looking for a reference walkthrough for the TryHackMe Basic Malware RE room, you’re in the right spot. In the spirit of learning, I will not be revealing any flags but I encourage you to follow along on your own. Thanks for reading along, hope it helps!
Challenge Link: https://tryhackme.com/r/room/basicmalwarere
Setup the REMnux Analysis Environment & Extract the challenge file:
Safety first — It’s always a good idea when working with lab/challenge files from TryHackMe (or any lab/challenge/range) to keep yourself safe by performing these tasks in a dedicated, isolated virtual machine. For example, I’m using REMnux for this challenge and walkthrough .
Second, I want to make a note that I’ll be referencing the excellent REMnux Documentation in this post. This is a great resource to discover the tools available within the environment.
Third, to keep this write-up focused I’m going to skip a step-by-step setup guide of REMnux. Instead, if you want to set up your own REMnux environment please follow the directions provided by REMnux directly. I opted for the virtual appliance method:
https://docs.remnux.org/install-distro/get-virtual-appliance
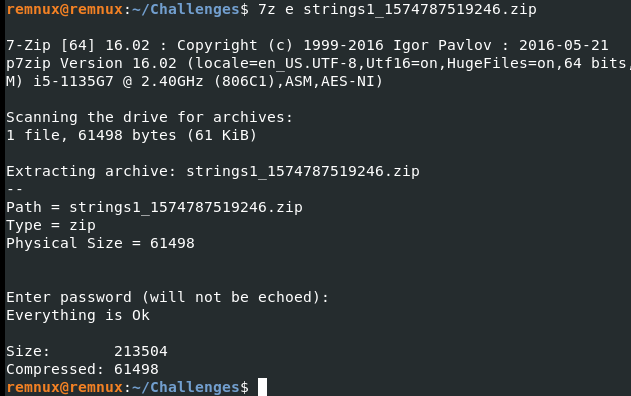
Okay! Now that we have our virtual environment created, updated, isolated, and snapshotted, we can download and extract our challenge file and get started! For this one, we have three tasks, and the extraction process is the same:
Strings :: Challenge 1
This executable prints an MD5 Hash on the screen when executed. Can you grab the exact flag?
Building on my write-up for the previous room in the series, MAL:Strings, we’ll start simple and utilize the strings command to see if there is anything obvious that we can find.
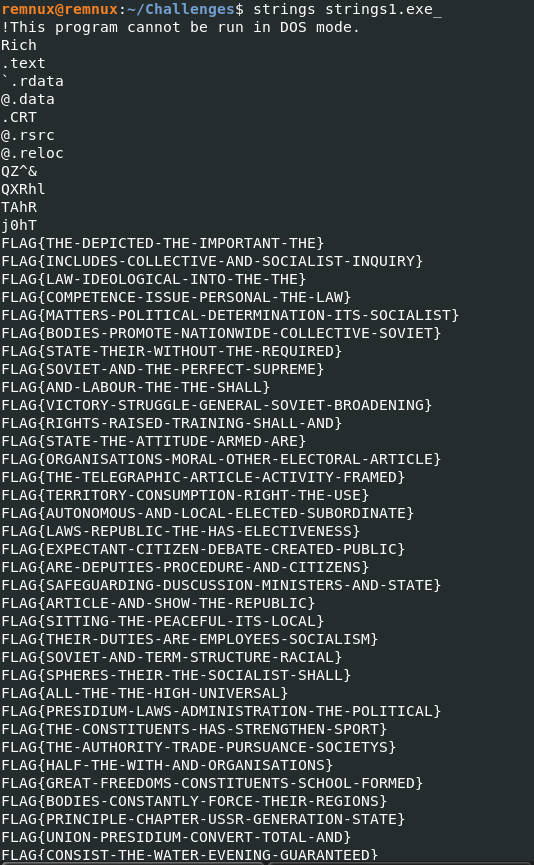
Snippet from the strings output
Woah! There are hundreds of FLAG strings. This looks like it might be a bit more complicated to analyze so we’ll need to pivot from simply using the strings command. The challenge states that dynamic analysis is out of the question, so we can’t execute the binary or use a debugger. Maybe we can use something like Ghidra, which is built in to REMnux, so that we can perform static analysis on the code? Now, full disclosure I have little experience with Ghidra outside of a lab or two. So, let’s get some background on what Ghidra is from the project’s GitHub before we stumble through this together.
Ghidra is a software reverse engineering (SRE) framework created and maintained by the National Security Agency Research Directorate. This framework includes a suite of full-featured, high-end software analysis tools that enable users to analyze compiled code on a variety of platforms including Windows, macOS, and Linux. Capabilities include disassembly, assembly, decompilation, graphing, and scripting, along with hundreds of other features.
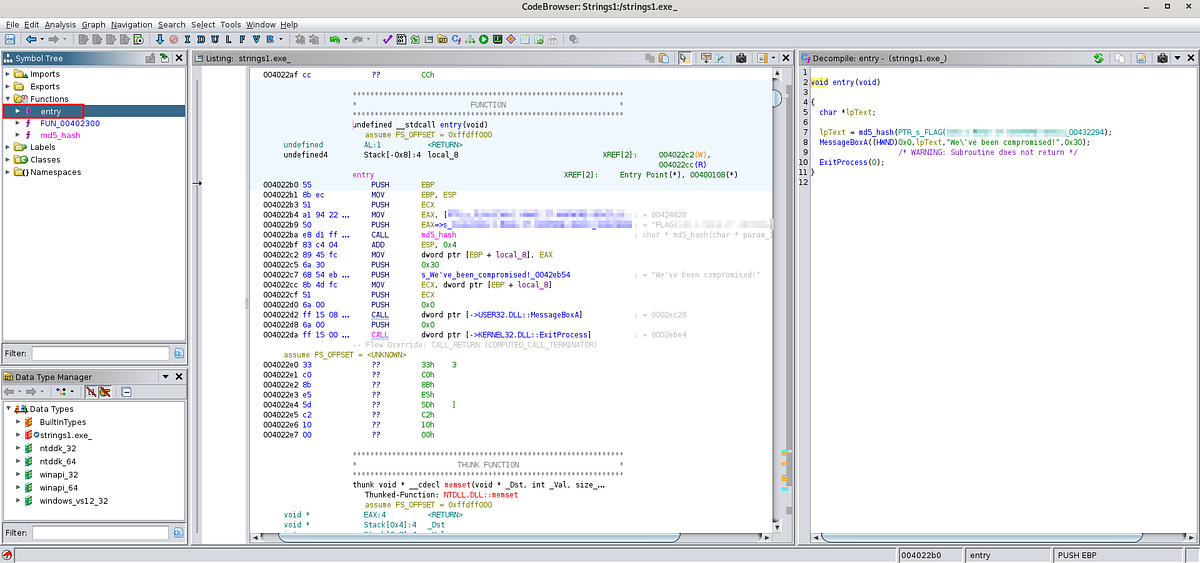
Now, let’s launch Ghidra. When it starts up_,_ we’ll create a project, drop in the strings1.exe, and let Ghidra perform the initial analysis. Once that is completed, we’ll have the symbol tree displayed on the left, the listing contents in the center, and the decompile window on the right.
Let’s start by looking at the functions. Based on what we know about this binary already, when the application is executed, it prints an MD5 hash of the flag string. So, put another way we need to find the MD5 hashing function and then locate the string within the code that is being hashed — this will be the flag we are looking for.
After doing some research, we’ll start by examining the entry function. We’ll enlist help from Microsoft Co-Pilot to explain this better for us and fill in some knowledge gaps. As a side note, remember to always verify the sources and information given by generative AI for accuracy.
The “entry function” in Ghidra refers to the initial function that is called when a program starts running. It’s the point where the control is transferred from the operating system to the program. In the context of reverse engineering, when you load a binary into Ghidra, it tries to identify this entry point so that analysts can begin tracing the program’s execution from the very start.
Great, this sounds like a good place to start! Right away, we see some evidence of a flag. While this seems promising, let’s dig in and try to understand what we are seeing.
Let’s focus on the decompile window. We see a character pointer, which is typically used to point to a memory location that stores a string: char *lpText;
It looks like this points to a string transformed by an MD5 hashing function. Messy explanation, I know, but stick with me and let’s double- click on the string that ends in “_00432294”.
This takes us to the below location in the code:
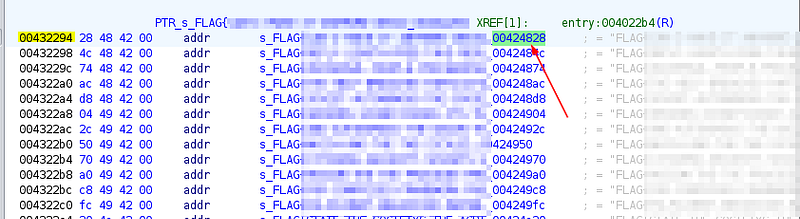
The top line matches the hash function string we found. Now let’s click the 00424828 entry…

There we go! We saw the complete flag string and managed to find our first flag! Awesome job!

Strings :: Challenge 2
This executable prints an MD5 Hash on the screen when executed. Can you grab the exact flag?
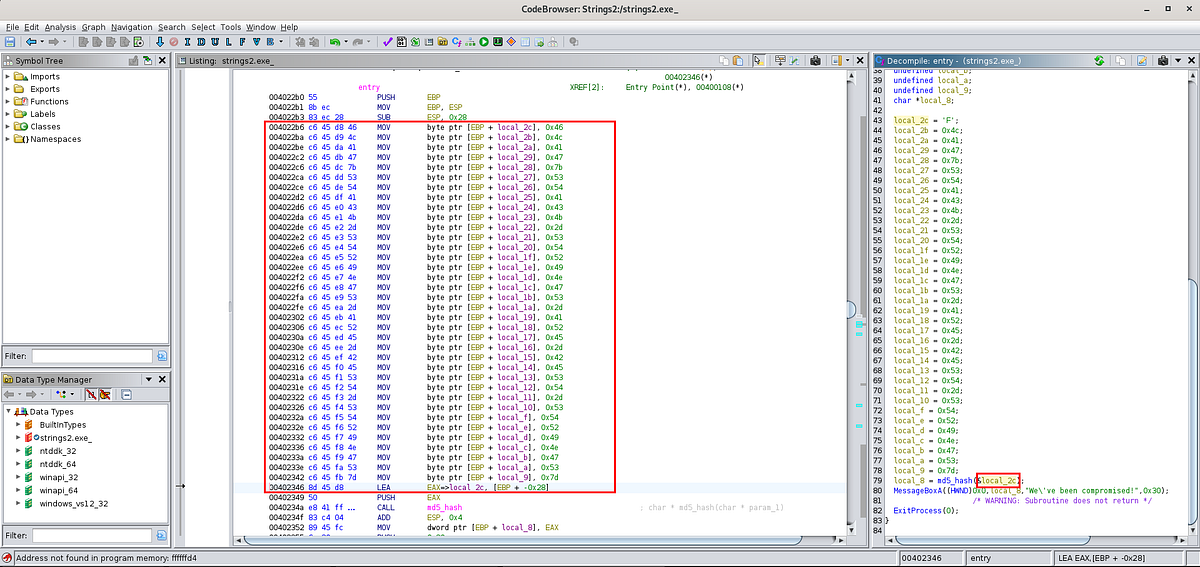
We’ll start this task the same way we did with the first one — we’ll create a new project in Ghidra, drop in the strings2.exe, and let Ghidra perform the initial analysis. Once that is complete, we’ll again start with the entry function and focus on the decompile window:
This time, as we scroll through the entry, we’ll see a different character pointer than we did in Task 1: char *local_8;
It seems like this points to another MD5 hashed string. This time instead of a fully defined string like we saw in Task 1, it appears that we have different variables in a stack represented as hexadecimal (hex) values that are hashed in sequence to form the full string. Lower address variables in the stack will be added first, so local_2c = “F”; would be added before local_2b = 0x4c; — maybe the F is the first character in “Flag”?
Let’s test the theory and focus on converting the hex values to ASCII and see if this reveals a flag.
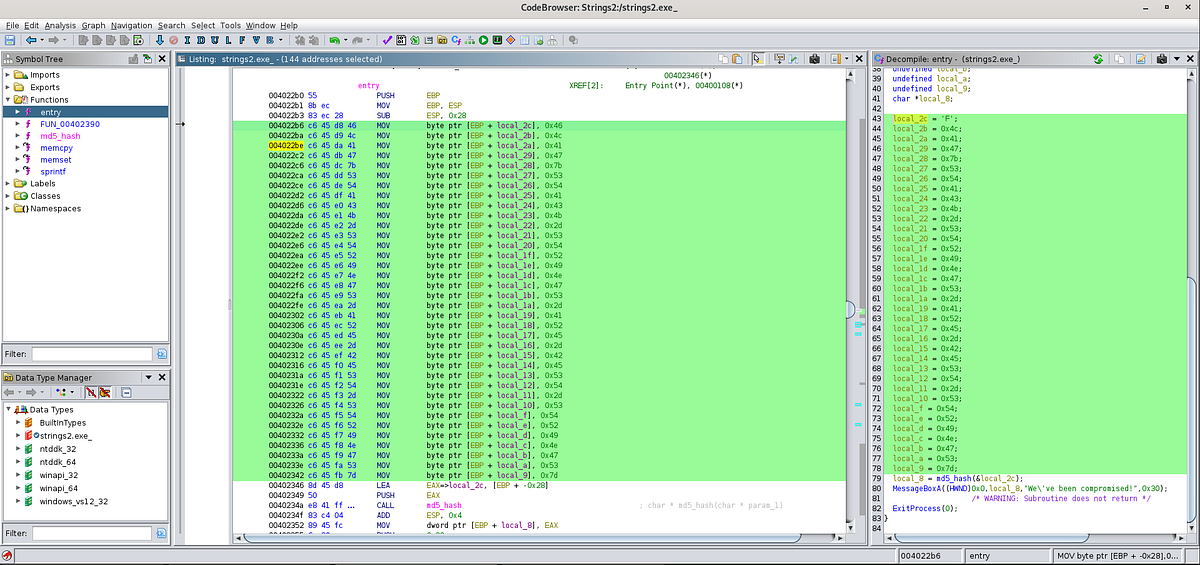
To do this, I am going to copy out the code with the hex values and add them to CyberChef so that we can perform the cleanup and conversion_._ The first goal is to strip out all the code other than the hex values. For this we can add a Find/Replace operation to the recipe and apply the following regular expression (REGEX) to the find operation: ^[^,]*,
This should match everything from the start of each line up to the first comma.
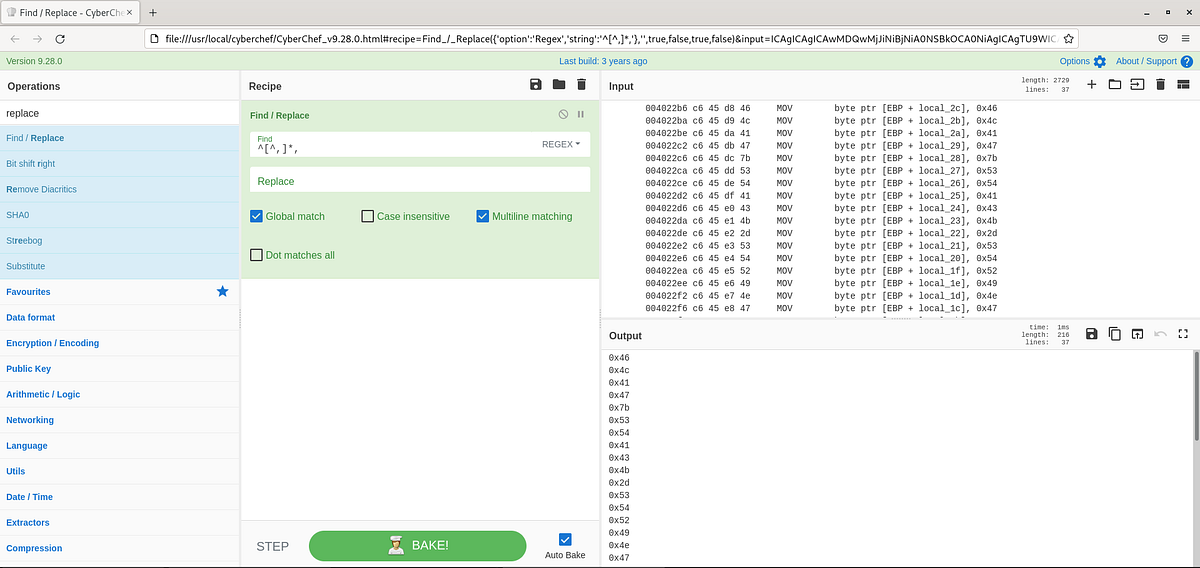
Now all we should have to do is add the “From Hex” operation to the recipe to convert the hex to ASCII to reveal the flag!
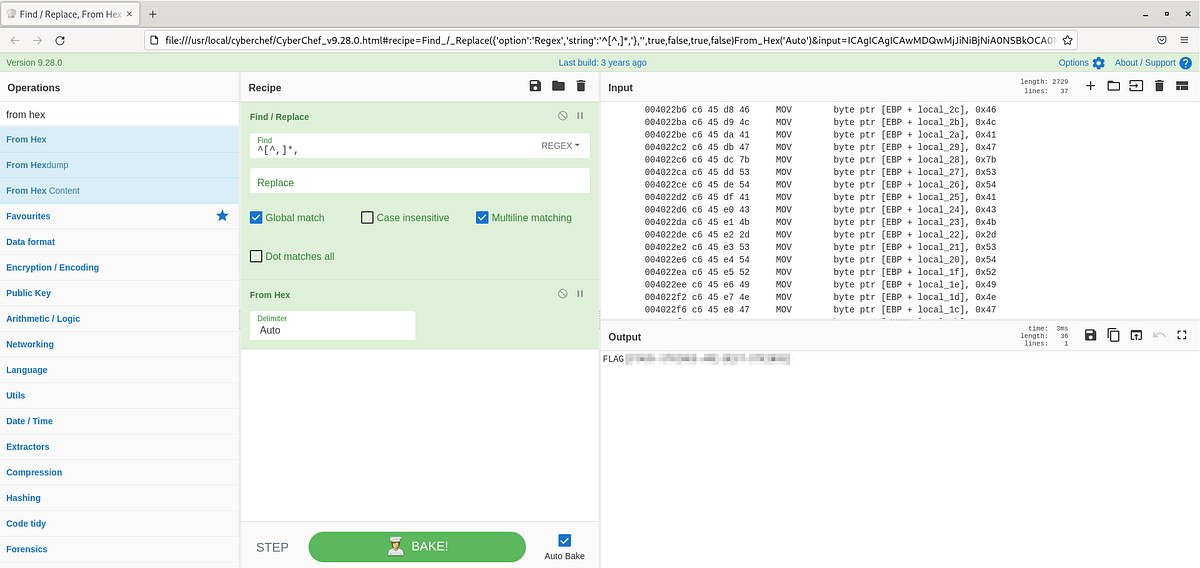
Let’s submit and check if we stumbled through this one correctly!

Strings :: Challenge 3
This executable prints an MD5 Hash on the screen when executed. Can you grab the exact flag?
Once again, we’ll start this task the same way we did with the last two tasks — we’ll create a new project in Ghidra, drop in the strings3.exe, and let Ghidra perform the initial analysis. Once that completes, we’ll again start with the entry function and focus on the decompile window:
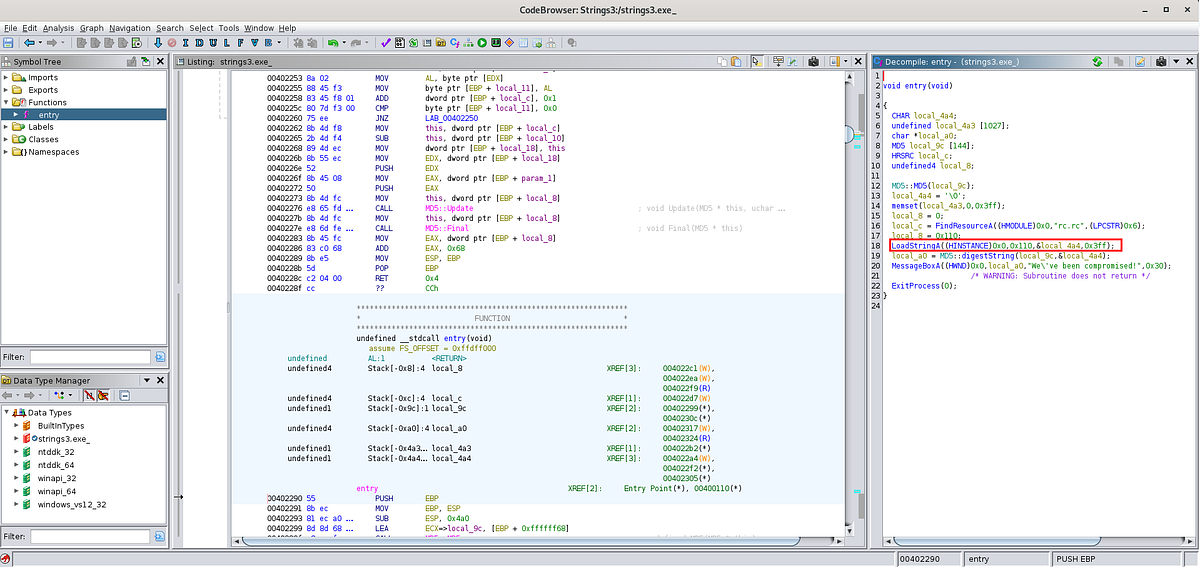
For this task, the code looks a little different than we saw in the previous two tasks. As this is a strings challenge, something sticks out to me, the LoadStringA function. I’ll lean on the documentation Microsoft Learn to help me out with some context for this function:
Loads a string resource from the executable file associated with a specified module and either copies the string into a buffer with a terminating null character or returns a read-only pointer to the string resource itself.
So, it looks like maybe strings3.exe is loading a string with the ID of 0x110 and then copies it into the memory buffer local_4a4 .
So, we’ll chase this theory and click the 0x110 ID in the decompile window.
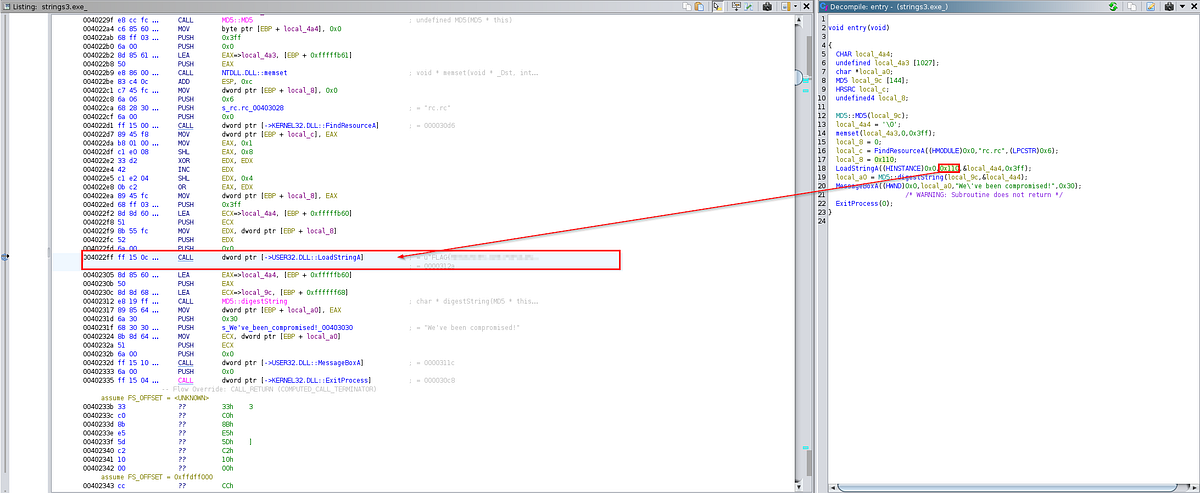
Right away, we’ve stumbled upon some evidence of the flag we are looking for in the code! Let’s examine the function call by clicking on CALL which takes us to the below strings table which contains several flags.
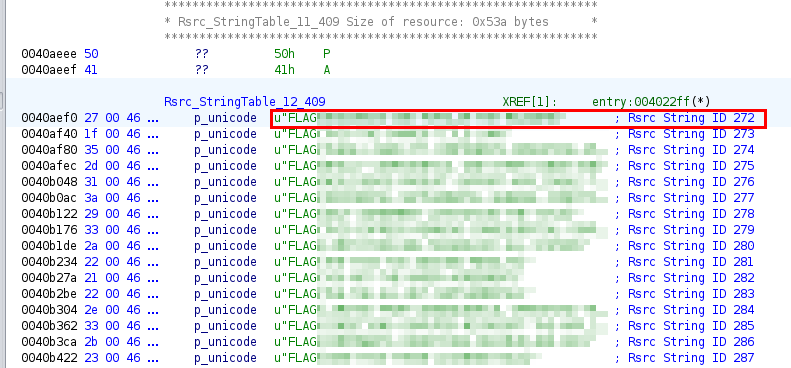
The top string matches the flag we found earlier, but let’s double verify before we try to submit. Remember that we click the 0x110 that we thought may be the identifier of the flag?
In the strings table we don’t see this value, but we do have a column of String IDs. In Task 2 we performed a hex to ASCII conversion, this time we can try a hex to decimal conversion. Fortunately, Ghidra has already taken care of this for us — we simply need to mouse over the 0x110 ID to get the decimal value of 272.
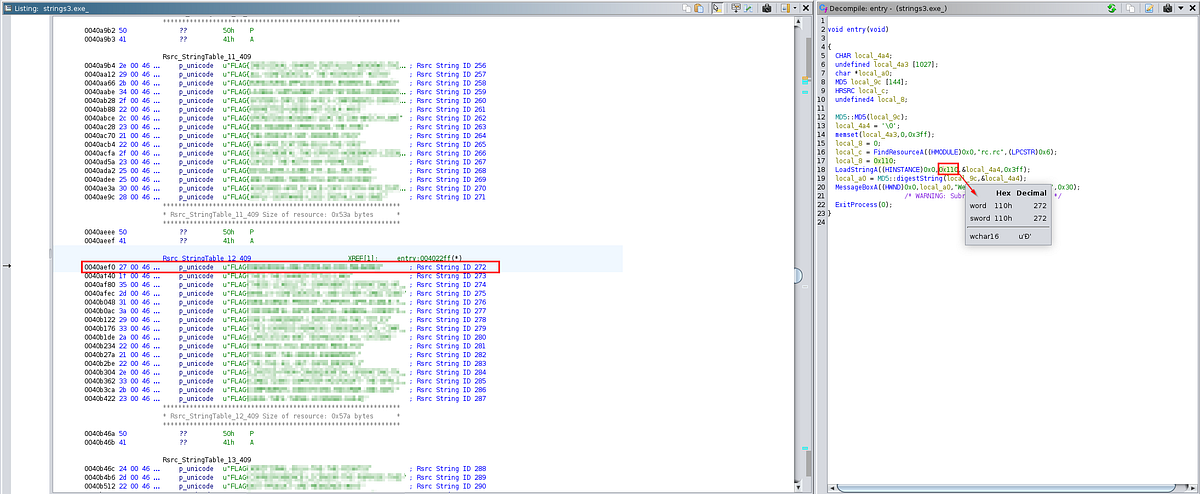
This confirms our findings and now we know for certain that String ID 272 is the flag string we are searching for. We managed to find our third and final flag!

Conclusion:
Awesome job! We might have stumbled a bit, but we made it through the Basic Malware RE room using Ghidra!
To wrap this up, thank you to TryHackMe for the challenging room and the valuable exposure to reverse engineering as I close in on the end of the Cyber Defense learning path.
This room was tougher than usual for me as I started out as a novice in reverse engineering and using Ghidra. But the experience was incredibly helpful to highlight my own gaps in reverse engineering knowledge and to help get me some hands-on practice. It was fun to think creatively and test how one might leverage generative AI solutions to help a newbie with static code analysis. In the real world, I might have skipped right to dynamic analysis in a sandbox but that isn’t always an option and understanding what is going on “under the hood” can be far more beneficial for deep analysis.
Thank you so much for reading along, too! I hope that you had as much fun as I did and learned something new, too. Until next week — stay curious!
Tools & References:
TryHackMe: https://tryhackme.com/r/room/basicmalwarere
REMnux: https://docs.remnux.org/discover-the-tools/statically+analyze+code/general#ghidra
Ghidra: https://ghidra-sre.org/
Microsoft Copilot: https://www.microsoft.com/en-us/windows/copilot-ai-features?r=1
CyberChef: https://gchq.github.io/CyberChef/
Microsoft Learn: https://learn.microsoft.com/en-us/windows/win32/api/winuser/nf-winuser-loadstringa