LetsDefend — Kernel Exploit Challenge Walkthrough
A Linux DFIR Challenge Using Unix-Like Artifacts Collector Logs.

Image Credit: https://app.letsdefend.io/challenge/kernel-exploit
Introduction:
Welcome to my weekly walkthrough! If you’ve stumbled across this blog searching for a comprehensive guide for the Kernel Exploit challenge from LetsDefend, you’re in the right place. This challenge is a fantastic introduction to digital forensics and incident response (DFIR) on Linux— let’s check out the scenario below.
Challenge Scenario:
In the afternoon, network monitoring systems detected anomalous traffic patterns originating from a critical transaction processing server. Initial signs suggest a potential security breach. You have been provided with a forensic image of the affected system and tasked with conducting a thorough investigation to determine the scope of the incident.
In this challenge, the stakes are high: we’re alerted to a critical transaction processing server that may have been compromised. It’s up to us to triage and analyze how the attack occurred, determine if this is a true positive, and figure out what we can do to prevent it from happening again.
To run our investigation, we’re provided with a forensic image of the affected server. So, what’s in our toolkit for this one? Since the image was created using Unix-like Artifacts Collector (UAC), we’ll rely on the generated artifacts and analyze them manually using a simple text editor. To enrich our findings with additional threat intelligence, we’ll also pivot out to VirusTotal and the National Vulnerability Database for some extra flavor.
Sounds like fun, right? Let’s get into it!
And if you find this walkthrough helpful — whether it levels-up your skills, gets you over a stumbling block, or serves as a handy reference — please give it a clap and consider following me for more content like this.
Thanks for reading and going on this investigation with me!
Question 1: What is the name of the key file the intruder downloaded to elevate their privileges after gaining unauthorized access?
Let’s dive right in by opening the ChallengeFile folder and extracting linuxTriageImage.tar.zip, which contains linuxTriageImage.tar.gz—go ahead and extract that too. This will leave us with the linuxTriageImage directory, which contains all the artifacts we’ll analyze during our investigation.
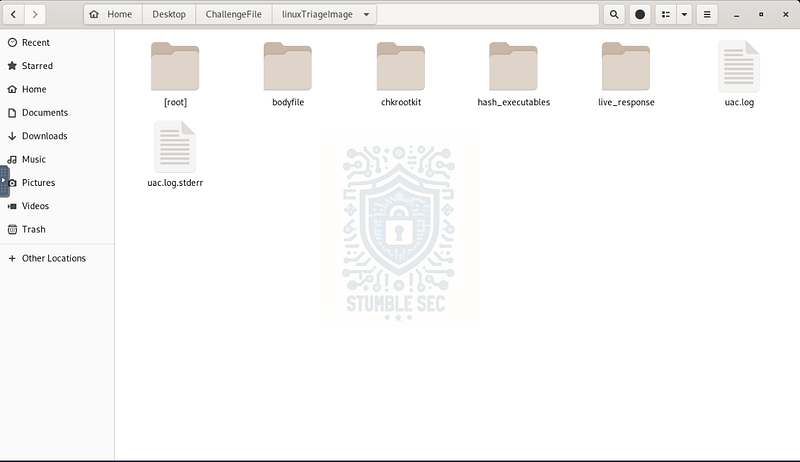
LetsDefend VM: Overview of challenge artifacts
This might look overwhelming at first, but one file stands out immediately: uac.log. Why is this important? This log indicates that the forensic utility Unix-like Artifacts Collector (UAC) was used to create the forensic image. According to the project’s GitHub page:
UAC (Unix-like Artifacts Collector) is a powerful and extensible incident response tool designed for forensic investigators, security analysts, and IT professionals. It automates the collection of artifacts from a wide range of Unix-like systems, including AIX, ESXi, FreeBSD, Linux, macOS, NetBSD, NetScaler, OpenBSD and Solaris.
Whether you’re handling an intrusion, conducting forensic investigations, or performing compliance checks, UAC simplifies and accelerates data collection while minimizing reliance on external support during critical incidents.
Awesome! This gives us a starting point. We can reference the UAC documentation to understand where specific artifacts are logged, and then put that knowledge into practice.
To answer Question 1, we’re looking for a file or exploit downloaded by the attacker that was critical to their attack — specifically, something that enabled privilege escalation. To identify it, we’ll leverage the artifact logs collected by UAC.
Navigate to the hash_executables folder within the challenge directory. Inside, you’ll find logs containing detailed information about executable files on the system. Let’s get an overview by opening list_of_executable_files.txt.
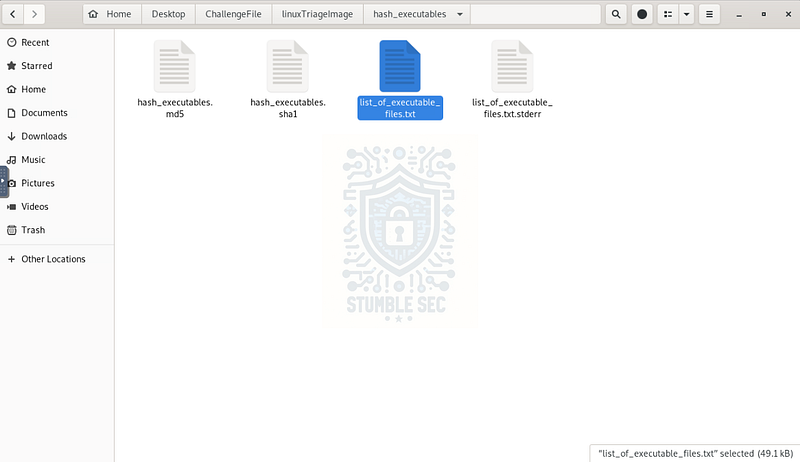
Locating the executable file log
This log makes it easy to search for executables present on the system. Try searching for something obvious like "exploit" and see if anything interesting turns up.
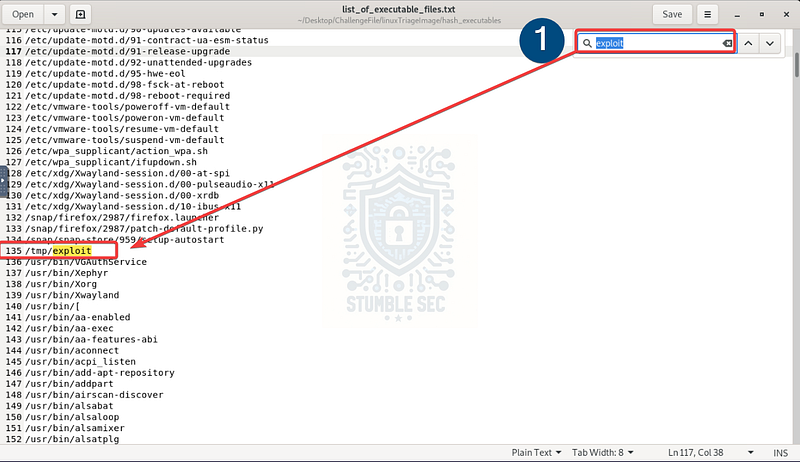
Identifying a suspicious file within the executable files log
Hey, what do you know! We’ve found a potentially malicious file. Based on its name and its location in the /tmp directory (a common staging area for the bad guys), it’s reasonable to assume this is the exploit the intruder downloaded to elevate their privileges.
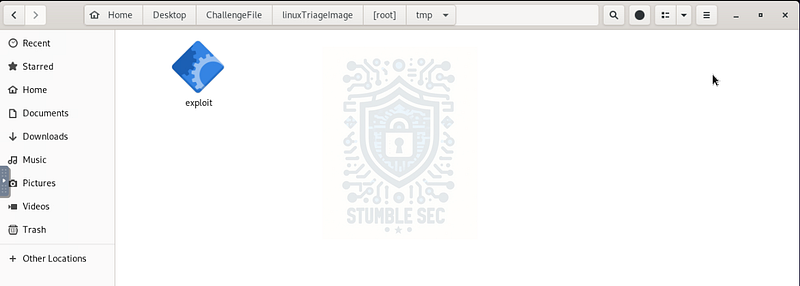
Validating the location of the suspicious file

Question 2: When was the file used for privilege escalation first submitted on Virus Total?
Now that we’ve identified the malicious file used for privilege escalation, it’s time to gather some threat intelligence. One of the best places to start is VirusTotal, where we can check if this file has been seen before and how it’s been classified by various antivirus engines.
But first, we need the file’s hash so we can search for it.
There are a couple of ways to obtain the hash:
- From the terminal, we can generate the SHA256 hash using the following command:
sha256sum exploit

Using the terminal to calculate the SHA256 hash of the exploit
d8dd09b01eb4e363d88ff53c0aace04c39dbea822b7adba7a883970abbf72a77
- Alternatively, UAC already collected the SHA1 hash during triage. You can find it in the
hash_executables.sha1log inside thehash_executablesfolder.
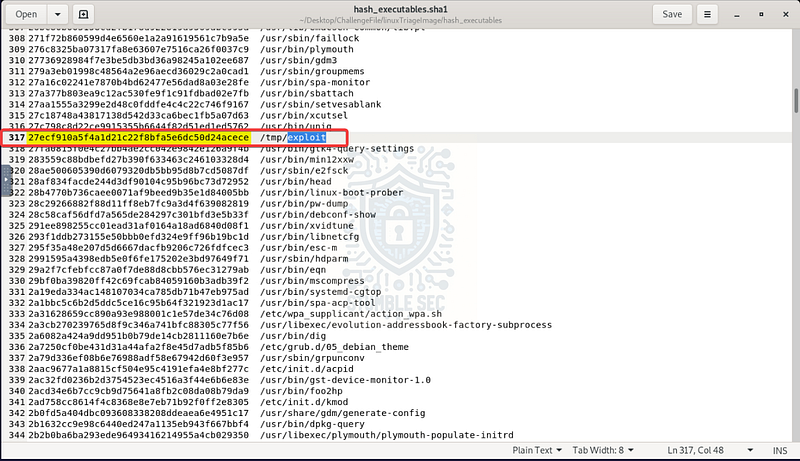
Identifying the SHA1 hash of the exploit within the hash_executables.sha1 log
Once you’ve got the hash, head over to VirusTotal and paste it into the search bar. We’ll see that this sample has been submitted to the platform before and it’s detected as malicious by a majority of the antivirus vendors.
To answer Question 2, we need to determine the first submission date of the file. You can find this under the Details tab, in the History section of the VirusTotal report as First Submission. This submission timestamp gives us some rough idea of how long the malware has been circulating.
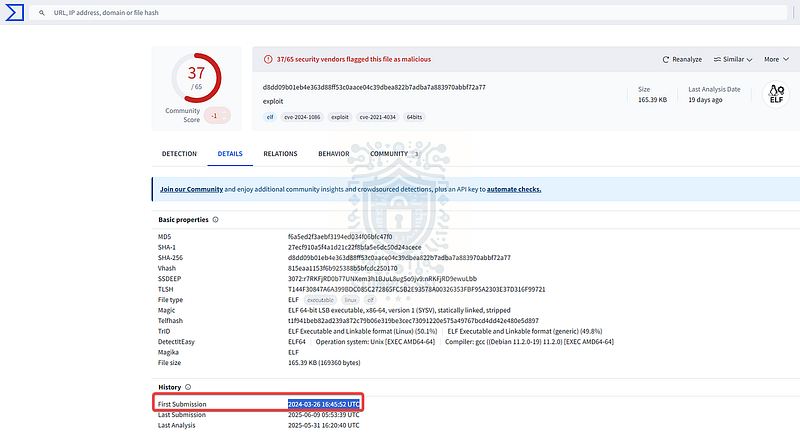
VirusTotal: Identifying the first submission time of the sample

Question 3: What is the Process ID (PID) of the operation launched by the attacker?
Now that we’ve identified the binary as malicious, the next step is to uncover the Process ID (PID) associated with its execution to help us follow the attacker’s activity on the system.
To do this, we’ll leverage the process artifacts collected by UAC. These logs are in the live_response folder, within the running_processes_full_paths.txt log. This file contains detailed information about all processes running on the system at the time of collection, including their full paths, user context, and PIDs.
Once you’ve opened the log, search for the name of the malicious binary. This will take you directly to the relevant entry (line 369) which shows the PID of the exploit.
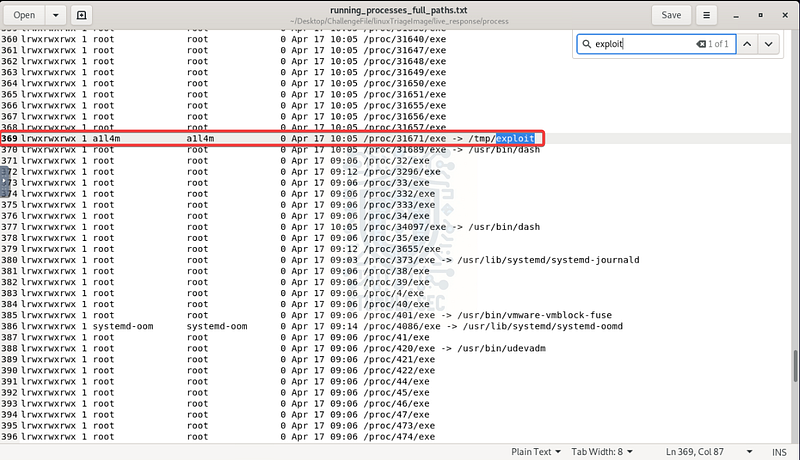
Identifying the entry for the running malicious process
Having this information handy is valuable for our investigation because it helps us to identify further malicious activity by searching for any parent/child processes or correlating the PID with other logs.

Question 4: What username was the malicious process running under?
Our next task is to determine which user context the malicious process was running under. For this, we can continue using the running_processes_full_paths.txt log that we referenced in the previous question.
Focus on the user column in the log entry for the malicious binary. You’ll see that the process was running under the account named a1l4m.
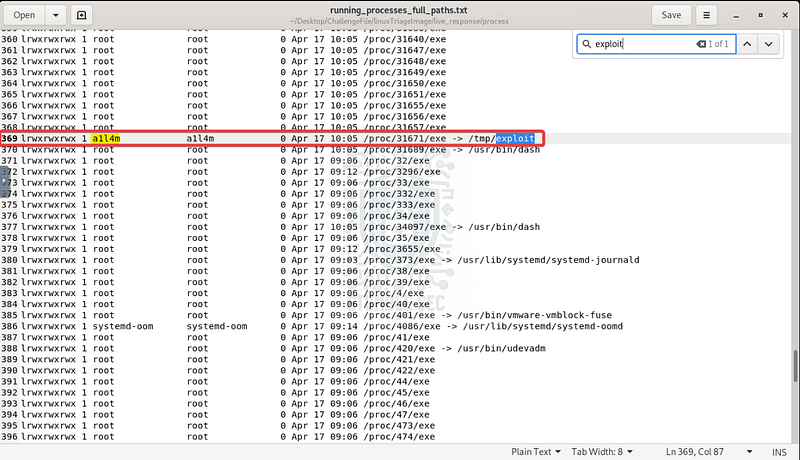
Identifying the user running the malicious process
Understanding the user context is another valuable datapoint and helps us track privilege escalation. For example, if the attacker initially launched the exploit under a non-privileged user like a1l4m, but later gains root access, we have clear evidence that the exploit was used to elevate privileges as part of the attack chain.

Question 5: What is the Parent Process ID (PPID) associated with the malicious process?
The next step in our investigation is to determine the Parent Process ID (PPID) of the malicious process we identified in Question 3. For this, we’ll examine the pstree_-p_-n.txt log generated by UAC. This log displays the system’s process tree at the time of collection, including parent-child relationships and associated PIDs.
Once you’ve opened the log, use your text editor’s Find function to search for either the name of the binary (exploit) or the PID we found earlier. You’ll see a line leading up and to the left of the process—that’s the visual representation of its parent relationship in the tree.
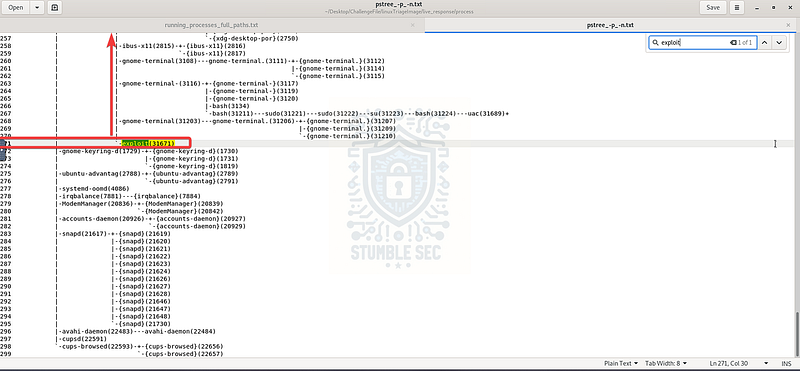
Locating the malicious process in the process tree
Follow that line upward until you reach the parent: systemd (PID 1686). For context in Linux, systemd is the system and service manager used to manage user sessions and services. Seeing it as the parent process suggests the malicious binary was likely executed as part of a user session or terminal command, rather than being launched by another malicious process.
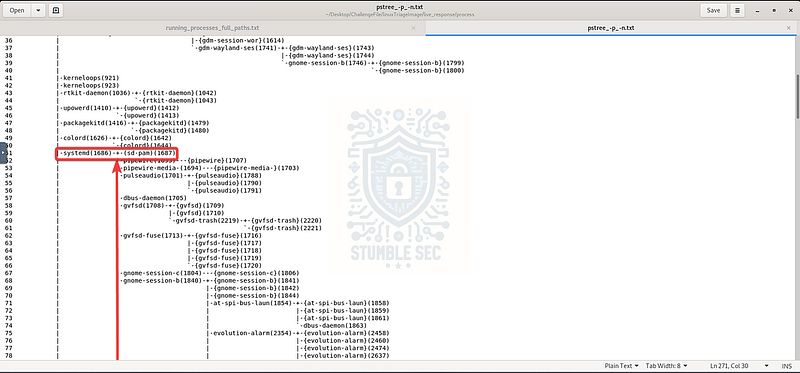
Identifying the parent process of the malicious process
Understanding the parent process is important because it helps us determine how the attacker executed the binary and whether it was user-initiated or part of a larger chain. All this data helps build a narrative of the attack.

Question 6: What are the operating system and its version on the compromised server?
We’ve spent some time analyzing the malicious privilege escalation exploit — now it’s time to collect information about the victim’s operating system environment. This can help us understand whether the system was running a version of the OS that may have been vulnerable to a specific privilege escalation exploit.
The first place we’ll check is the hostnamectl.txt log file located in the live_response/network directory.
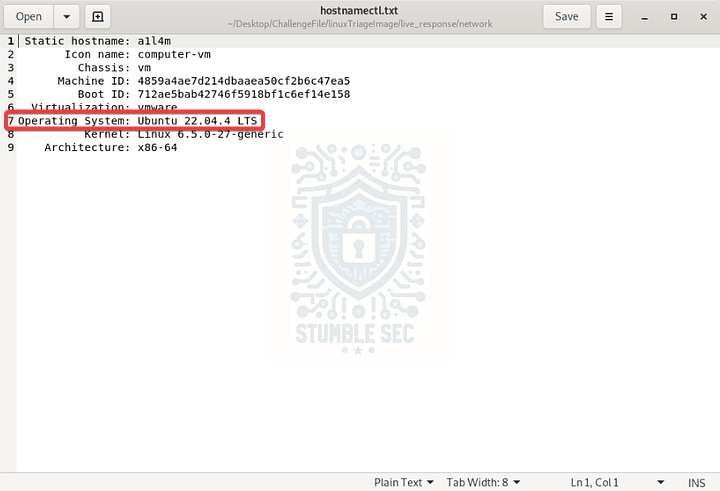
The logged output of hostnamectl
While this log contains some useful details, the OS version listed doesn’t match the required answer format. No problem! Let’s pivot to a second log file: uname_-a.txt, found in the live_response/system directory.
After opening this file, we can identify a slightly different version of Ubuntu where the output of uname -a matches the expected answer format for the challenge.
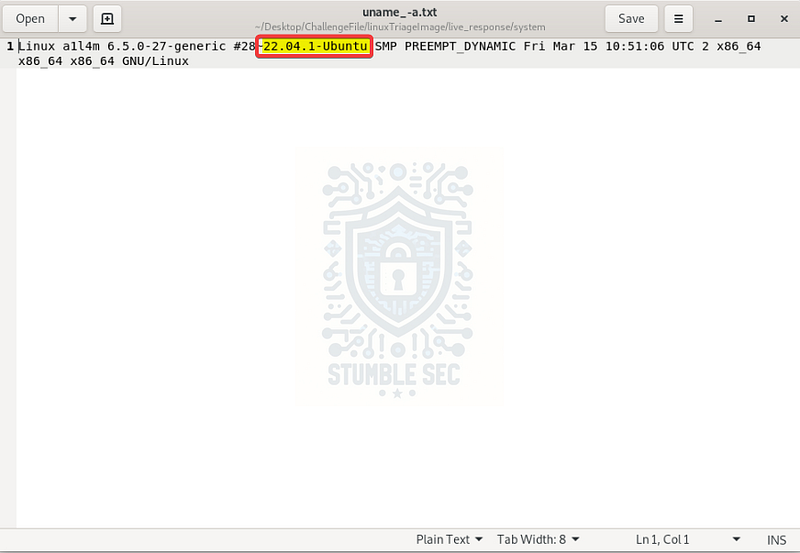
The logged output of uname -a

Question 7: What is the kernel version of the compromised system?
Answering Question 7 can be accomplished the same way we approached the last question. We can identify the kernel version of the compromised system by checking either the hostnamectl.txt or uname_-a.txt logs.
This time, both logs display the same kernel version, so either one will give us the correct answer.
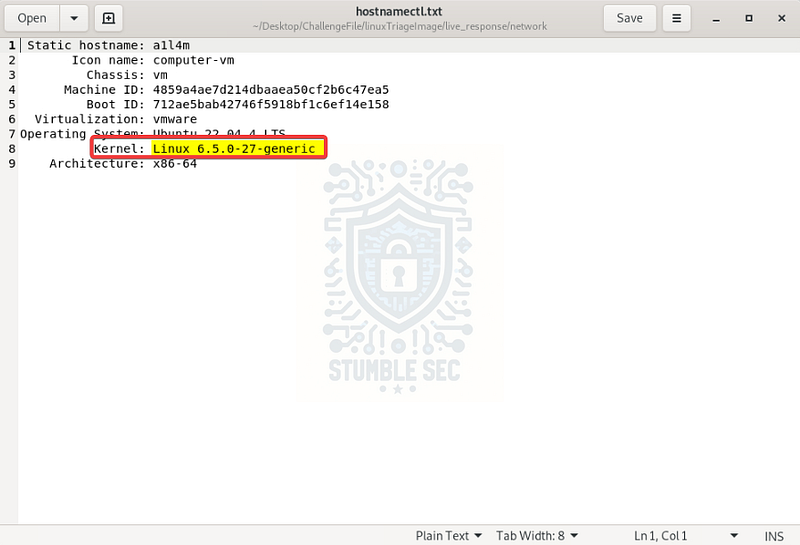
Identifying the kernel version in the hostnamectl log

Identifying the kernel version in the uname -a log

Question 8: What is the most recent CVE number associated with the vulnerabilities exploited in this attack?
We’ve made it to the final question — and now it’s time to put everything we’ve learned into practice by identifying the most recent Common Vulnerabilities and Exposures (CVE) number associated with the exploit.
To start, let’s head back to the VirusTotal entry for the exploit we analyzed in Question 2. You’ll notice two CVE tags listed: CVE-2021-4034 and CVE-2024-1086. Since we’re looking for the most recent one, our answer is CVE-2024-1086.

VirusTotal: Identifying the most recent CVE number
Great! We’ve found our answer. But let’s dig a little deeper by checking out the entry for this CVE in the National Vulnerability Database (NVD). This additional intelligence tells us that we’re dealing with a Linux Kernel Use-After-Free vulnerability, exploitable to achieve local privilege escalation. It affects several versions of the Linux kernel:
From (including) 6.2 Up to (excluding) 6.6.15
NVD _A use-after-free vulnerability in the Linux kernel’s netfilter: nf_tables component can be exploited to achieve local…_nvd.nist.gov
This confirms that the kernel version running on the victim’s system was outdated and vulnerable. It’s a great reminder of the importance of always keeping on top of your patching game.
Now let’s submit our answer and wrap up this investigation!

Conclusion:

Mission accomplished! By poring over the logs generated by UAC, we were able to identify and correlate key artifacts and uncover a privilege escalation exploit using CVE-2024€“1086. Now that we’ve put our Linux forensics skills into practice and confirmed the malicious activity, it’s time to close out this walkthrough of the Kernel Exploit challenge.
A big thank you to LetsDefend for another awesome challenge! I chose this one to start dipping my toes into the world of Linux forensics. Coming from a Windows background, it’s definitely a different skillset with a different set of tools. This challenge was a great blend of learning how to work with the UAC triage utility, exploring Linux artifacts, and leveraging threat intelligence to better understand exploitation and system compromise. Awesome stuff!
Thanks for your support and partnering on this investigation. If you found this walkthrough helpful, don’t forget to give it a clap! Your feedback really is invaluable, and it pumps me up to support your security journey. Remember, Cybersecurity is a team sport and we’re in this together!
Until next week’s challenge — stay curious and be safe out there!

Tools & References:
Challenge Link: https://app.letsdefend.io/challenge/kernel-exploit
UAC: https://github.com/tclahr/uac
UAC Documentation: https://tclahr.github.io/uac-docs/
VirusTotal: https://www.virustotal.com/
VirusTotal — Exploit Sample: https://www.virustotal.com/gui/file/d8dd09b01eb4e363d88ff53c0aace04c39dbea822b7adba7a883970abbf72a77
MITRE ATT&CK —Privilege Escalation (TA0004): https://attack.mitre.org/tactics/TA0004/
Wikipedia — Systemd: https://en.wikipedia.org/wiki/Systemd#:~:text=systemd%20is%20a%20software%20suite,and%20improvise%20to%20solve%20problems.
National Vulnerability Database (NVD): https://nvd.nist.gov/vuln/detail/cve-2024-1086#range-16535572