LetsDefend — Disclose The Agent Challenge Walkthrough
Investigating a Suspicious Email Using Wireshark.
https://app.letsdefend.io/challenge/disclose-the-agent
Introduction:
Welcome to my weekly walkthrough! If you’ve stumbled across this blog looking for a practical guide to the Disclose the Agent challenge from LetsDefend, you’re in the right place. This challenge is a great introduction to investigating network traffic and carving out email-based artifacts using Wireshark — let’s check out the scenario below.
Challenge Scenario:
We reached the data of an agent leaking information. You have to disclose the agent.
Log file: /root/Desktop/ChallengeFile/smtpchallenge.pcap
Note: pcap file found public resources.
Got it! We’re provided with a PCAP file and need to investigate a malicious insider leaking information. To figure out what’s going on, we’ll use the network traffic analysis tool Wireshark to extract email communications, uncover clues within the message contents, and paint the full picture.
This challenge is a great opportunity to practice protocol-level analysis, decode encoded credentials, and reconstruct file attachments from raw packet data. Sounds like fun, right? Let’s get into it!
If you find this walkthrough helpful — whether it levels up your skills, gets you over a stumbling block, or serves as a handy reference — please give it a clap and consider following me for more content like this.
Thanks for reading and going on this investigation with me!
Question 1: What is the email address of Ann’s secret boyfriend?
Let’s kick off this investigation by opening the ChallengeFile folder and locating the artifact smtpchallenge.pcap.
So, what do we do with this? Well, a PCAP file is a network packet capture file containing the packet-level details of a network session. For this challenge, we’ll be leveraging Wireshark to view the pcap and perform our analysis. Double-click the file to open it.

Location of the ChallengeFile
To answer Question 1, we’re searching for an email exchange between Ann and a secret boyfriend. For this, we can focus on filtering the Wireshark traffic for the Simple Mail Transfer Protocol (SMTP) packets. If you’re unfamiliar with this protocol, here’s some background from the Wireshark Wiki that’s helpful to know for this challenge:
This protocol is widely use to send e-Mail from the authors mail program to the mail server and between servers too.
Typically, SMTP uses TCP as its transport protocol. The well known TCP port for SMTP traffic is 25.
SMTP uses MIME_multipart to transfer attachments
The idea here is to filter SMTP traffic to review emails that Ann sent. Hopefully, this contains some kind of clue about the identity of her boyfriend. To perform the filtering, simply enter the protocol name smtp into Wireshark’s filtering box.
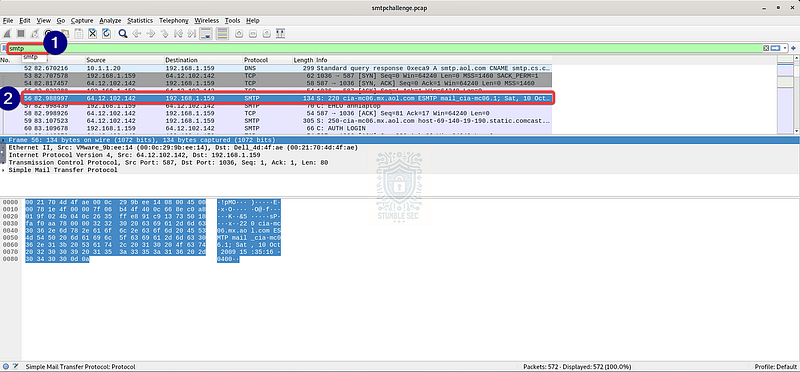
Once the filter is applied, search through the traffic to find the first displayed SMTP packet („– 56). Once we’ve found it, right-click the line and select Follow > TCP Stream. This will open up the TCP stream window for us to view the contents.
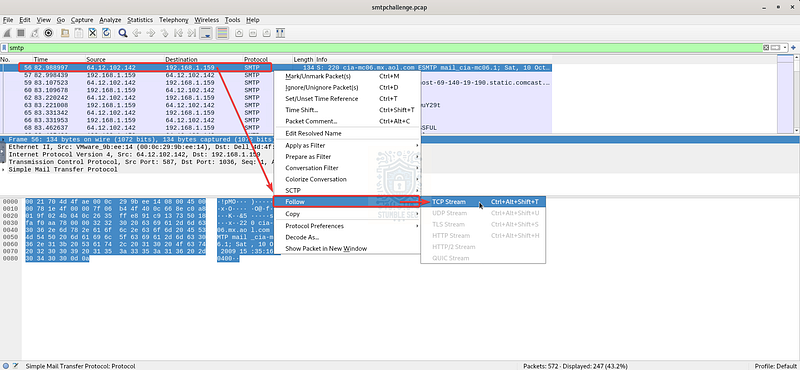
Wireshark: Packet 56— following the TCP stream
Unfortunately, while interesting, this message stream doesn’t contain any spicy details about Ann’s affair. Let’s try another stream containing another message…
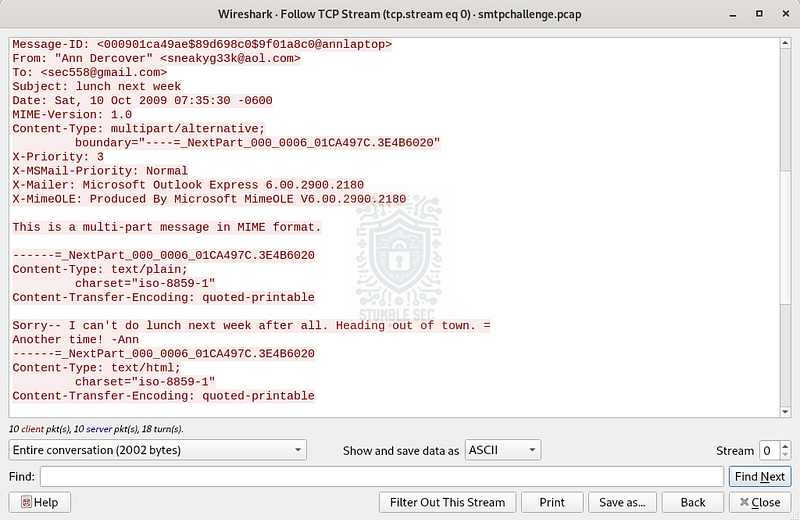
Wireshark: The contents of TCP Stream 0
Let’s check the next SMTP stream starting with packet number 116. Follow the same process to view the TCP stream.

Wireshark: Packet 116 — following the TCP stream
Now we’ve got them! This message is much more suggestive, and we can confirm the email address of Ann’s boyfriend — the elusive “Mister Secret.”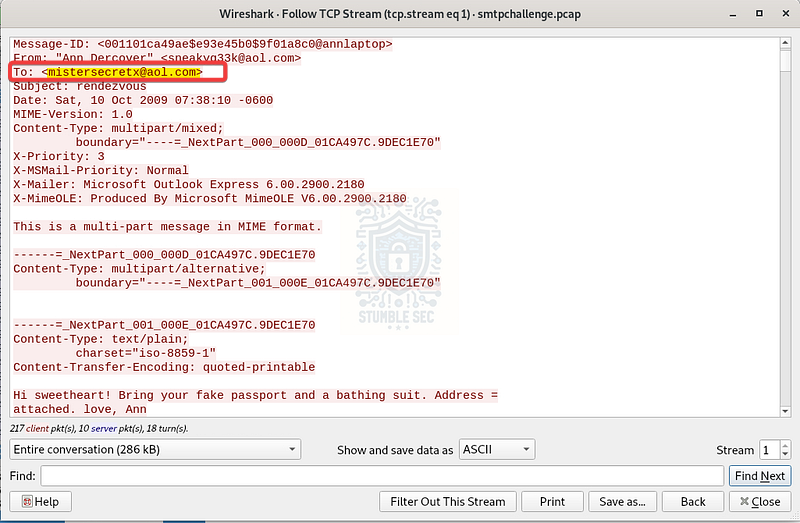
Wireshark: Identifying the email of Anne’s secret boyfriend

Question 2: What is Ann’s email password?
Our next objective to answer Question 2 is to determine Ann’s email password. SMTP traffic is transmitted in clear text by default, meaning that the authentication credentials could be visible in the PCAP file.
Let’s find out! To illustrate this, close the TCP stream window and zoom out to the packet view again. Here, we’re able to see the complete user authentication flow (packets 120€“128), including the PASS field containing the password.
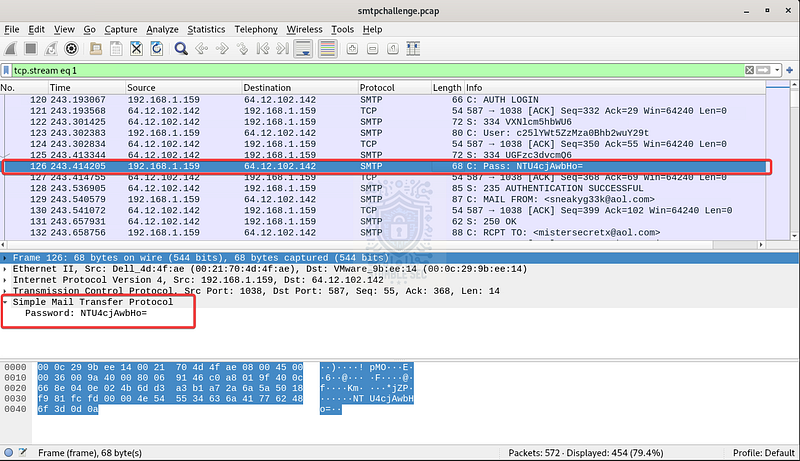
Wireshark: Identifying the SMTP password field
Just one small obstacle: the field appears to be encoded, so the password isn’t as it appears here. Remember, encoding is not the same as encryption, so we should be able to simply decode the PASS string. To do this, right-click the packet and select Protocol Preferences > Decode Base64 encoded AUTH parameters.
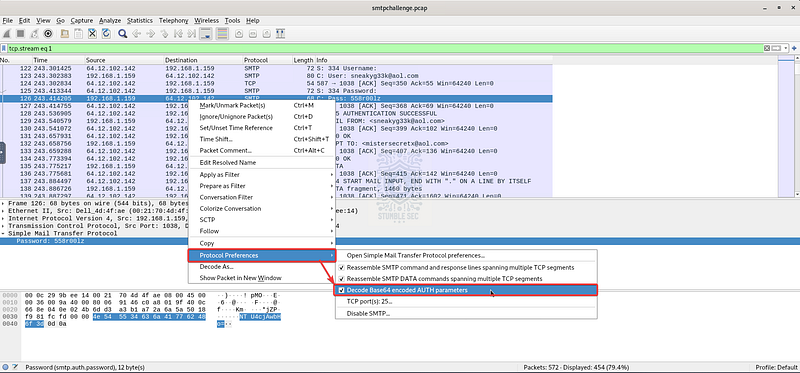
Wireshark: Applying the Base64 decode operation
This automatically decodes the password for Ann’s email — great find!

Wireshark: Viewing the decoded password

Question 3: What is the name of the file that Ann sent to his secret lover?
To answer Question 3, navigate back to the TCP stream window. For this task, we’re looking for the name of the file that Ann sent. You might recall from the SMTP notes on the Wireshark Wiki that:
SMTP uses MIME_multipart to transfer attachments.
Wireshark: Identifying the attachment filename in the MIME section
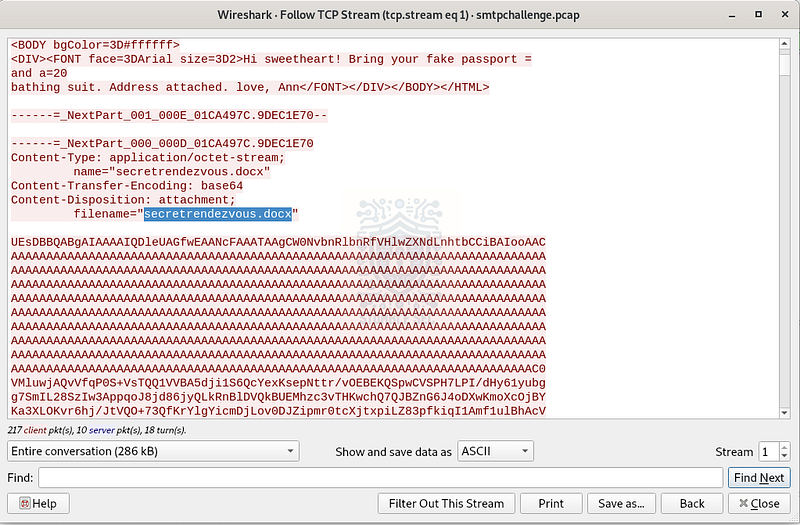
This means that by scrolling down to the MIME contents section, we can discover the filename field containing the name of the attachment — secretrendezvous.docx.

Question 4: In what country will Ann meet with her secret lover?
To find the answer to Question 4, turn your attention to the big blob of encoded text following filename="secretrendezvous.docx" that we found in the previous question.
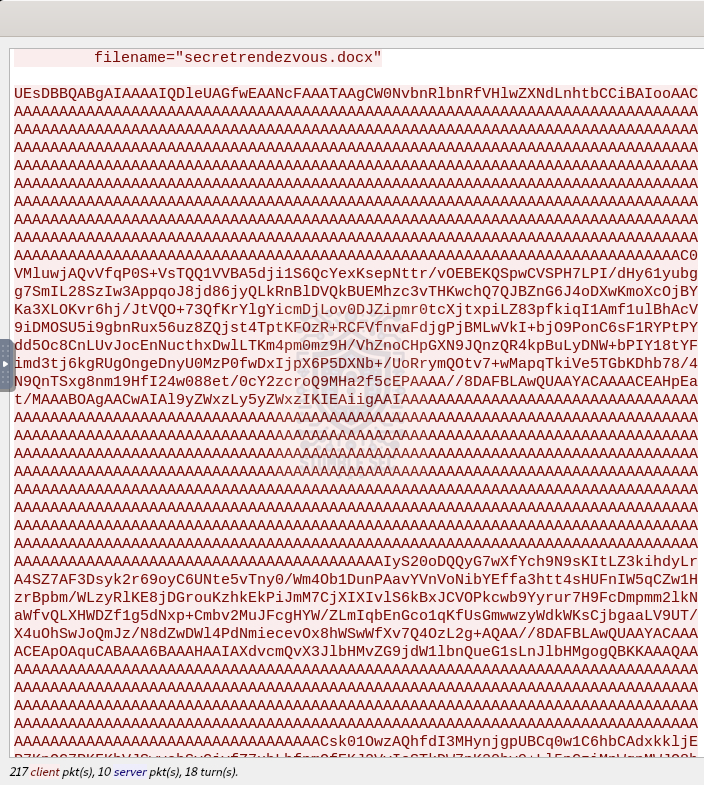
Wireshark: The encoded attachment
The encoded content between the filename and the ending boundary --=_NextPart_000_000D_01CA497C.9DEC1E70 is actually the .docx file attachment. With a little know-how and effort, we can convert this blob into the original, readable file.
The first step is to copy the blob to the clipboard and paste it into a text editor like Mousepad, which is built into the LetsDefend VM.
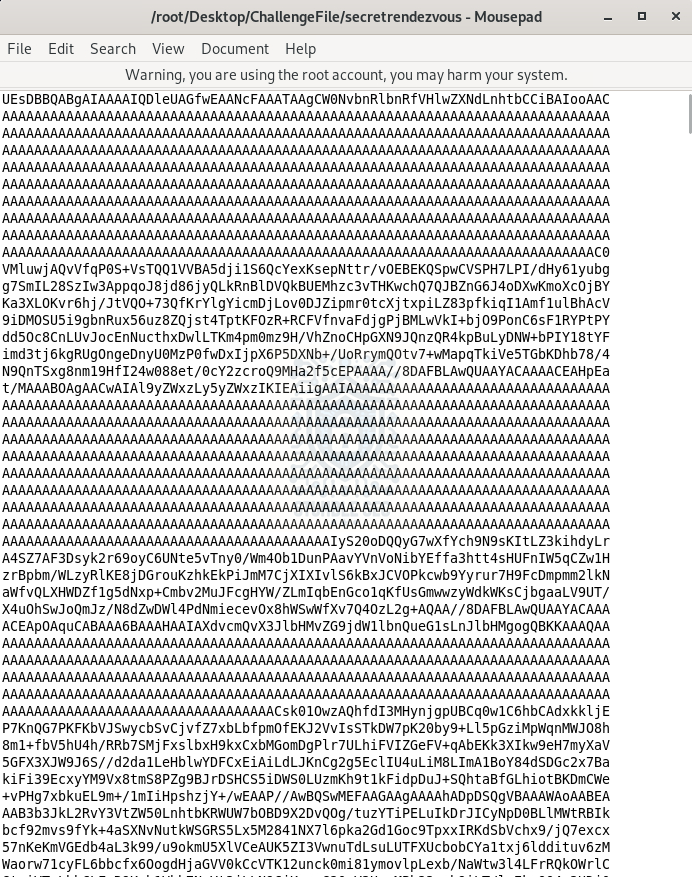
Mousepad: Pasting the Base64 blob
Once the contents have been pasted into the empty document, go ahead and save it.
Next, we’ll leverage the base64 command to decode the contents and output them into a new file, secretrendezvous.docx. Use the command below to watch the magic happen:
base64 -d -i secretrendezvous > secretrendezvous.docx
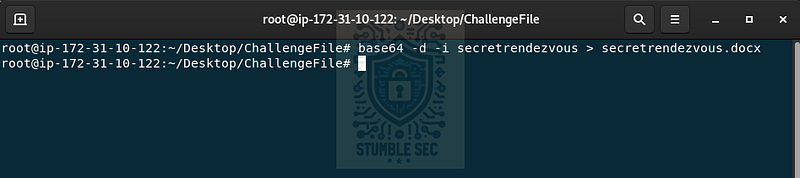
Now that the encoded contents have been piped to a new .docx file, go ahead and open it to find a map location for the secret rendezvous!
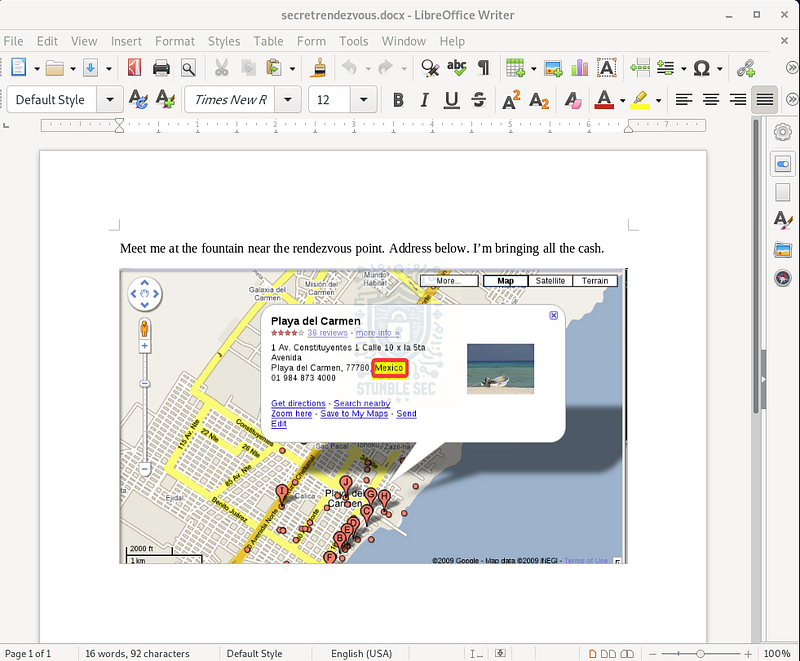
The rendezvous location revealed

Question 5: What is the MD5 value of the attachment Ann sent?
To wrap up our investigation and answer Question 5, we simply need to determine the MD5 hash value of the secretrendezvous.docx attachment that Ann sent.
We’ve already done most of the legwork by reassembling this artifact from the TCP stream, so now we just need to run the md5sum command from the terminal to grab the hash:
md5sum secretrendezvous.docx
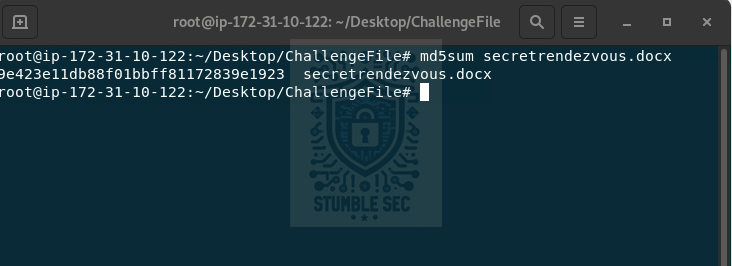
Terminal: Calculating the MD5 hash of the document
9e423e11db88f01bbff81172839e1923
The resulting output is the MD5 hash value we need to answer the final question. This is a handy thing to have in the real world since it serves as a file-level signature, and can be used to confirm that the file is identical to the original document, or to pivot into threat intelligence platforms to check if this exact specific file has been seen before.
In this case, the content is innocuous — but still interesting.

Conclusion:
How fun was that! A big shoutout to LetsDefend for putting out another great challenge.
This one was a solid exercise in classic network forensics and gave us the chance to work through a plausible real-world email analysis scenario. From filtering SMTP traffic in Wireshark, to decoding Base64-encoded credentials, and even reconstructing a .docx file from raw packet data — this challenge packed a lot of practical skills into a focused investigation.
I picked this one because I wanted to brush up on SMTP packet analysis and get some reps in with extracting email-based artifacts, which are still incredibly relevant in phishing investigations and insider threat cases. Each question built naturally on the last, and I’m always a fan of a fun narrative to chase during these challenges. All in all — very fun!
Thanks for following along and partnering on this investigation. If you found this walkthrough helpful, don’t forget to give it a clap! Your feedback keeps me going and helps me keep supporting your security journey. Remember, cybersecurity is a team sport — and we’re in this together.
Until next week’s challenge — stay curious and be safe out there!
Tools & References:
Challenge Link: https://app.letsdefend.io/challenge/disclose-the-agent
Wireshark: https://www.wireshark.org/
Wireshark Docs — SMTP: https://wiki.wireshark.org/SMTP