CyberDefenders — SpottedInTheWild Blue Team Lab Walkthrough
A Windows DFIR Challenge Using Arsenal Image Mounter, FTK Imager, Detect It Easy, ProcMon, CyberChef, and Eric Zimmerman’s Tools

Introduction:
Welcome to my weekly walkthrough! If you’ve stumbled across this blog while looking for a detailed guide to the SpottedInTheWild blue team challenge from CyberDefenders, you’re in the right place. This challenge is rated HARD by the authors, but don’t let the difficulty rating scare you off. Whether you’re just getting started in digital forensics or you’ve been around the block a few times, this challenge has something for everyone.
Challenge Scenario:
You are part of the incident response team at FinTrust Bank. This morning, the network monitoring system flagged unusual outbound traffic patterns from several workstations. Preliminary analysis by the IT department has identified a potential compromise linked to an exploited vulnerability in WinRAR software.
For this challenge, we’re putting on our incident response hats. Several workstations in the environment are showing suspicious outbound traffic, and it’s up to us to shed some light on the situation. Fortunately, we’re given a virtual hard disk for one of the devices, so we can dig into all the forensic artifacts, reconstruct a timeline, and determine what happened.
This scenario pushes us to think creatively, pivot between tools, and piece together a full attack chain using a variety of forensic artifacts. We’ll be using a mix of Eric Zimmerman’s forensic tools, FTK Imager, CyberChef, Detect It Easy, and even a few public sandbox platforms like Any.Run and VirusTotal to validate our findings. If you’re using Flare-VM, most of these tools are already built in and ready to go.
I’ll walk through each step clearly, and by the end, you’ll have a solid understanding of how to approach similar investigations in the wild. Sounds like fun, right? Let’s get into it!
And if you find this walkthrough helpful — whether it levels-up your skills, gets you over a stumbling block, or just gives you a clearer view of the blue team side of incident response — please give it a clap and consider following me for more content like this.
Thanks for reading and going on this investigation with me!
Important: Setup a Safe Analysis Environment & Extract the Challenge File:
Safety first! It’s always important when working with lab/challenge files from CyberDefenders (or any educational lab/challenge/range) to keep yourself protected by performing these tasks in a dedicated, isolated virtual machine environment. As this is a Windows-based challenge, I’m using FLARE-VM for this challenge which is " # “a collection of software installations scripts for Windows systems that allows you to easily setup and maintain a reverse engineering environment on a virtual machine (VM).“To keep this write-up focused I’m going to skip the step-by-step setup of FLARE-VM but _i_f you’d like to set up your own environment, please follow the directions provided directly by FLARE-VM on GitHub.
GitHub — mandiant/flare-vm: A collection of software installations scripts for Windows systems that… _A collection of software installations scripts for Windows systems that allows you to easily setup and maintain a…_github.com
Once you have a safe virtual environment created, updated, isolated, and snapshotted, we can extract the challenge file and start the investigation!
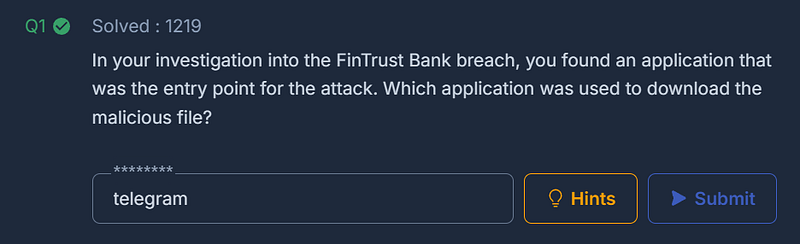
Question 1: In your investigation into the FinTrust Bank breach, you found an application that was the entry point for the attack. Which application was used to download the malicious file?
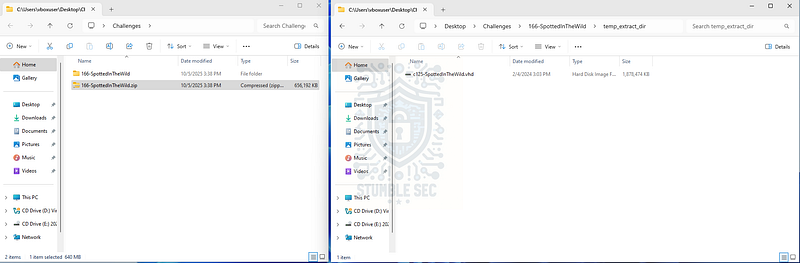
Let’s kick off our investigation and start digging into the provided artifacts. First, unzip the 166-SpottedInTheWild.zip archive from CyberDefenders using the password provided on the challenge page.
Once extracted, we’ll have access to the challenge file: c125-SpottedInTheWild.vhd.
So, what do we do with this thing? There are a variety of options, some of which we’ll explore during this investigation. As a first point of entry, we’ll leverage one of the suggested tools in the challenge, Arsenal Image Mounter. Arsenal gives us the ability to mount the virtual hard disk (.VHD) file and view the contents of the file system so we can analyze the forensic artifacts contained within.
Open Arsenal and press the Mount Disk Image button at the bottom. Select c125-SpottedInTheWild.vhd and use the default mount options.
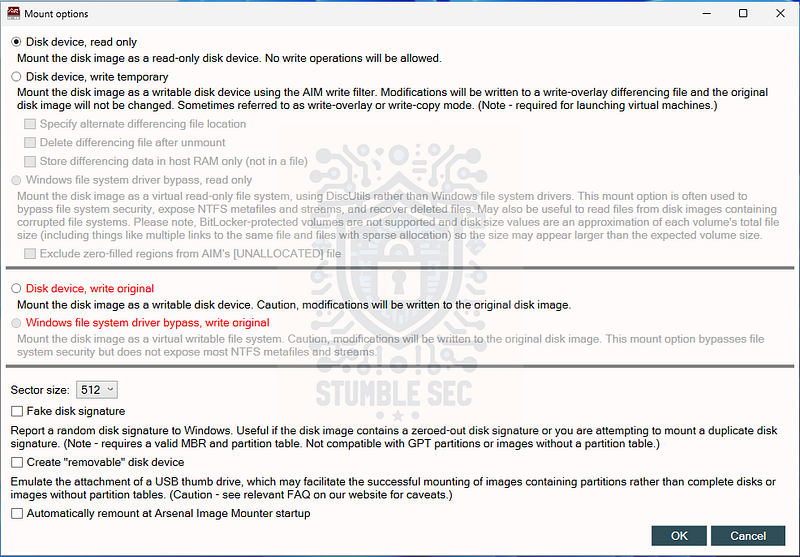
Arsenal: Selecting the default mount options
Once it’s loaded, we’ll see the file listed in the center pane. As a shortcut, we can open the mounted directory by pressing the F:\ drive letter.
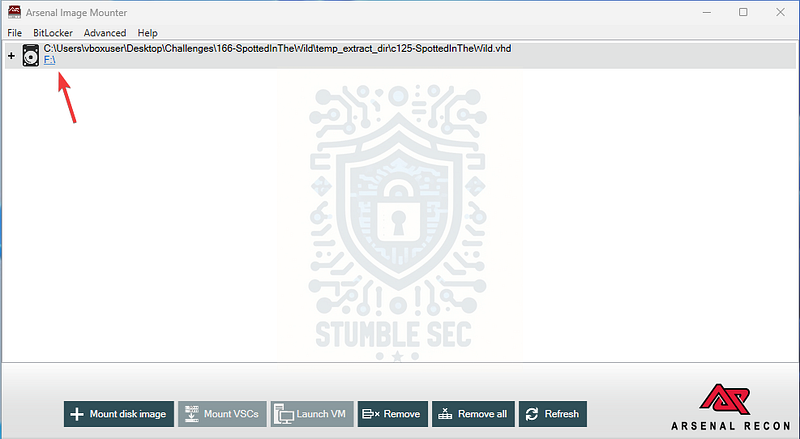
Arsenal: Opening the mounted directory
Now we can start checking out the contents of the challenge file.
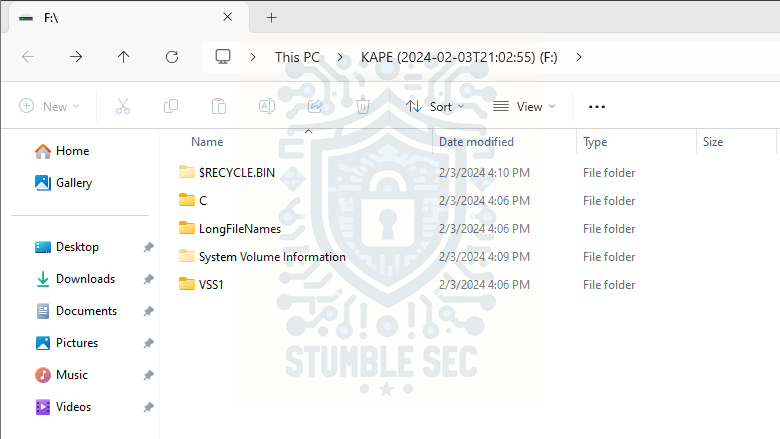
To answer Question 1, we need to determine which file is malicious and where it came from. A logical starting point is the Downloads folder, which we can access by opening the path C\Users\Administrator\Downloads.
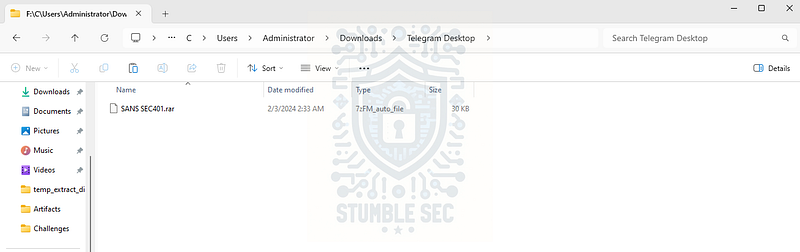
Inside that directory, we’ll find a folder named Telegram Desktop, which contains a suspicious WinRAR archive: SANS SEC401.rar. Something feels off…
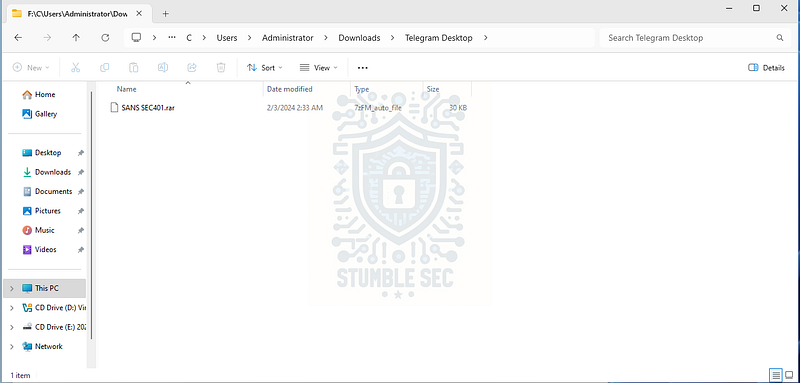
Identifying the suspicious download
This archive supposedly contains material from the SANS 401 Security Essentials course, but the folder name suggests it came from the Telegram Desktop app, which is unusual. Since this is the only file in any of the download directories, it’s likely the malicious file used to gain initial access to the victim’s device. We’ll confirm this later in our investigation.
For now, we can reasonably assume that Telegram is the application used to download the file. We can confirm its presence on the system by navigating to C\Users\Administrator\AppData\Roaming\Telegram Desktop.
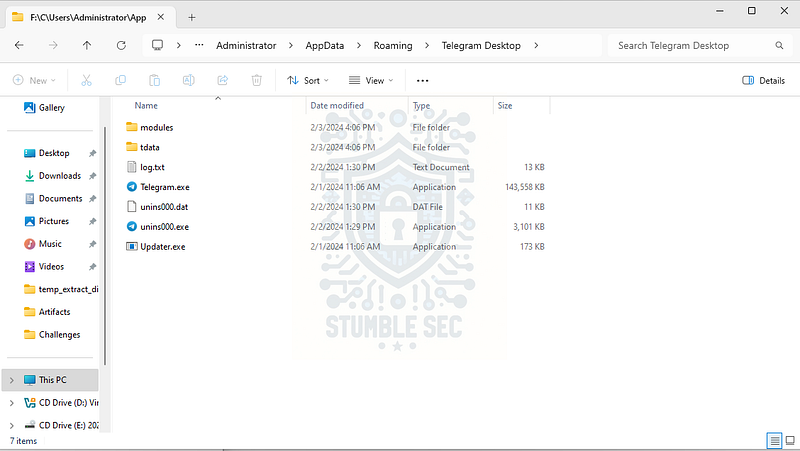
Confirming the presence of Telegram Desktop on the victim device
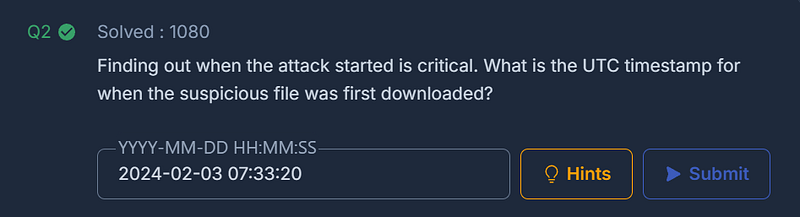
Question 2: Finding out when the attack started is critical. What is the UTC timestamp for when the suspicious file was first downloaded?
Great! Now that we’ve positively identified the malicious file and its source, we need to grab the timestamp in UTC for when this file was first downloaded. This will help us start building out a timeline of the attack.
There are several ways to approach this task, but for this walkthrough we’ll leverage the Master File Table (MFT) artifact from the victim’s image. If this is a new artifact for you, here’s an excellent overview from the Magnet Forensics blog:
In the Windows NTFS file system, the MFT is a database that stores metadata about every file on an NTFS file system volume. It contains records describing each file’s attributes, such as its name, size, timestamps, permissions, and more.
The idea here is to use the $MFT to grab the creation timestamp of the Telegram Desktop folder, and to have this artifact loaded for later in the investigation.
To analyze this artifact, we’ll use Eric Zimmerman’s MFTExplorer, a graphical parser for the $MFT that lets us explore its contents. If you’re following along using Flare-VM, this tool is already built-in.
Open MFTExplorer, then go to File > Load MFT, and select the victim’s $MFT from the C directory of the mounted file system.
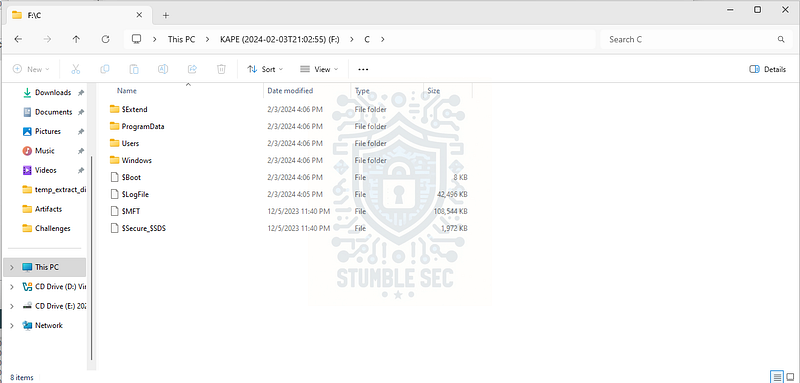
The location of the $MFT artifact on the victim image
Once the $MFT is open, navigate to the C:\Users\Administrator\Downloads directory in the file tree. With the contents displayed, check the SI_Created On column to grab the time this file was created (or downloaded) onto the disk. This is the timestamp we need to answer Question 2.
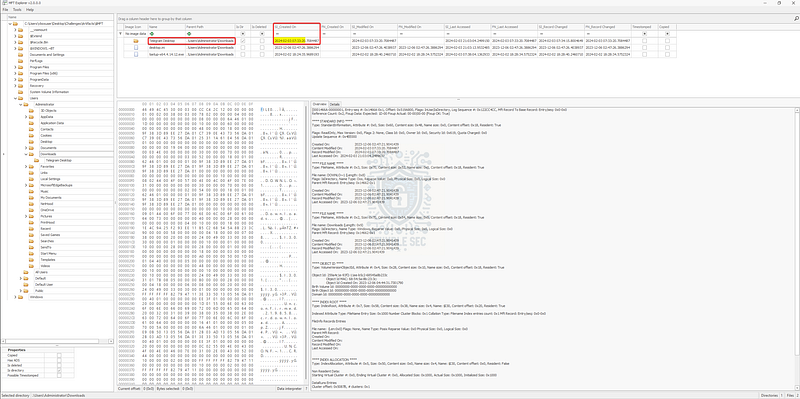
MFTExplorer: Identifying the file creation time of Telegram Desktop
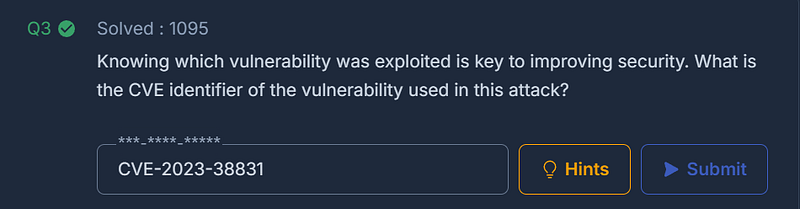
Question 3: Knowing which vulnerability was exploited is key to improving security. What is the CVE identifier of the vulnerability used in this attack?
Our next objective is to identify which vulnerability was used to carry out the attack. This is a great opportunity to pivot to an external threat intelligence platform so we can benefit from the research of the broader security community. But first, we need to obtain the file hash of the malicious archive.
Jump back into the file explorer and navigate to the Telegram Desktop folder.
To collect the hash of SANS SEC401.rar, we can use PowerShell’s Get-FileHash command:
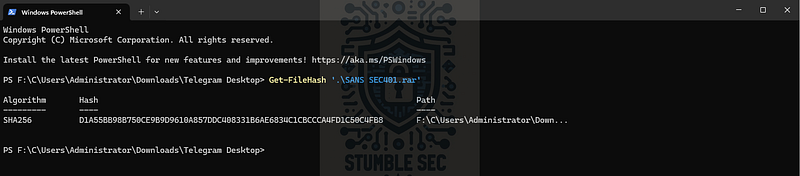
PowerShell: Computing the malware archive file hash
D1A55BB98B750CE9B9D9610A857DDC408331B6AE6834C1CBCCCA4FD1C50C4FB8
Now that we’ve obtained the SHA256 file hash, head over to VirusTotal and submit the hash in the search box. We’ll discover that this sample has already been submitted to the platform, and about half of the security vendors flag the archive as malicious. However, what we’re really interested in is one of the tags: CVE-2023€“38831.
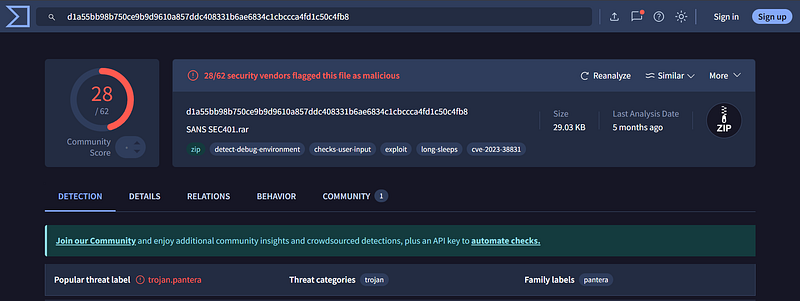
https://www.virustotal.com/gui/file/d1a55bb98b750ce9b9d9610a857ddc408331b6ae6834c1cbccca4fd1c50c4fb8
This CVE designation tells us that the file is potentially weaponized to exploit a vulnerability in the WinRAR archive tool. For context, let’s take a look at the National Vulnerability Database entry for this CVE:
RARLAB WinRAR before 6.23 allows attackers to execute arbitrary code when a user attempts to view a benign file within a ZIP archive. The issue occurs because a ZIP archive may include a benign file (such as an ordinary .JPG file) and also a folder that has the same name as the benign file, and the contents of the folder (which may include executable content) are processed during an attempt to access only the benign file.
That’s scary! This vulnerability is especially dangerous because the victim thinks they’re opening a harmless archive, but it could be weaponized to execute malicious code instead.
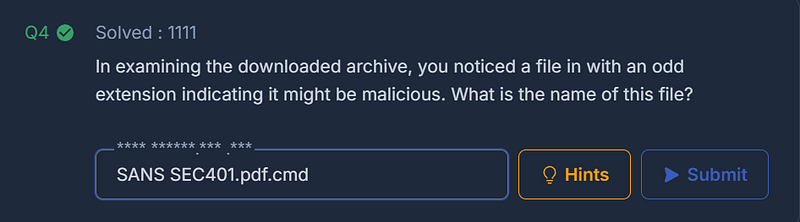
Question 4: In examining the downloaded archive, you noticed a file in with an odd extension indicating it might be malicious. What is the name of this file?
Now that we have a better understanding of the SANS SEC401.rar file, let’s try to open it and see what’s inside. Since we mounted the image using Arsenal’s default settings, we’re in read-only mode — which means we’ll need to copy the file to our analysis file system to extract it.
Full disclosure: when I exported the file from Arsenal, I ran into some errors and couldn’t extract it. If it works for you — great! If not, join me for Plan B: mounting and extracting with FTK Imager.
FTK Imager is another popular forensic tool used to create and read forensic disk images — and it’s also installed on Flare-VM. Once you open FTK, load the image by pressing: File > Add Evidence Item > Image File > Select c125-SpottedInTheWild.vhd > Finish.
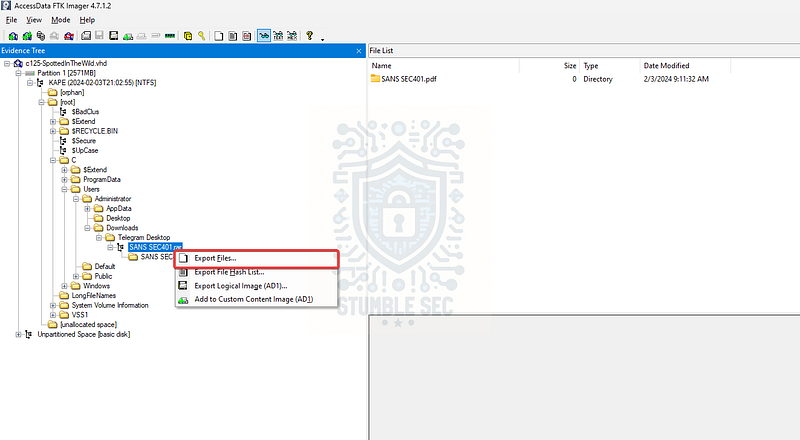
FTK Imager: Exporting the malicious RAR file
After it loads, you’ll see a familiar-looking file tree on the left-hand side. Navigate to the C:\Users\Administrator\Downloads\Telegram Desktop directory and expand it. Right-click the SANS SEC401.rar file and select Export Files…
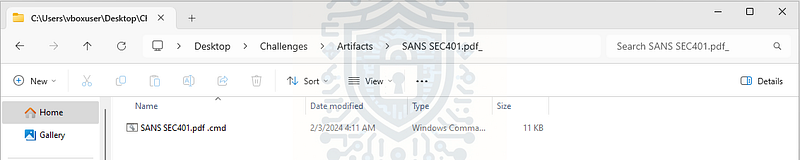
Once it’s copied to your analysis environment, you can use a tool like 7-Zip to extract the contents and reveal the payload within.
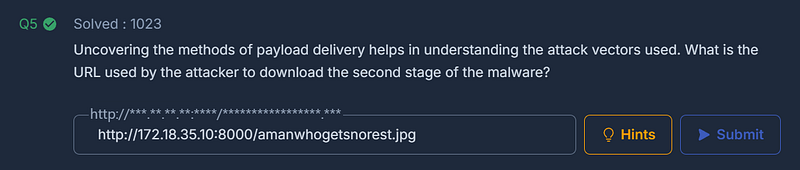
Question 5: Uncovering the methods of payload delivery helps in understanding the attack vectors used. What is the URL used by the attacker to download the second stage of the malware?
To answer Question 5, let’s turn our attention to analyzing the SANS SEC401.pdf.cmd file we just accessed from the RAR archive. For this challenge, we’ll start with a simple strings analysis to identify plaintext strings within the file. Maybe we’ll stumble across a clue about the second-stage URL.
There are plenty of ways to approach this, but I’m going to use Detect It Easy (DiE) to parse the file. DiE is another tool preinstalled on Flare-VM, so open it up and point the file name box to the extracted SANS SEC401.pdf.cmd file. Then, tick the Advanced box and press Strings.
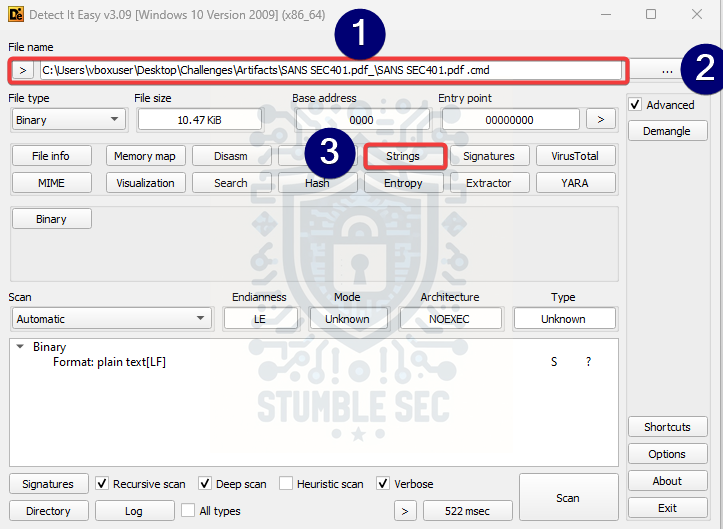
Detect It Easy: Loading the malicious .cmd file
While much of the output is obfuscated, we’ll get a few clues toward the bottom in the form of readable strings that can help inform the next steps of our analysis.
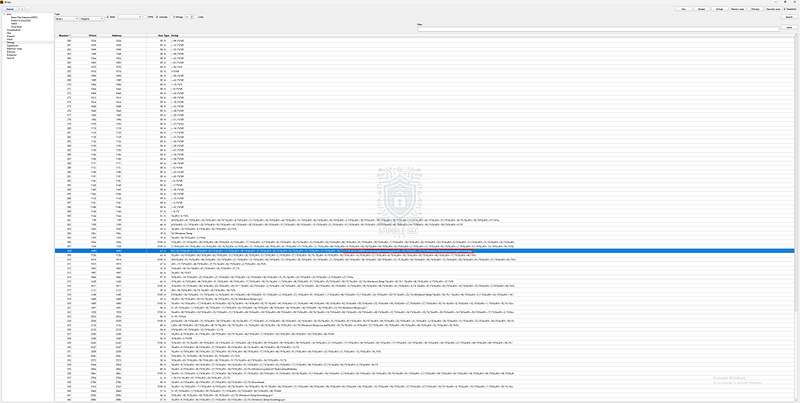
Detect It Easy: Analyzing the strings
For example, on line 308, we can see most of a URL — exactly what we need to answer Question 5.
![]()
Detect It Easy: Identifying a URL in the strings
Since the protocol (like HTTP or HTTPS) is obfuscated, let’s pivot to dynamic analysis in our safe sandbox environment.
For this dynamic component, we’ll actually execute the .cmd file and observe its behavior.

CMD: Executing the malware in the sandbox
Notice the error? That result makes sense since there’s no Internet connection in the sandbox. Importantly though, we can now see the URL more clearly than we could with the strings view. The second stage is attempting to download an image named amanwhogetsnorest.jpg.
Question 6: To further understand how attackers cover their tracks, identify the script they used to tamper with the event logs. What is the script name?
Okay, the next stop on our investigation is to identify the script used to tamper with the Windows Event Logs to evade detection. Let’s jump back to the DiE strings view.
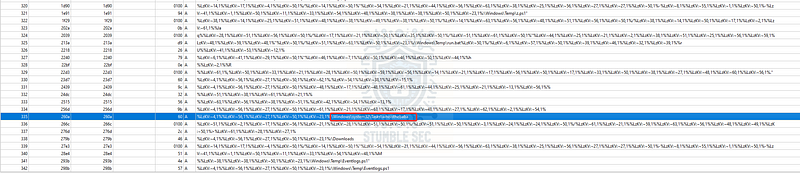
At the very bottom of the output window (lines 341€“342), we’ll spot a potential clue: a file named Eventlogs.ps1 located in the \Windows\Temp directory. Let’s follow this thread and see if we can determine what this script does.
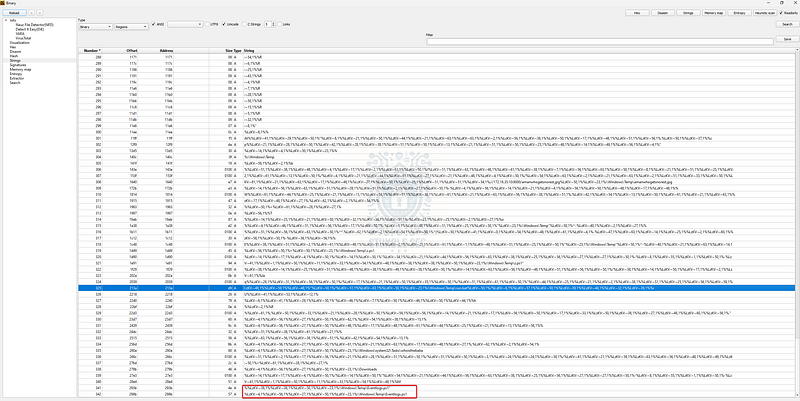
Detect It Easy: Identifying a potential log clearing script
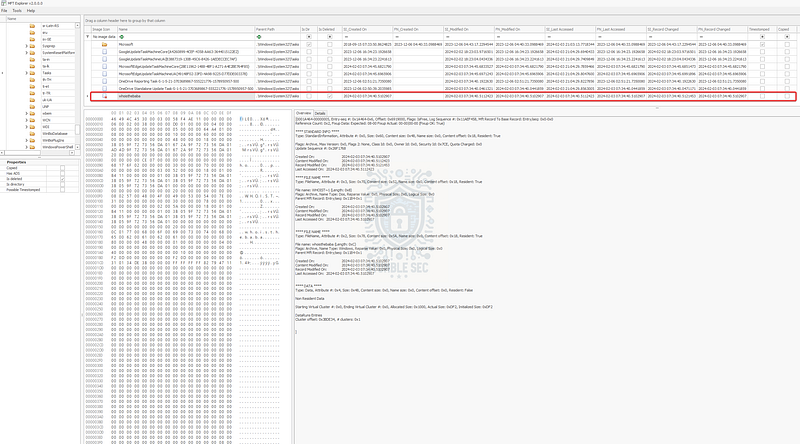
Next, let’s head back into MFTExplorer and try to locate the file in the directory we found with DiE.
MFTExplorer: Confirming script location in the MFT
Bingo! Unfortunately, the image data doesn’t exist, so we can’t simply export the file. While we can gain some insight into the script’s function, it looks a bit daunting to decode statically — so let’s try something else.
I know we’re bouncing around between tools but bear with me. Rather than continue with the GUI tool MFTExplorer, we’re going to pivot to another pair of Eric Zimmerman’s tools: MFTECmd and Timeline Explorer.
The plan is to parse the NTFS USN Journal file. The quick version: this file has a special data stream ($J) that contains a record of all file and filename creations, modifications, and deletions. This gives us a detailed timeline of file activity. We’ll use MFTECmd to parse the Journal file and export the results to .CSV, which we can then analyze with Timeline Explorer to understand the lifecycle of Eventlogs.ps1.
Let’s put this into practice:
- Export the
$Jfile from either Arsenal or FTK Imager from the victim image’sC:\folder. - Open PowerShell as an administrator and run the following command:
MFTECmd.exe -f ‘<path to $J>’ –csv “<path to CSV output”
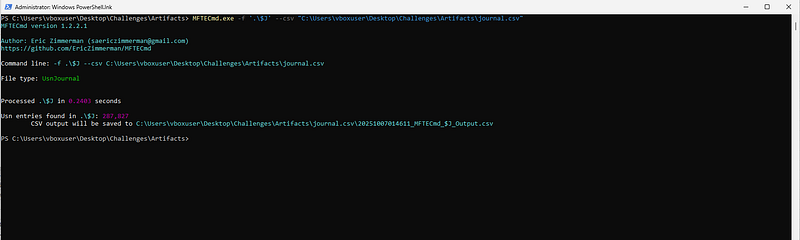
PowerShell: Executing MFTEcmd.exe
- Open the resulting file with Timeline Explorer. For this challenge, we’ll keep it simple and enter
eventlogs.ps1into the Name column. This will show all records with that filename, and we can refer to the Update Reasons column to understand when the file was created and deleted.

Now we know the file exists and is part of the malware — but if we can’t analyze it directly, what else can we do to confirm it tampered with the event logs?
Luckily for us, Microsoft audits event log clearing in the Security event log as Event ID 1102 — “The audit log was cleared.”1102(S) The audit log was cleared. — Windows 10 _Though you shouldn’t normally see it, this event generates every time Windows Security audit log is cleared. This is…_learn.microsoft.com
Though you shouldn’t normally see it, this event is generated every time the Windows Security audit log is cleared.
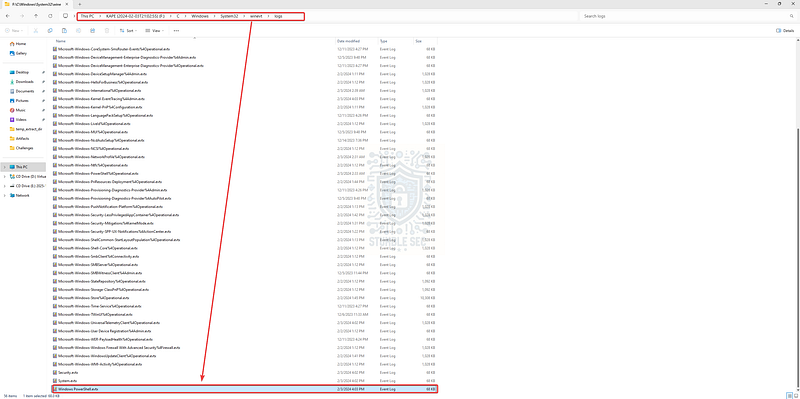
We can open the relevant Security.evtx log from the victim’s device in the C:\Windows\System32\winevt\Logs directory.
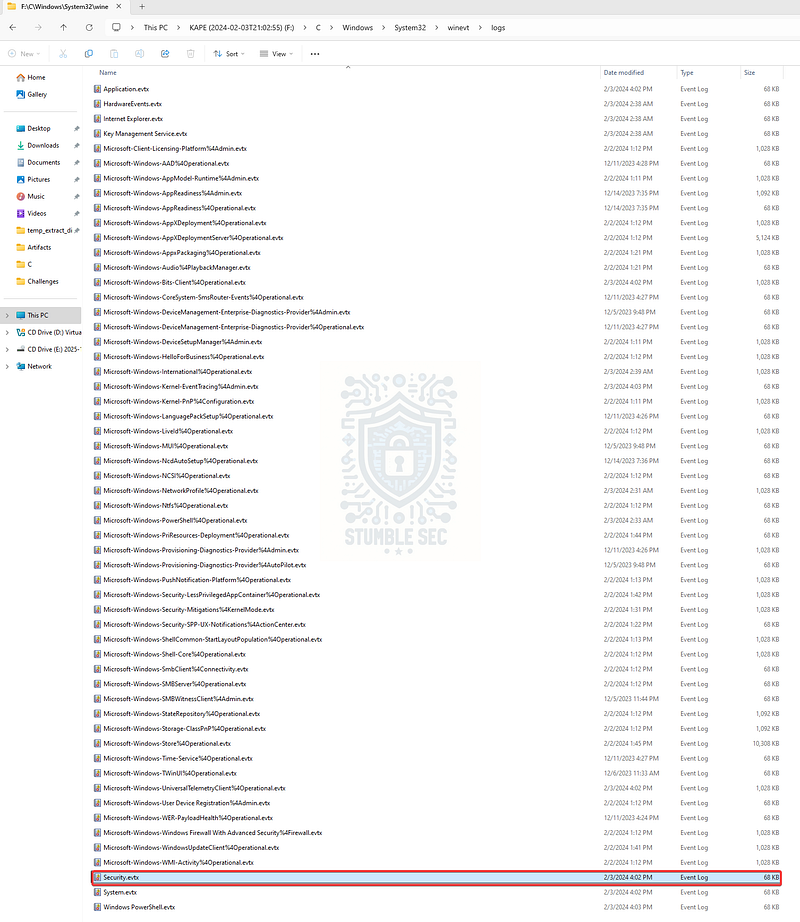
The location of the Security.evtx logs
Once the log is opened in Event Viewer, filter for the 1102 events by pressing Filter Current Log and entering 1102 in the search field.
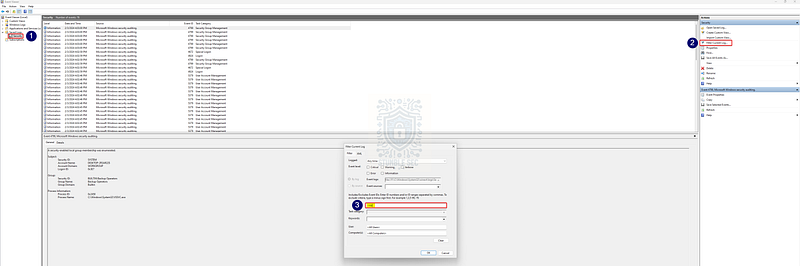
Event Viewer: Filtering for 1102 events
This gives us one event confirming that the Windows Event Logs were cleared — but the real indictment is that the event timestamp matches what we found with Timeline Explorer.
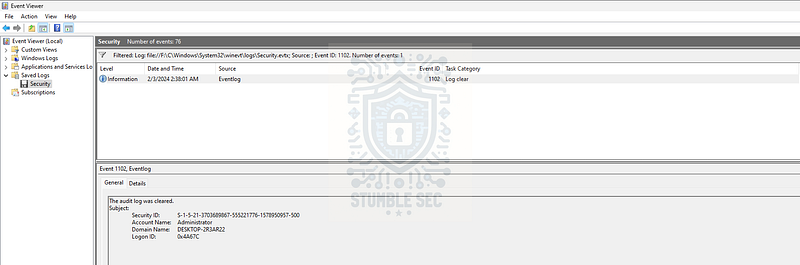
Event Viewer: Identifying a log clear event
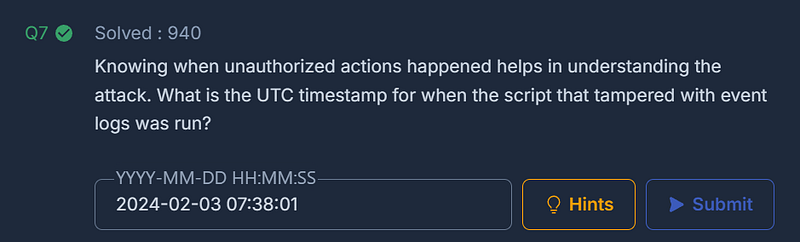
Question 7: Knowing when unauthorized actions happened helps in understanding the attack. What is the UTC timestamp for when the script that tampered with event logs was run?
Based on the evidence we found in Question 6, we already have two solid datapoints indicating when the eventlogs.ps1 script was run — one from Timeline Explorer and another from the Security event log (Event ID 1102). But just for fun, let’s triple-confirm this by checking the PowerShell logs.
Navigate back to the mounted C\Windows\System32\winevt\Logs directory and load up the Windows PowerShell.evtx log this time.
The location of the Windows PowerShell.evtx logs
Instead of filtering for an event ID, we’ll use the Find… function to search the log for eventlogs.ps1.
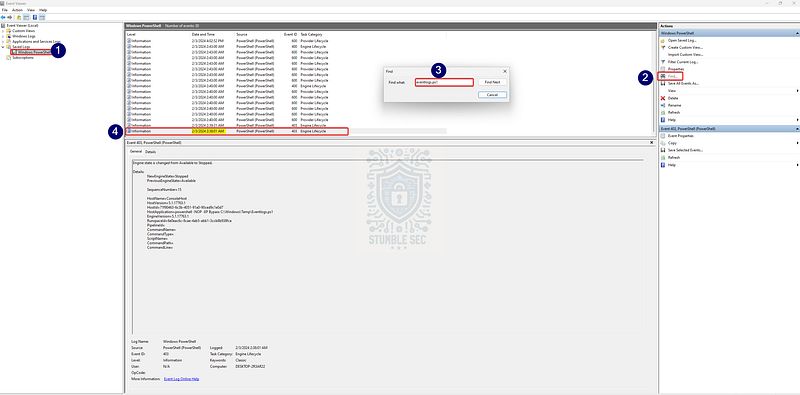
Event Viewer: Identifying Eventlogs.ps1 activity
This search surfaces the corresponding event within the PowerShell logs, showing that the script was executed at the same time we correlated the logs being cleared and the file being deleted.
Since the results from MFTECmd were already in UTC, we don’t even need to perform a conversion.
So, while we couldn’t see the script contents directly, we can infer its impact through correlation — and now we’ve got three independent sources confirming the timestamp of execution.
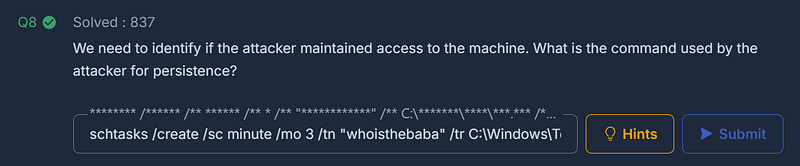
Question 8: We need to identify if the attacker maintained access to the machine. What is the command used by the attacker for persistence?
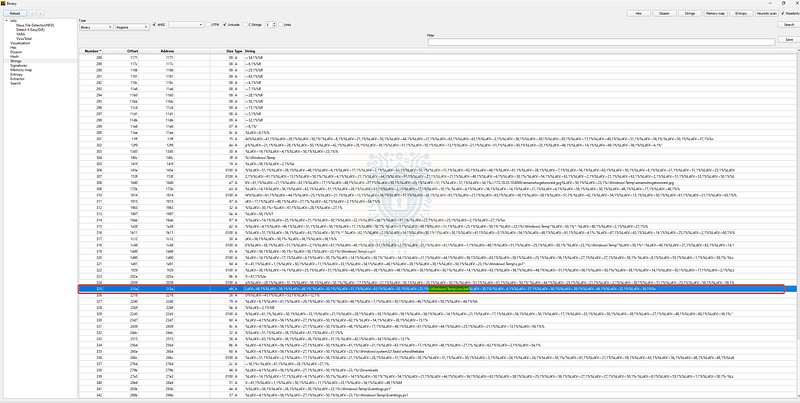
We’re closing in on the end of our investigation. Let’s jump back into DiE and review the strings for further clues. Down on line 335, we’ll find evidence of a suspicious task in the Tasks directory: _\Windows\System32\Tasks\whoisthebaba_
Detect It Easy: Identifying a suspicious scheduled task in strings
We’re off to a solid start, but let’s correlate this with the victim image using MFTExplorer to see if this file existed on the system by navigating to the folder within the mounted image.
MFTExplorer: Identifying the scheduled task artifact in the victim image
Great — we found it! Unfortunately, we can’t extract the file, and there’s no evidence in the registry or Security Event Log to determine what this task actually does.
Time to get creative.
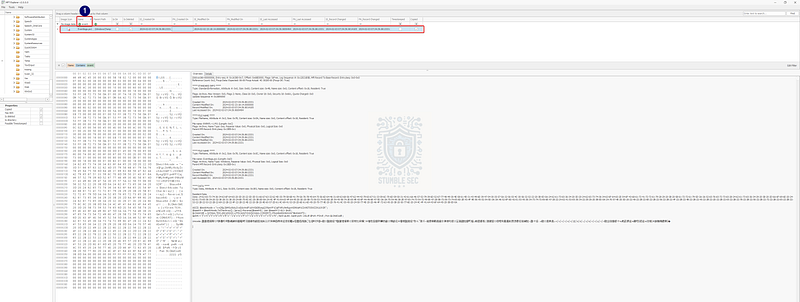
Since my environment doesn’t have Internet access, the next-stage payloads can’t be downloaded, so dynamic analysis locally won’t help much. Instead, let’s pivot to another external threat analysis service. This time, instead of VirusTotal, we’ll use something more visual: Any.Run.
In your browser, navigate to Any.Run and locate the report search. In the upper-right search box, submit the hash of SANS SEC401.pdf.cmd, which we can collect from FTK Imager or PowerShell (as we did in Question 3):
5790225B1BCFA692C57A0914DD78678CEEF6E212FBE7042B7DDF5A06FD4AB70D
The search will return several reports where the platform has analyzed this file. For this walkthrough, select the report from 09 August 2025, labeled Malicious Activity.
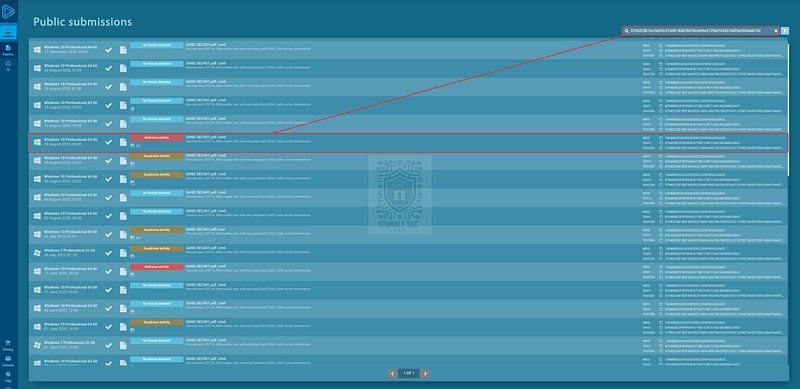
Any.Run: Searching public submissions
Once inside, we can use the visual replay window to watch the execution of the file, just as we would have seen in our own sandbox. This is an extremely robust capability offered by Any.Run that helps visualize the dynamic analysis process.
But for Question 8, we’re most interested in the command used to create the scheduled task. We can identify this in the Command Prompt window during execution. On the right side, we’ll also see it listed in the process tree:
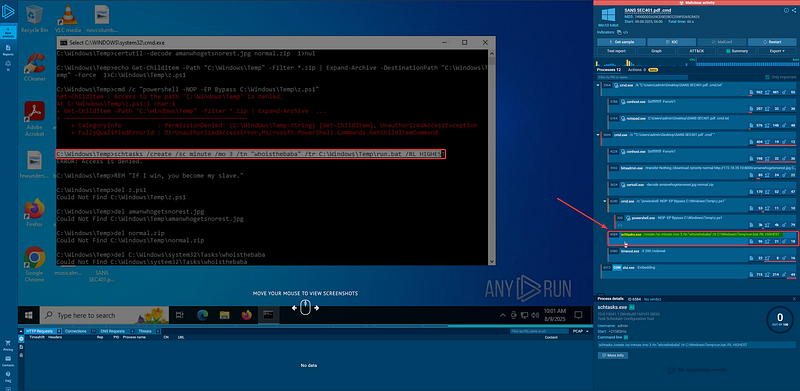
https://app.any.run/tasks/69a81081-12f1-4fde-bd29-596d67b44cfb
schtasks /create /sc minute /mo 3 /tn “whoisthebaba” /tr C:\Windows\Temp\run.bat /RL HIGHEST
This command creates a scheduled task named whoisthebaba that runs every 3 minutes with the highest privilege level, executing run.bat from the Temp directory.
So, while we didn’t uncover this in our own environment, this shows the value of leveraging public sandboxes for dynamic analysis to overcome local limitations to ultimately find the answer.
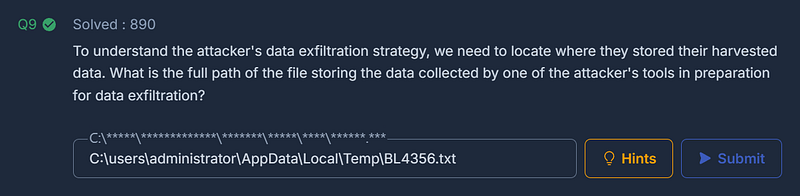
Question 9: To understand the attacker’s data exfiltration strategy, we need to locate where they stored their harvested data. What is the full path of the file storing the data collected by one of the attacker’s tools in preparation for data exfiltration?
We’ve made it to the final question — and now we need to determine what data the malware collected and how it was staged for exfiltration.
We’ve already identified another script set to run with the scheduled task we found in Question 8: C:\Windows\Temp\run.bat
You may have already noticed that we previously found a reference to this script during the strings analysis using DiE.
Detect It Easy: Confirming the run.bat string
Fortunately, we can return to FTK Imager and extract this file from the VHD by navigating to the C:\Windows\Temp directory, right-clicking run.bat, and selecting Export Files…
There’s something curious at the bottom of the data window — we also see a reference to run.ps1. Let’s export that file too and drop it into the exported artifacts directory of our analysis environment.
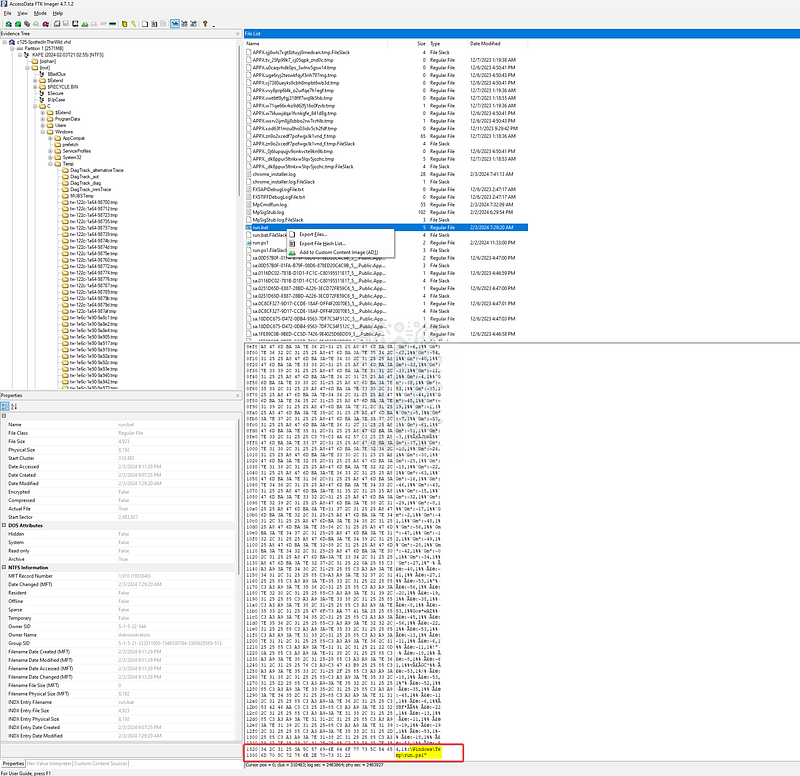
FTK Imager: Discovering run.ps1 reference in run.bat
Since run.bat references run.ps1, we’ll jump straight into analyzing the .ps1 file first. And because my sandbox is isolated and has no internet access, there’s little danger in executing run.ps1 locally.
Before executing, we’ll monitor the activity with another built-in tool from Flare-VM: Sysinternals Process Monitor (ProcMon). Open ProcMon and set the filter to: Process Name is powershell.exe.
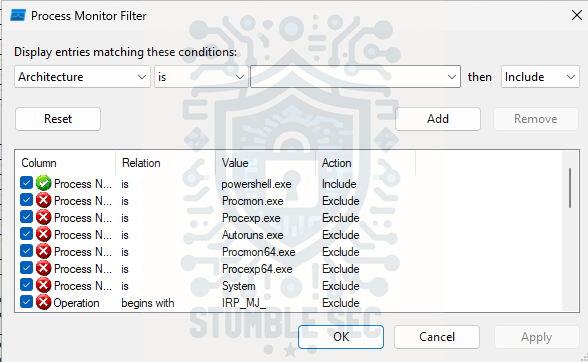
ProcMon: Filtering the powershell.exe process
This narrows our focus to only PowerShell events, which helps us better understand what the script is doing. Since we’re looking for the full path of the file storing the data collected, we’ll start by searching for CreateFile events.

ProcMon: Discovering CreateFile events
By doing this, we’ll see that PowerShell creates a file named BL4356.txt in the analysis environment. Simultaneously, the PowerShell window appears to be listing dozens of IP addresses as offline…
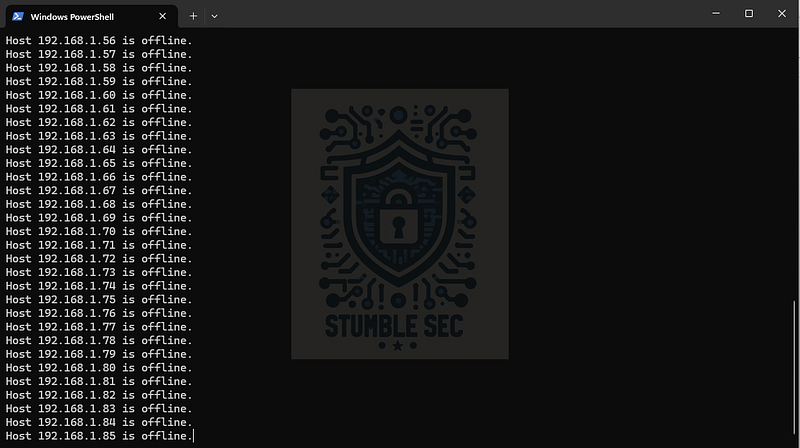
PowerShell: Output of the run.ps1 script
Let’s confirm whether this BL4356.txt artifact also exists in the victim image using FTK Imager or Arsenal.

FTK Imager: Confirming activity in the victim image
Bingo! This confirms the same behavior in both environments. Between the PowerShell output and the contents of the file, it’s clear that the script is performing host discovery and saving the results.
Let’s take it a step further and analyze the contents of run.ps1 directly. For this, we’ll use CyberChef, since I suspect there’s some obfuscation involved.
With CyberChef open, click Open as File in the upper-right to load the script into the input window. As expected, there’s a blob of base64-encoded strings, but decoding it isn’t quite so straightforward. Notice the reverse operation? The script appears to convert $best64code into an array, then reverse it back into a string.
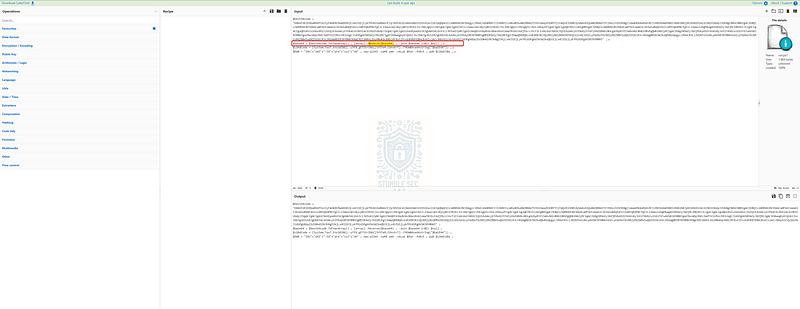
CyberChef: Analyzing the run.ps1 script
To decode it, copy the $best64code into a new CyberChef tab, then add the Reverse and From Base64 operations to your recipe — and voilà !
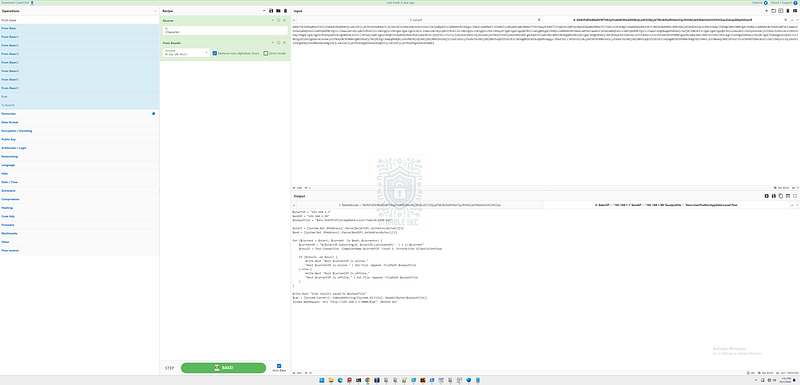
CyberChef: Decoding the run.ps1 script
We can confirm that this script performs a host discovery scan and saves the results into the following path: $env:UserProfile\AppData\Local\Temp\BL4356.txt.
We now just need to substitute the victim’s actual UserProfile path to construct the full answer.
Conclusion:
Whew! That was a tough one — but that wraps up our investigation of the SpottedInTheWild challenge! We walked through each phase of the attack, from identifying the initial malicious archive downloaded via Telegram, to uncovering the use of a WinRAR vulnerability, tracking persistence through scheduled tasks, and finally discovering how the attacker staged data for exfiltration.
A big thank you to CyberDefenders for putting together such a fun and challenging lab! There was some stumbling along the way, but this one really pushed me to think creatively and combine the strengths of static and dynamic analysis. It also highlighted how public tools like Any.Run, VirusTotal, and CyberChef can help fill in the gaps when your own environment has limitations.
I initially chose this challenge to learn more about Arsenal Image Mounter, since it was new to me — but it ended up becoming a much more sprawling example of how defenders can pivot between forensic artifacts like the $MFT, USN Journal, and event logs to reconstruct attacker behavior. Whether it was filtering for CreateFile events in ProcMon, decoding obfuscated PowerShell in CyberChef, or correlating timestamps across tools, every step helped us build a clearer picture of the compromise. Awesome stuff!
Thanks for your support and partnering on this investigation. If you found this walkthrough helpful, don’t forget to give it a clap! Your feedback really is invaluable, and it pumps me up to support your security journey. Remember, Cybersecurity is a team sport and we’re in this together!
Until next week’s challenge — stay curious and be safe out there!

Tools & References:
Challenge Link: https://cyberdefenders.org/blueteam-ctf-challenges/spottedinthewild/?cta=navbar-sign-in&origin=%2Fblueteam-ctf-challenges%2Fspottedinthewild%2F
Flare-VM: https://github.com/mandiant/flare-vm
Arsenal Recon — Arsenal Image Mounter: https://arsenalrecon.com/
**Magnet Forensics — " # "
Harnessing MFT parsing for incident response investigations” :** https://www.magnetforensics.com/blog/harnessing-mft-parsing-for-incident-response-investigations/
VirusTotal — SANS SEC401.rar: https://www.virustotal.com/gui/file/d1a55bb98b750ce9b9d9610a857ddc408331b6ae6834c1cbccca4fd1c50c4fb8
NIST NVD — CVE-2023€“38831: https://nvd.nist.gov/vuln/detail/cve-2023-38831
Exterro — FTK Imager: https://www.exterro.com/digital-forensics-software/ftk-imager
Detect it Easy: https://github.com/horsicq/Detect-It-Easy
Microsoft Learn — 1102(S): The audit log was cleared: https://learn.microsoft.com/en-us/previous-versions/windows/it-pro/windows-10/security/threat-protection/auditing/event-1102
Any.Run: https://app.any.run/tasks/69a81081-12f1-4fde-bd29-596d67b44cfb
Sysinternals — Process Monitor: https://learn.microsoft.com/en-us/sysinternals/downloads/procmon
CyberChef: https://gchq.github.io/CyberChef/